background image

3.0  

TRANSMITTER CONTROLS, INDICATORS, AND ALARMS


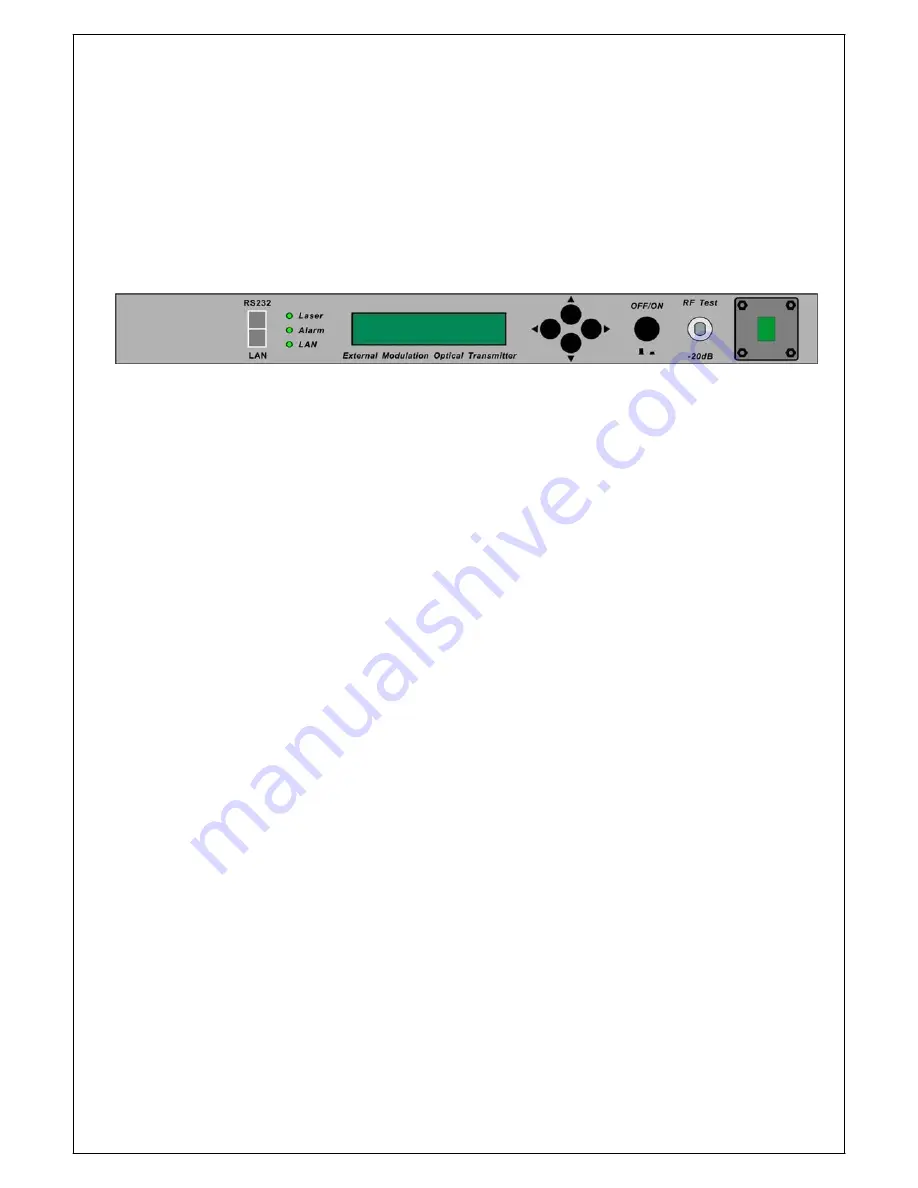
This section of the manual will give an overview of the available menus in the 
GS8510 series transmitter. All instructions in Section 3.0 refer to the representation 
f the front panel shown in the diagram below. The user can scroll through the menus 
by using the push buttons that are on the front panel and are located in the right of 
the LCD screen. 


3.1 

The operation of the panel


3.1.1 Open 

menu


A. 

Plug in 110V city power supply 


B. 

Turn on power switch in the rear panel 


Front panel display “ KEY OFF” 


Laser Status 

lamp 

Red 


Alarm Status 

lamp 

Green 


LAN 

With   network   management 
lamp shows green 

status,   indication

C.  Press laser start-up key switch 


Front panel shows 

KEY ON…”

,  laser status lamp turns green 

from red, and machine enters self-checking. After checking, it enters 
working status, and display 

“ 

Descriptor

”. 


3.1.2 

Start-up main menu


Press 

\


button and the following menu will be displayed in sequence. 


Menu #1 -    Descriptor


Read-only menu, tells the type of this equipment 


Menu #2 -    Model


Read-only menu, tells the model of this equipment 


Menu #3 -    MOD S/N


Read-only menu, tells MOD serial-number 


Menu #4 -  OUTPUT


Page 4 of 7 

Summary of Contents for GS8510 Series

Page 1: ...i is si io on n 1 15 55 50 0n nm m E Ex xt te er rn na al l M Mo od du ul la at ti io on n O Op pt ti ic ca al l T Tr ra an ns sm mi it tt te er r G GS S8 85 51 10 0 S Se er ri ie es s U US SE ER R MA AN NU UA AL L ...

Page 2: ... INSTALLATION 1 2 1 Unpacking 1 2 2 Transmitter Mounting and Power Connection 1 2 3 RF connection 2 2 4 Optic connection 2 3 0 TRANSMITTER CONTROLS INDICATORS AND ALARMS 4 3 1 The operation of the panel 4 4 0 GUARANTEE AND REPAIR ITEMS 7 ...

Page 3: ...rk management 1 1 back up power supply and casing temperature auto control All the optical port can be installed in the front panel The back panel is also available if needed 2 0 INSTALLATION 2 1 Unpacking Inspect the shipping boxes for any obvious damages Unpack the unit from all packaging boxes Inspect the appearance of the unit for any shipping damages Document and inform the shipping company a...

Page 4: ...F connection Connect the RF cable the connector on TX rear panel RF connector is F type plug F Female F male Optional The resistance is 75Ω 2 4 Optic connection 1 Considering for protection safety all the fiber optic connector need protective cover during transportation 2 In order to ensure the insertion loss return loss the end interface of fiber optic connector should be cleaned Please don t dir...

Page 5: ...acturer s pulling tension or bend radius specifications when removing fiber bulkhead connector plate To remove the transmitter optical connector plate remove the screw on the far left of the optical plate and remove the screw on the far right of the optical plate Do not remove the screws on the optical bulkhead connector Slowly remove the optical connector plate from the rear panel and disconnect ...

Page 6: ...ply B Turn on power switch in the rear panel Front panel display KEY OFF Laser Status lamp Red Alarm Status lamp Green LAN With network management lamp shows green status indication C Press laser start up key switch Front panel shows KEY ON laser status lamp turns green from red and machine enters self checking After checking it enters working status and display Descriptor 3 1 2 Start up main menu...

Page 7: ...OMI adjustable the range is betweent 7 3dBm 7 3dBm step 0 3 0 2 dBm Menu 11 RF Level Read only menu displays RF level and shows LOW NORMAL HIGH Menu 12 SBS SBS restrain 135 16 18dBm optional Menu 13 SBS State Read only menu tells the situation of SBS Menu 14 CSO State Read only menu tells the situation of CSO Menu 15 Date Read only menu tells the date Menu 16 Version Read only menu tells the versi...

Page 8: ...d exit For example amend IP setup menu IP 192 168 000 015 if change 5 to 6 use key to choose the place of 5 then press key to change 5 to 6 then press to save amended IP 192 168 000 016 2 The manual for the control way of RF modulation The default control way is AGC That is when you use or to switch the menu to the modulation control way it shows RF Mode AGC At this time when you press it shows RF...

Page 9: ...nduced factor If the Red lamp sparking Alarm please send the product back to manufacturer for repairing The user should not open the top cover for repair otherwise even within guarantee period maintain and material fee will be charged 3 Lifelong maintain and upgrade can be provided even though the guarantee period is expired 4 If component is damaged by man induced factor material fee will be char...

Reviews: