


Before performing cleaning, maintenance or
adjustment operations and/or replacing any
part, it is mandatory to set the main switch
to 0 (zero) and lock it with a padlock. Remove
pressure from the device by disconnecting the
quick coupling compressed air connection and
locking it with a padlock.
8.1 BELT REPLACEMENT
To replace the belts, proceed as follows:
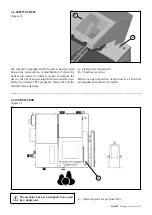
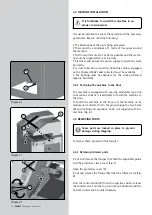
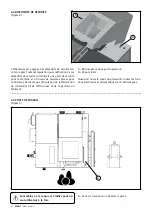
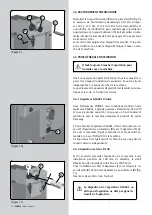
- Open the protective cover of the clamp.
- Remove screw E, the support washer and the intermediate
washer between the motor cover and the clamp protector
(Fig. 23)
- Remove the protective motor cover by taking off the screws
F (Fig. 23)
Motor belt
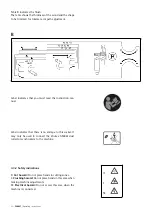
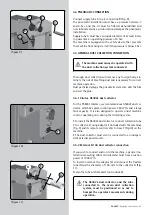
- Remove the secondary belt G by turning the pulley with
your hand while applying outward pressure (Fig. 24)
- Remove motor belt H by proceeding in the same way as
above
- Follow these steps in reverse to fit a new belt
Primary and secondary belt
- Remove copier J and take out the bit as indicated in section
7.2
- Remove suction head N using screws H, removing these and
the metal shavings protector O (Fig. 21)
- Remove the air connection tubes for drive cylinder K (Fig.
24), pressing the rims of the connectors while the tube is
stretched outwards
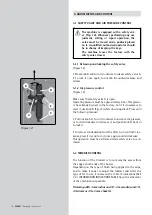
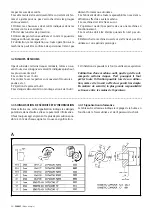
- Remove the four screws L (Fig. 25) holding the drive cylin-
der to the hinge and remove safety ring M from the shaft.
- Now remove the drive cylinder
- Remove the damaged belt by turning the pulley with your
hand while applying outward pressure (Fig. 24)
- Proceed in the opposite way to fit the new belt
- Refit the cylinder to the hinge, install the safety ring and
connect the air connection tubes
- Refit the shaving protector and the dust collector head
- Fit the bit and the feeler
- Fit the motor cover and the clamp protection cover
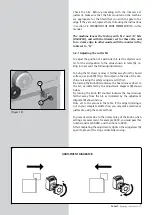
CAUTION
Be sure to connect the air tubes in the right position.
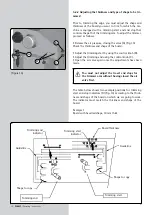
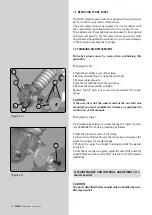
(Figure 23)
F
J
E
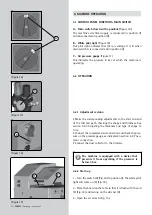
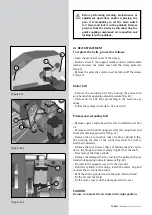
(Figure 24)
H
G
K
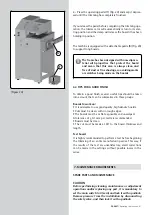
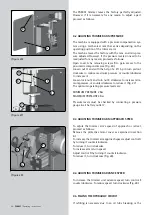
(Figure 25)
M
L
PAE85T
/ Operating instructions - 43
Summary of Contents for PAE85T
Page 71: ......


