


7
To Set Up Recording Rates
•
Right click to open the menu and select “MAIN MENU”.
•
Select “SETTING”
•
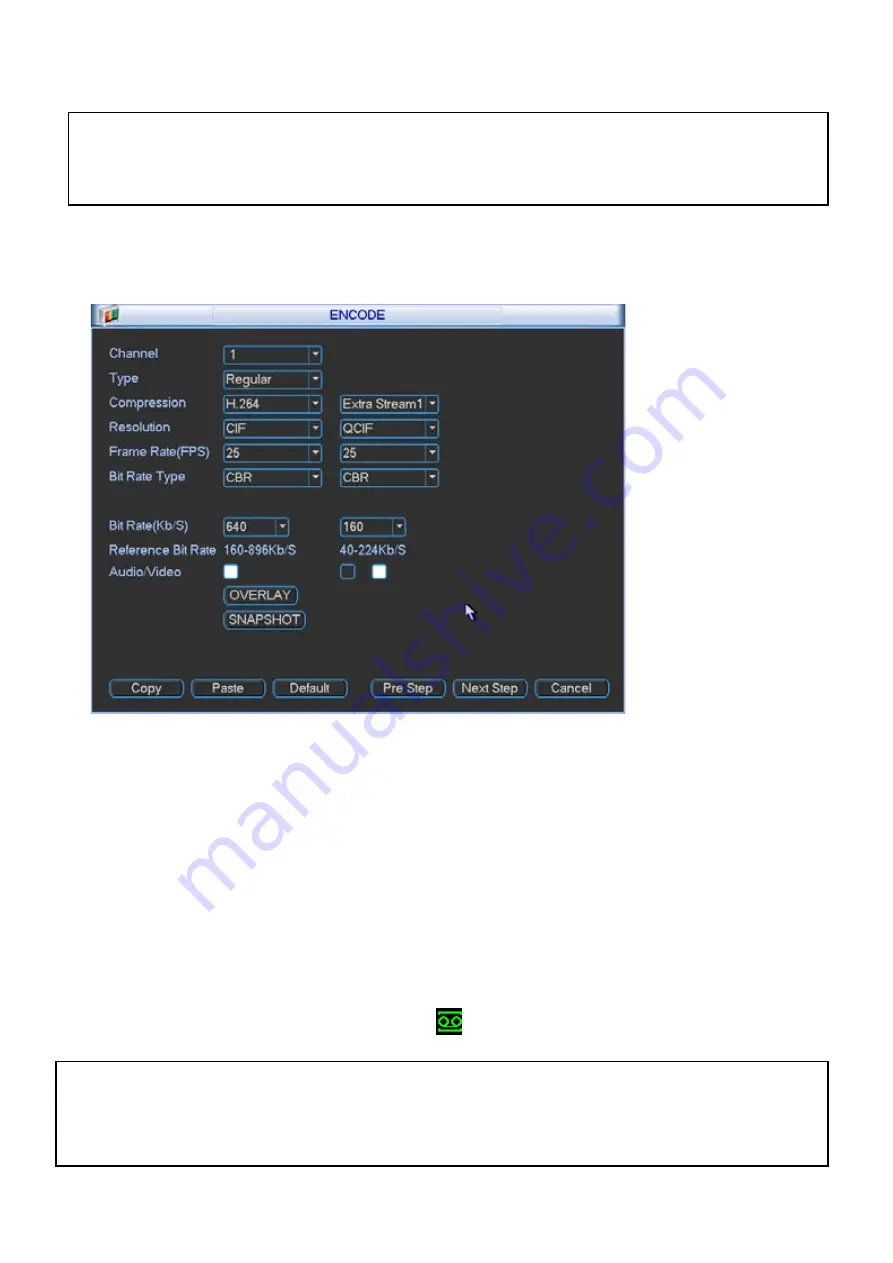
Select “ENCODE”
We recommend:
That each camera be set to
H.264
with a maximum of
1280x720
resolution,
15fps
, Bit Rate:
VBR
of
2048
. While any of the cameras may be set higher, please be aware that it will reduce the total recording
time to less than 2 weeks.
You may also set individual encoding options for
Regular
,
Motion Detect
and
Alarm
Recording
To Begin Recording
Once you have successfully set the Date and Time, exit the Menu by right clicking or pressing the ESC
button. By default, the NVR will begin recording when it is properly connected to the cameras and has an
installed HDD. If it is recording, the recording icon “
”
will be displayed on screen.
Overwriting View:
When the system is in Overwrite recording mode, the oldest recorded data will be
overwritten automatically. This NVR System is set to Overwrite by factory default.
You may set this option in the “GENERAL” Menu.
Record Times:
The NVR8PROPACK2 system is capable of storing 2 weeks of recorded footage based on 2Tb of
storage and the 8 included 1.3MP Cameras set to 720P @ 15fps and VBR @ Quality 5.


