background image

9

TABLE OF CONTENTS                                                                                                                                                      

Page

1,  General information ................................................................................................................................................................ 10

  1.1 Product description and type of use .....................................................................................................................................10

  1.1.1 General features ......................................................................................................................................................... 10

  1.2   Opening the box................................................................................................................................................................10

  1.2.1  Contents  of  the  box  ..................................................................................................................................................  10

  1.3    Warnings........................................................................................................................................................................... 10

  1.3.1 Power ........................................................................................................................................................................ 10

  1.3.2 Safety precautions..................................................................................................................................................... 10

  1.3.3 Installation precautions.................................................................................................................................................. 11 

1.3.4 Cleaning the device.................................................................................................................................................... 11

  1.3.5 Privacy and copyright................................................................................................................................................ 11

2. controls and settings...............................................................................................................................................................12

  2.1    Controls     ........................................................................................................................................................................ 12

  2.2   OSD CCTV menu controls............................................................................................................................................. 13

  2.2.1 Picture........................................................................................................................................................................  13

  2.2.2 Sound.........................................................................................................................................................................  14

  2.2.3 Time...........................................................................................................................................................................  15

  2.2.4 Optional......................................................................................................................................................................  16

3.  Product specifications.........................................................................................................................................................17

en

SAFETY INSTRUCTIONS FOR INSTALLERS

-  Carefully read the instructions on this leaflet: they give important information on the safety, use and maintenance of the installation. 

-  After removing the packing, check the integrity of the set. Packing components (plastic bags, expanded polystyrene etc.) are dangerous 

for children. Installation must be carried out according to national safety regulations.

-  It is convenient to fit close to the supply voltage source a proper bipolar type switch with 3 mm separation (minimum) between contacts.

-  Before connecting the set, ensure that the data on the label correspond to those of the mains. 

-  This apparatus must only be used for the purpose for which it was expressly designed, e.g. for audio or video door entry systems. Any 

other use may be dangerous. The manufacturer is not responsible for damage caused by improper, erroneous or irrational use. 

-  Before cleaning or maintenance, disconnect the set.

-  In the event of faults and/or malfunctions, disconnect from the power supply immediately by means of the switch and do not tamper with 

the apparatus.

-  For repairs apply only to the technical assistance centre authorized by the manufacturer.

-  Safety may be compromised if these instructions are disregarded. 

-  Do not obstruct opening of ventilation or heat exit slots and do not expose the set to dripping or sprinkling of water. No objects filled with 

liquids, such as vases, should be placed on the apparatus.

-  Installers must ensure that manuals with the above instructions are left on connected units after installation, for users’ information. 

-  All items must only be used for the purposes designed. 

WARnInG:

 to prevent injury, this apparatus must be securely attached to the floor/wall in accordance with the installation instructions.

-  This leaflet must always be enclosed with the equipment.

directive 2002/96/ec (Weee)

The crossed-out wheelie bin symbol marked on the product indicates that at the end of its useful life, the product must be handled 

separately from household refuse and must therefore be assigned to a differentiated collection centre for electrical and electronic 

equipment or returned to the dealer upon purchase of a new, equivalent item of equipment.

The user is responsible for assigning the equipment, at the end of its life, to the appropriate collection facilities.

Suitable differentiated collection, for the purpose of subsequent recycling of decommissioned equipment and environmentally compatible 

treatment and disposal, helps prevent potential negative effects on health and the environment and promotes the recycling of the materials 

of which the product is made. For further details regarding the collection systems available, contact your local waste disposal service or 

the shop from which the equipment was purchased.

Risks connected to substances considered as dangerous (Weee).

According to the WEEE Directive, substances since long usually used  on electric and electronic appliances are considered dangerous for 

people and the environment. The adequate differentiated collection for the subsequent dispatch of the appliance for the recycling, treatment 

and dismantling (compatible with the environment) help to avoid  possible negative effects on the environment and health and promote the 

recycling of material with which the product is compound.

Product is according to EC Directive 2004/108/CE and following norms.

Summary of Contents for Elvox 46910.H32

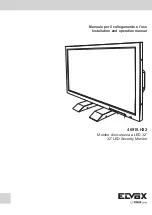
Page 1: ...46910 H32 Monitor di sicurezza a LED 32 32 LED Security Monitor Manuale per il collegamento e l uso Installation and operation manual ...

Page 2: ... di quanto so pra può com pro met te re la si cu rez za del l ap pa rec chio Non ostru i re le aperture o fessure di ven ti la zio ne o di smaltimento calore e non esporre l apparecchio a stillicidio o spruzzi d acqua Nessun oggetto pieno di liquido quali vasi deve essere posto sull apparecchio L installatore deve as si cu rar si che le in for ma zio ni per l uten te siano pre sen ti sugli ap pa r...

Page 3: ...ICHE GENERALI Area di visualizzazione Montaggio a parete con staffa non inclusa Ingresso uscita audio su presa Ingresso video HDMI Due canali di ingresso video compositi BNC e un canale di uscita video composito BNC Il connettore Y Pb Pr accetta il segnale video analogico Menu OSD multilingue per la facile impostazione e ottimizzazione del display 1 2 APERTURA DELL IMBALLO Controllare che l imball...

Page 4: ...rica Contattare il rivenditore o l installatore autorizzato Fessure e aperture nell alloggiamento assicurano un adeguata ventilazione Queste aperture non devono essere bloccate o coperte Non posizionare oggetti pesanti o che generano calore sopra all apparecchio potrebbero danneggiare l alloggiamento e o aumentare la temperatura interna causando dei guasti Non coprire l apparecchio con un panno me...

Page 5: ...Modalità di risparmio energetico NO SIGNAL significa che non è stato selezionato come ingresso alcun segnale video collegato PRESA DI ALIMENTAZIONE AC Inserire il cavo di alimentazione dell adattatore in dotazione nella rispettiva presa DC TASTO Power Viene utilizzato per accendere e spegnere il monitor Il LED blu si accende quando il monitor è acceso mentre quando è rosso indica la condizione di ...

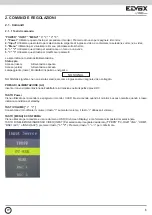
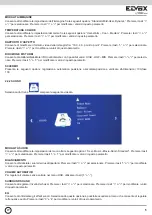
Page 6: ...deo BNC1 BNC2 a un altro ingresso video un altro monitor o un DVR 2 2 COMANDI DEL MENU TVCC OSD Selezionare il menu utilizzando il tasto MENU MENU per accedere ai menu e sottomenu e alle loro funzioni Utilizzo dei tasti Selezione dei menu Premere il tasto MENU per visualizzare il menu principale Per selezionare i menu della barra orizzontale premere i tasti Premere il tasto per selezionare ogni si...

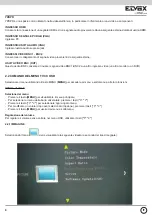
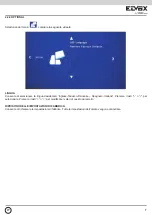
Page 7: ...rametro SCHERMO Presenta le seguenti opzioni regolazione automatica posizione orizzontale posizione verticale 24 dimensioni 100 fase 100 2 2 2 SUONO Selezionando l icona compare la seguente videata MODALITÀ SUONO Consente di modificare le impostazioni del suono fra le seguenti opzioni User Music Movie Sport Standard Premere i tasti o per selezionare Premere i tasti o per modificare i valori di que...

Page 8: ...enica 5 Tutti i giorni 6 Una volta 7 Spento ORA DI ACCENSIONE Lu ve 8 Lu sa 9 Sa do 10 Domenica 11 Tutti i giorni 12 Una volta 13 Spento TIMER DI SPEGNIMENTO AUTOMATICO Consente di impostare l ora di spegnimento automatico Le opzioni sono OFF 10M 20M 30M 60M 90M Premere i tasti o per selezionare Premere i tasti o per modificare i valori di questo parametro AUTO SLEEP IT ...

Page 9: ...ngua desiderata Inglese Tedesco Francese Spagnolo Italiano Premere i tasti o per selezionare Premere i tasti o per modificare i valori di questo parametro RIPRISTINO DELLE IMPOSTAZIONI DI FABBRICA Consente di richiamare le impostazioni di fabbrica Tutte le impostazioni dell utente vengono cancellate IT ...

Page 10: ...CR 10 in basso 89 89 Supporto colore 16 7 milioni Frequenza PC compatibile 30 80 KHz H 50 75 Hz V Compatibilità video Multi Standard per NTSC PAL Rapporto d aspetto 16 9 Durata Tip 30 000 ore Altoparlanti Multimedia Dx x 1 Sx x 1 5 W Demodulazione suono Stereo Audio Mute Si Umidità di funzionamento 10 90 Temperatura di funzionamento da 10 C a 50 C INTERFACCIA IN OUT Interfaccia video VGA BNC 3 Y P...

Page 11: ... of water No objects filled with liquids such as vases should be placed on the apparatus Installers must ensure that manuals with the above instructions are left on connected units after installation for users information All items must only be used for the purposes designed WARNING to prevent injury this apparatus must be securely attached to the floor wall in accordance with the installation ins...

Page 12: ...not attempt to use the device in this case Send the product back in its original packing if it is damaged 1 2 1 CONTENTS OF THE BOX LED CCTV monitor Remote Control Optional Power cable VGA cable Audio cable Instruction manual Important Note Accessories may be changed without prior notice 1 3 WARNINGS 1 3 1 POWER Only use the power unit provided to power the device Check mains rating before pluggin...

Page 13: ...to prevent faults Do not use the device in presence of smoke vapor humidity dust or intense vibrations Wait for a while before operating a device immediately after transporting it from a cold place to a warm place and vice versa Wait on average for three hours this will allow the device to adapt to the new ambient temperature humidity etc The monitor is provided with a plastic base and rubber feet...

Page 14: ...means that a not connected video signal has been selected as input POWER CONNECTOR AC Plug the power wire of the adapter provided into the respective DC Power BUTTON This is used to switch the monitor on and off The blue LED lights up when the monitor is on while when it is in red stands for standby condition VOLUME BUTTONS They allow to change the volume button increases the volume button decreas...

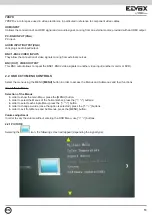
Page 15: ...other video input another monitor or DVR 2 2 OSD CCTV MENU CONTROLS Select the menu using the MENU MENU button in order to access the Menus and Submenus and their functions Use of the buttons Selection of the Menus In order to show the main Menu press the MENU button In order to select the Menus of the horizontal bar press the buttons In order to select each single Menu press the button In order t...

Page 16: ...Its information as follows Auto Adjust Horizontal Pos Vertical Pos 24 Size 100 Phase 100 2 2 2 SOUND Selecting the icon the following screen will appear SOUND MODE It allows to change the sound settings among the following User Music Movie Sport Standard Press or buttons to slect Press or to change the values of this parameter BALANCE It allows to balance the sounds of the two speakers Press or bu...

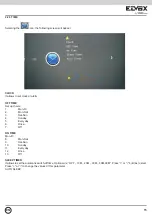
Page 17: ...oice 1 Mon Fri 2 Mon Sat 3 Sat Sun 4 Sunday 5 Everyday 6 Once 7 Off ON TIME Mon Fri 8 Mon Sat 9 Sat Sun 10 Sunday 11 Everyday 12 Once 13 Off SLEEP TIMER It allows to set the automatic switch off time Options are OFF 10M 20M 30M 60M 90M Press or buttons to slect Press or to change the values of this parameter AUTO SLEEP EN ...

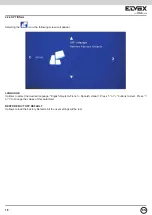
Page 18: ...ear LANGUAGE It allows to select the desired language English Deutsch French Spanish Italian Press or buttons to slect Press or to change the values of this parameter RESTORE FACTORY DEFAULT It allows to load the Factory Defaults All the user settings will be lost EN ...

Page 19: ...10 down 89 89 Color support 16 7M PC Compatible Frequency 30 80KHz H 50 75Hz V Video Compatiblity Multi Standard for NTSC PAL Aspect Ratio 16 9 Lifespan Typical 30 000 hours Speaker Multimedia Speakers Right x 1 Left x 1 5W Sound Demodulation Stereo Audio Mute Yes Work Humidity 10 90 Work Temperature 10 to 50 C IN OUT INTERFACE Video Interface VGA BNC 3 Y Pb Pr HDMI AUDIO Audio Interface Audio in ...

Page 20: ...Vimar SpA Viale Vicenza 14 36063 Marostica VI Italy Tel 39 0424 488 600 Fax Italia 0424 488 188 Fax Export 0424 488 709 www vimar com 49400695A0 14 05 VIMAR Marostica Italy ...

Reviews: