Note
: The presence or absence of external and auxiliary probes depends on their
actual installation according to the needs and type of temperature control system.
•
WEATHER STATION
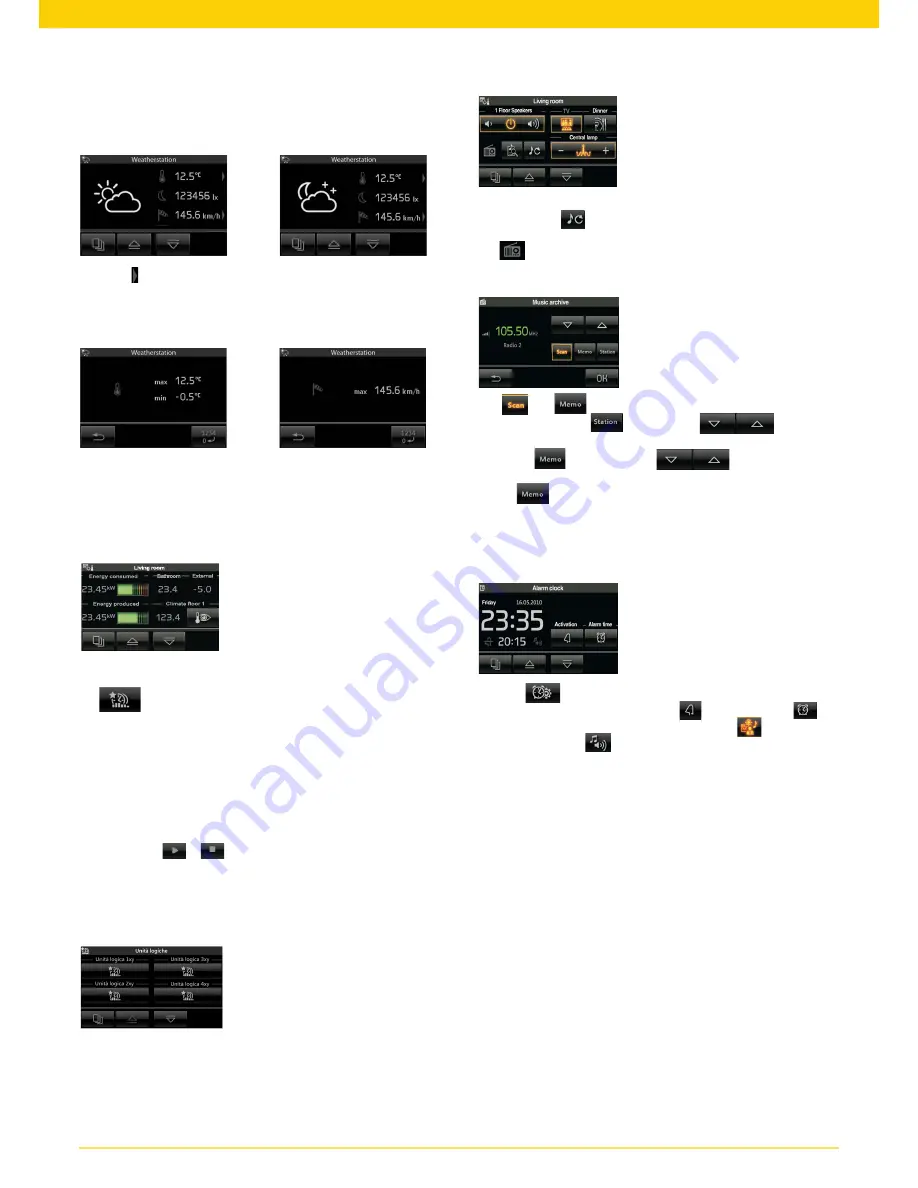
If the weather station is installed in the system, the touchscreen will display the
measured data in a specific screen. Two examples of screens showing the data
measured by the weather station are given below.
The arrows next to the temperature and wind speed take you to a page showing
the extreme values recorded. Resetting these values can be done manually (with
the specific button) or automatically at midnight every day. The choice between the
two reset modes is made during installation.
Reference screens displaying the extreme temperature values:
IMPORTANT: The weather symbols displayed by the touchscreen correspond
to the current state of the weather and are not a forecast.
•
LOAD
CONTROL
Using the touch screen you can see at any time the instantaneous power consu-
med by the plant; in addition, if the same system is also monitoring a manufacturing
plant, you will see the instantaneous power produced in the system.
•
LOGIC UNIT
The
icon is displayed in the main menu when the system contains one or
more logic units in which there are programs whose timing you can change.
Whenever the main screen is accessed, the touchscreen displays the following
information:
• number of programs;
• name of each program;
• number of timings for each program;
• type of each timing.
For each program you can:
• view the status (
or
icons);
• view and if necessary the timing (
a program can have more than one weekly/
periodic/cyclic type of timing
).
Tap the icon associated with the desired logic unit to access the screen displaying
the list of programs it contains. The symbol to the left of the name indicates whether
the program is paused (present) or playing (absent).
• SPEAKER SYSTEM
If a screen of the touchscreen includes an audio zone of the speaker system, the
screen displayed will be similar to the following one:
In this case it is possible to control switching the zone on/off and adjusting the
volume. Touching
enables changing the channel for listening to the speaker
system (changing the source).
The
icon indicates the type of source you are listening to and touching it
takes you to the control screen of the active source.
The FM radio control screen for the speaker system is the following:
The
and
icons enable setting the method of selecting the station
to listen to; by touching
it is possible to
search for the
next or previous station that the radio is able to receive.
By touching
it is possible to use
to select the previous or
next station saved on the radio (up to 8 different stations can be saved).
Keeping
pressed a long time enables passing on to the screen for saving the
active broadcaster to one of the 8 stations that can be saved; on this screen, touch
one of the 8 buttons to save the active broadcaster to the corresponding memory
and then automatically return to the previous screen.
When combined with the speaker system, the touchscreen can also function as an
alarm clock. The alarm clock control/setting screen is the following:
Touching
displays the screen for setting the alarm clock; via this screen
you can enable/disable the alarm clock (icon
), set the time (icon
) and
select whether the alarm clock will activate a scenario (icon
) or simply switch
on the audio zone (icon
).
Alarm clock operation.
When the time of day coincides with the time set on the alarm clock, the touchscre-
en switches on to display the relevant screen and the system activates the selected
audio zone or scenario.
The
Snooze
function is available whenever the alarm clock is activated and it can
only be used until the following intervention of the screensaver; in this case, touching
the touchscreen at any point temporarily deactivates the audio zone associated with
the alarm clock (even if the scenario output is selected) and
will be reactivated after
8 minutes
(this applies to each activation of the “Snooze” function).
If the “Snooze” function is not used, the alarm clock will not reactivate the audio
zone (which can be switched off with the normal By-me controls, with the tou-
chscreen or with a scenario) but remains set to activate on the following day at
the same time.
■
CONTROL FOR iPOD, iPHONE AND AUXILIARY SOURCES
If the sound system includes a Docking Station, by using the touch screen you can
control:
- Apple devices (iPod/iPhone);
- auxiliary stereo sources.
Auxiliary stereo sources are connected to the Docking Station with the jack on
its base; this input takes priority over any Apple device connected to the Docking
Station and therefore the iPod/iPhone can only be controlled when there is no
auxiliary source.
When the Apple device is connected, the zone page displays the button to access
Docking Station control (button, next to the icon representing the device) thus
providing access to the Playback menu.


