14
Operation
O
p
e
ra
ti
o
n
15
O
p
e
ra
tio
n
Operation
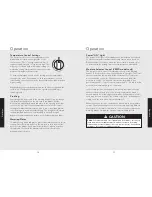
Temperature Control Settings
The knob is used to select the temperature of the
drawer and is located on the right side of the
control panel. The “1” setting represents low, “2”
represents medium, and “3” represents high. The
majority of foods are held at a medium setting to
maintain a serving temperature. However, your own
preference may be for hotter foods.
To keep several types of food hot for serving, key the temperature
setting for the meat. For example, to hold rare roast beef, select a
lower setting, cover the other foods that otherwise would be kept at a
higher setting.
Repeated opening of the drawer allows the hot air to escape and the
food to cool. The drawer should not be opened unless adding or
removing food.
Proofing
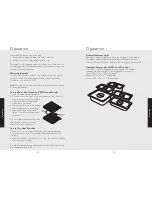
Yeast dough can be proofed in the warming drawer. Place the dough
in a bowl. Place the bowl on the low rack in the drawer. Fill the
moisture cup half full with water and place in the opening in the rear
center of the low rack. Turn the temperature control to the lowest
setting to facilitate the fermentation time. A towel should be placed
over the dough to minimize surface drying. The dough should remain
in the warming drawer until it has doubled in size and a slight
depression remains when the surface is touched gently with a finger.
Warming Plates
To warm serving bowls and plates, place temperature control on a low
setting. Place the empty dishes on the low rack to raise them off the
bottom of the drawer. If you want hotter dishes or want to heat fine
china, please check with the manufacturer of the dishes for their
maximum heat tolerance.
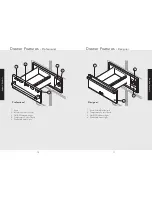
Power “ON” Light
The power “ON” light is located above the temperature control knob
on Professional models and below the temperature control knob on
Designer models. It turns on when the control knob is set and cycles
on and off with the heating element as temperature is maintained.
Moisture Selector Control (VEWD models only)
The moisture selector control is located at the top of the warming
drawer. To keep foods moist, move the handle to the right. This closes
the vents and seals the moisture inside the drawer. For crisp foods,
move the handle to the left. This opens the vents and allows the
moisture to escape. The moisture selector can be placed in any
position between “-” (open for less moisture) and “+” (closed to retain
moisture) to maintain any degree of moisture.
In the closed position, the drawer is completely sealed which keeps
the hot foods moist and soft. In this setting, condensation may be
noticed around the inside edge of the drawer. If the drawer is not full,
there may be some drying on the surface of the food. If this happens,
simply cover the food with a lid or aluminum foil.
When in the open position, the drawer is vented, which lets moisture
escape. This dry heat keeps the foods exterior dry and crisp. With the
vents open, it is normal for moisture to collect on surfaces above the
warming drawer. Simply wipe up the moisture with a dry cloth.
CAUTION
DO NOT
use plastic wrap to cover foods placed in the drawer, nor to keep
foods warm that are wrapped or placed in plastic containers for heating.
Plastics can melt onto the drawer if they are in direct contact. If melted onto
the drawer, they can be very difficult to remove.
Summary of Contents for F1614H
Page 12: ...22 23...


