background image

12


|


SIDE BURNER ACCESSORY CARE & USE/INSTALLATION

PROPANE HOOK UP

NATURAL GAS HOOK UP

GAS CONNECTIONS 

...

continued 

WARNING

COLD WEATHER WARNING: PROPANE 
Extremely cold temperatures may cause your burner 
to light 

inside

 the burner instead of 

outside

. Once 

lit, if you hear a ‘whooshing’ sound, immediately 
turn the burner knob off to extinguish the flame and 
then immediately re-light the burner.

MAXIMUM RUNS FOR ALL  

APPLIANCES ON SUPPLY LINE

Run Length      

3/4” Pipe (in feet)

Max BTU for all  

Appliances on line

10

360,000

20

245,000

30

198,000

40

169,000

50

150,000

60

135,000

70

123,000

80

115,000

19

propAne hook up

nAturAl gAs hook up

MAxIMUM RUNS FOR ALL  

APPliAnces on suPPly line

Run Length

3/4” Pipe

(in feet)

Max BTU for all 

Appliances on 

line

10

360,000

20

245,000

30

198,000

40

169,000

50

150,000

60

135.000

70

123,000

80

115,000

Summary of Contents for DOUBLE SIDE BURNER Series

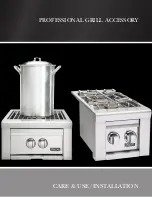
Page 1: ...CARE USE INSTALLATION PROFESSIONAL GRILL ACCESSORY ...

Page 2: ...s used in one of the components of the IR burner as an agent known to the state of California to cause cancer IF YOU SMELL GAS 1 Shut off all gas supply lines to the grill accessory 2 Extinguish any open flames 3 Carefully open the lid Remember it may be extremely hot 4 If odor continues keep everyone away from the grill accessory and immediately call your gas supplier or your fire department 1 DO...

Page 3: ...empt to extinguish a grease fire with water or other liquids Storing your accessory Store your accessory in a well ventilated area If stored indoors detach and leave LP cylinder outdoors in a well ventilated area away from heat and away from where children may tamper with it Keep any electrical supply cord and the fuel supply hose away from any heated surfaces Electrical cords should be placed awa...

Page 4: ...n must meet local electric codes or in the absence of local codes the latest edition of the National Electrical Code ANSI NFPA No 70 or the Canadian Electrical Code CGA 1 6b2005 Use only a Ground Fault Interrupter GFI protected circuit with this outdoor cooking gas appliance This accessory is equipped with a three prong grounding electric plug for your protection against shock hazard and must be p...

Page 5: ...Testing the Installation 14 Leak Testing 14 IMPORTANT SAFETY PRECAUTIONS 15 A MESSAGE TO OUR CUSTOMERS 16 USING THE POWER BURNER 17 Smell of Gas While Cooking 17 Yellow Flames 17 LIGHTING INSTRUCTIONS FOR ALL ACCESSORIES 18 Safety Practices and Precautions 18 At Each New Season 18 Purging the Gas Lines 18 Match Lighting 18 Low Heat Flame Adjustment 19 CONTACTING CUSTOMER SERVICE 20 SCHEMATICS 21 V...

Page 6: ...ak tested If not check the connection before continuing If yes please continue Do you know where your side burner s main gas supply shut off valve is located If not locate it before continuing If yes please continue Are all burners properly seated in the side burner If not seat the burners properly before continuing If yes please continue Is the wind blowing just lightly and not blowing on the sid...

Page 7: ...nstruction Installation must conform with local codes or in the absence of local codes with either the National Fuel Gas Code ANSI Z223 1 NFPA 54 or Natural Gas and propane Installation Code CSA B149 1 or Propane Storage and Handling Code B149 2 in Canada BEFORE YOU START WARNING IF SHIPMENT ARRIVES DAMAGED IMPORTANT NOTES WHERE S THE WIND When selecting a suitable location consider important fact...

Page 8: ... information The grill accessory may be powered from either a 120 volt 60 hertz 15 amp GFI certified outlet installed by a qualified electrician OR it may be powered directly from your grill transformer power supply When a grill is not available or if the grill is not located close enough to the accessory a LASK Accessory Switch Kit is available as an optional purchase CLEARANCE TO COMBUSTIBLE MAT...

Page 9: ...ur website at www vikinggrills com in the US and www brigade ca in Canada WITH INSULATED JACKET INSTALLED MODEL A B C LIJ27 33 00 11 63 24 00 LIJ30 36 00 11 63 26 50 LIJ36 42 00 11 63 24 00 LIJ42 48 00 11 63 26 50 LIJ54 60 00 11 63 26 50 5 4 5 3 A A B C COUNTER TOP NOTCH DETAIL Only required if island counter top overhangs the face of the island SPECIFICATIONS INSTALLATION 3 GRILLS MODEL A B C C V...

Page 10: ...ion parts must conform to local codes with the National Electrical Code ANSI NFPA 70 1990 and the National Fuel Gas Code ANSI Z223 1 NFPA 54 in the U S and CGA B149 1 2 in Canada Canadian installations must conform to CGA B149 1 2 natural gas propane installation code Canada NATURAL GAS Viking Range LLC recommends that only qualified professionals perform the required plumbing on this product The ...

Page 11: ...d or rusty LP cylinder may be hazardous and should be avoided If in doubt have it checked by your LP supplier Always check for leaks after every LP cylinder change See INDEX Leak Testing for further details Always shut off the LP gas supply at the cylinder when the accessory is not in use Cylinders must be stored outdoors in a well ventilated area out of the reach of children If your accessory is ...

Page 12: ... knob off to extinguish the flame and then immediately re light the burner MAXIMUM RUNS FOR ALL APPLIANCES ON SUPPLY LINE Run Length 3 4 Pipe in feet Max BTU for all Appliances on line 10 360 000 20 245 000 30 198 000 40 169 000 50 150 000 60 135 000 70 123 000 80 115 000 19 propAne hook up nAturAl gAs hook up MAxIMUM RUNS FOR ALL APPliAnces on suPPly line Run Length 3 4 Pipe in feet Max BTU for a...

Page 13: ...l and connect those plugs to the mating plugs on your accessory See Index Electrical Connections Important note If using multiple accessories with the Control Illumination Blue LED S a connector for this purpose is built into the accessory wiring This will allow you to use the light switch on your grill to actuate the power on more than one accessory OPTIONAL ELECTRICAL KITS Each accessory include...

Page 14: ...to align with the gas flow 4 For LP turn the cylinder valve knob counter clockwise one full rotation 5 Apply the soap solution generously by paint brush or squirt bottle on all connections and fittings 6 If bubbles appear to grow on any of the connections you have a gas leak IMMEDIATELY turn off the gas supply FIXING A GAS LEAK DANGER To prevent fire or explosion hazard DO NOT smoke or allow any p...

Page 15: ...d can melt knobs and ignition modules Such damage is specifically excluded from your warranty 10 Never use charcoal or any other solid fuel in the grill accessory 11 Cooking excessively fatty meats and oils will cause flare ups Internal fires or damage caused by them or by the grill accessory being left unattended while cooking are not covered under the terms and conditions of our warranty 12 Neve...

Page 16: ...of these features only by carefully reading this manual before your first cook out This manual includes important safety tips and great hints for better grilling You should keep it handy for easy reference Also we enjoy hearing from our customers We like to hear about your successes but also about any difficulties you are having Please feel free to contact us with any questions or problems or just...

Page 17: ...WHILE COOKING Perform a leak test See INDEX Leak Testing for further details Check for blockages YELLOW FLAMES A yellow flame on the main burners indicates a lack of air But if the air around the grill is dusty or if heavy grease is present some orange tips on the burner flame are normal ADJUST THE AIR SHUTTER ONLY DO THIS WHEN THE ACCESSORY HAS COOLED DOWN COMPLETELY Make sure all grill controls ...

Page 18: ...grill accessory 1 Make sure all grill controls are in the OFF position 2 Slowly turn on the main gas supply 3 Push in the control knob for the burner furthest from the fuel source Using the burner furthest from the fuel source will completely purge the lines It will take several seconds for the burner to light 4 Hold the knob ON for about 20 seconds to allow the air in the system to purge and the ...

Page 19: ...djust the burner for low setting 1 Make sure the grill accessory is cool 2 Remove the grates so that you can see the flame while adjusting the burner 3 Light the burner and set it to LOW all the way counter clockwise 4 Pull off the control knob 5 While holding the valve shaft with pliers insert a thin flat blade screwdriver into the shaft and while watching the flame adjust it to a minimum stable ...

Page 20: ...her on the underside of the drip tray if you have one on the heat shield behind the front panel or on the inside left panel wall For warranty service contact the Preferred Customer Service for an authorized service agent near you at 888 845 4641 www vikingrange com in the US or www brigade ca in Canada Your satisfaction is of the utmost importance to us If a problem cannot be resolved to your sati...

Page 21: ...SIDE BURNER ACCESSORY CARE USE INSTALLATION 21 SCHEMATICS WHITE ...

Page 22: ...o the sale or use of its grill products 4 Warranty shall not apply and Viking Range LLC is not responsible for damage resulting from misuse abuse alteration of or tampering with the appliance accident hostile environment flare up fires improper installation or installation not in accordance with the instructions contained in this manual or the local codes 5 Viking Range LLC shall not be liable for...

Page 23: ...anty applies only to the original location of installa tion and may not be transferred 3 Warranty is in lieu of all other warranties expressed or implied and all other obligations or liabilities related to the sale or use of its grill products 4 Warranty shall not apply and Viking Range LLC is not responsible for damage resulting from misuse abuse alteration of or tampering with the appliance acci...

Page 24: ... CARE USE INSTALLATION SIDE BURNER EXPLODED PARTS VIEW MODEL INNER BURNER OUTER BURNER OPEN TOP BURNER TOTAL INPUT VQGPB5200 N L SS 13 000 34 000 47 000 BTU Hr VQGSB5130 N L SS 2 15 000 30 000 BTU Hr MODEL SPECIFIC BTU OUTPUTS ...

Page 25: ...ments 10 Gas Supply Line Runs 12 L Leak testing 14 Lighting the Burner 6 Lighting with a Match 18 Locating Serial Number 10 20 LP Connections 11 M Manual Lighting 18 Maximum Supply Line Runs 12 N Natural Gas Hook Up 12 O Obtaining Service 19 Optional Electrical Kits 14 P Propane Hook Up 12 Purging the Gas Lines 18 S Schematics 21 Serial Number Location 10 20 Service Contacting Viking 20 Specificat...

Page 26: ...Viking Range LLC 111 Front Street Greenwood Mississippi 38930 Service 888 845 4641 www vikingrange com www brigade ca ...

Reviews: