background image

Dossier D100

User’s Guide

29

Tilt up the HDD module as shown by

#1

.

Remove the HDD module as shown by

#2

.

Remove the four screws as shown by

#1

.

Remove the HDD drive as shown by

#2

.

To insert the HDD drive, reverse the steps above.

Summary of Contents for Dossier D100 W651UI

Page 1: ...Dossier D100 User s Guide Model W651UI First Edition December 2007 ...

Page 2: ...e incorporated in future editions The manufacturer assumes no responsibility for errors or omissions in this document Windows is the trademark of Microsoft Corporation Intel is the trademark of Intel Corporation Bluetooth is the trademark owned by its proprietor Other trademarks are properties of their respective owners NOTICE TRADEMARKS ...

Page 3: ...oldface with or without capitalization refers to the notebook computer that you have purchased Boldface type is also used to highlight important information in this document Whenever extra caution is called for the information will be boxed in a dark frame preceded by Note or Warning Standards ...

Page 4: ...User s Guide Page IV This page is left blank intentionally ...

Page 5: ...1 9 THE FN KEY 15 1 10 THE SCROLL AREA ON TOUCH PAD 18 CHAPTER 2 BATTERY 19 2 1 BATTERY PACK 19 2 2 RECHARGING THE BATTERY PACK 19 2 3 QUESTIONS AND ANSWERS 20 2 4 BATTERY MAINTENANCE 21 2 5 POWER CONSUMPTION 21 2 6 REDUCING POWER CONSUMPTION 22 2 7 REMOVING THE BATTERY PACK 22 CHAPTER 3 MEMORY 23 3 1 REMOVING MEMORY MODULE 24 CHAPTER 4 MINI PCI EXPRESS MODULE 26 4 1 REMOVING MINI PCI EXPRESS MODU...

Page 6: ... SPECIFICATION 30 CHAPTER 7 BIOS SETUP 31 7 1 CONFIGURATION SOFTWARE 31 7 2 RUNNING THE SETUP UTILITY 32 7 3 MAIN SETUP 33 7 4 ADVANCED SETUP 35 7 5 SECURITY SETUP 37 7 6 BOOT SETUP 39 7 7 EXIT SETUP 40 APPENDIX A AGENCY REGULATORY NOTICES 41 ...

Page 7: ...g your computer 1 1 Checking What You Received Your notebook package should contain the following items The Notebook AC Adapter AC Power Cord Driver CD Disc Optional Battery Pack Note You should keep the original factory carton and packing materials in case you need to ship the unit back for servicing ...

Page 8: ...to get acquainted with your notebook s main features and interfaces Panoramic View Internal Microphone Optional LCD Screen Web Cam Lens Optional Power Button Web Cam LED Optional Keyboard Two Speakers Fingerprint Reader Optional Nine System Buttons Two Click Buttons ODD Drive Five Status LEDs Touch Pad ...

Page 9: ...Dossier D100 User s Guide 3 Front View Two Power LEDs Microphone Jack Headphone Jack SPDIF Rear View VGA Connector Battery Pack RJ11 Fax Modem Connector DC In Jack Kensington Lock ...

Page 10: ...ide 4 Left View Media Card Slot for MMC SD MS MS Pro Cards RJ45 LAN Connector Two USB Connectors Ventilation Holes HDMI Connector Optional PCI Express Card Slot Right View USB Connector ODD Drive Eject Button Emergency Hole ...

Page 11: ...CPU Ventilation Holes Battery Pack Two Battery Latches Note Some external USB devices consume more power than this system unit can provide In this case these USB devices have their own power cords To make sure this kind of USB devices can function properly please connect these devices to the AC source first before connecting to the system unit ...

Page 12: ...ier D100 User s Guide 6 Two Types of Audio Jack Mono Jack Your microphone jet should have this type of connector as shown here Stereo Jack Your headphone jet should have this type of connector as shown here ...

Page 13: ...le Battery pack is being recharged fast charge or pre charge Blue Battery pack is in full power capacity Off Battery pack is not under recharge Red Blinking Battery pack is consuming down to 10 level Battery pack error Note The Two Power LEDs are located near the front side of system unit For exact location please refer to the Front View diagram in Chapter 1 2 For more details on Standby and Hiber...

Page 14: ...ck mode In this mode all characters you type are in uppercase The Num Lock LED This LED would be lit when the keyboard is in Num Lock mode In this mode the embedded numeric keypads can be used The ODD Access LED This LED would be lit when system is accessing the ODD drive The HDD Access LED This LED would be lit when system is accessing the HDD drive Note The Five Status LEDs are located near the ...

Page 15: ...utton is programmable by user For detail on how to program this button please refer to the Power Options of Control Panel in Windows System Note The Power Button is located near the top left of keyboard For exact location please refer to the Panoramic View diagram in Chapter 1 2 ...

Page 16: ...ate the internet function Media Player Button Press this button to activate the media player function Play Pause Button Press this button to play or pause media playback Stop Button Press this button to stop media playback Previous Track Button Press this button to skip to the previous track chapter of media playback Next Track Button Press this button to skip to the next track chapter of media pl...

Page 17: ...tration process by double clicking on the mail reg execution program Then follow the instructions to complete the process Reboot the system to activate the email function In order for the Media Player Button to function properly in Windows Vista operating system first you need to perform the below one time registration procedure In the driver CD disc there is an execution program WMPlayer reg Star...

Page 18: ...the system unit through this slot when PCI Express Card is not inserted When inserting this PCI Express Card slot door please make sure the arrow is on the topside as shown above Inserting this door upside down may cause damage to your notebook The Media Card slot door is now inserted into the system unit The PCI Express slot door is now taken out from the system unit The Media Card slot door is n...

Page 19: ...oor as supplied together with this notebook The purpose of this media card slot door is to prevent foreign matters from entering into the system unit through this card slot when no card is inserted When inserting this media card slot door please make sure the arrow is on the topside as shown above Inserting this door upside down may cause damage to your notebook ...

Page 20: ...Dossier D100 User s Guide 14 1 8 Operating Temperature Operating Temperature 10ºC to 35ºC ...

Page 21: ...tering venues like airplanes airports and hospitals where the usage of Wireless LAN is prohibited or not advisable Sleep Switch Press this key combination Fn F3 to enter sleep mode In sleep mode the LCD display and selected devices would be switched off for less energy consumption LCD CRT Switch Press this key function combination Fn F4 to switch between LCD only CRT only and LCD CRT simultaneousl...

Page 22: ...seconds during system reboots into Windows operating system or resumes from standby or hibernation NumLock Switch Press this key combination Fn to activate or deactivate the embedded numeric keypads Break Switch Press this key combination Fn to break the MS DOS application program you are running Its function is the same as the industry standard break key Print Screen Switch Press this key combina...

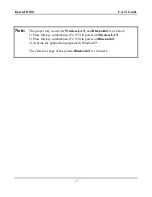
Page 23: ...e Wireless LAN and Bluetooth is as below 1 Press this key combination Fn F2 to power on Wireless LAN 2 Press this key combination Fn F6 to power on Bluetooth 3 Activate the application programs in Windows The effective range of the system Bluetooth is 10 meters ...

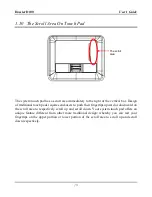
Page 24: ...h pads requires end users to push their fingertips upward or downward on the scroll area to respectively scroll up and scroll down Your system touch pad offers an unique feature different from other more traditional design whereby you can rest your fingertips on the upper portion or lower portion of the scroll area to scroll up and scroll down respectively The scroll area ...

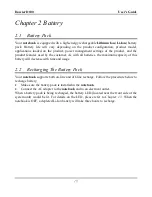
Page 25: ... maximum capacity of this battery will decrease with time and usage 2 2 Recharging The Battery Pack Your notebook supports both on line and off line recharge Follow the procedure below to recharge battery Make sure the battery pack is installed in the notebook Connect the AC adapter to the notebook and to an electrical outlet When a battery pack is being recharged the battery LED located near the ...

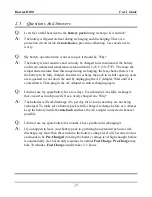
Page 26: ... the AC Adapter Wait until it is cooled down Then plug in the AC Adapter to start recharging again Q I did not use my spare battery for a few days Even though it was fully recharged there wasn t as much power left as a newly charged one Why A The batteries will self discharge 1 per day for Li Ion when they are not being recharged To make sure a battery pack is fully charged recharge before use Alw...

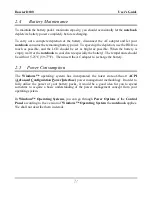
Page 27: ... down especially the battery The temperature should be within 15 25 C 59 77 F Then insert the AC adapter to recharge the battery 2 5 Power Consumption The Windows operating system has incorporated the latest state of the art ACPI Advanced Configuration Power Interface power management methodology In order to fully utilize the power of your battery packs it would be a good idea for you to spend som...

Page 28: ...n the battery pack compartment 2 7 Removing The Battery Pack This battery pack can easily be removed and replaced Make sure that the computer is properly shutdown before changing the battery pack If you would like to change the battery pack while power is on make sure this battery pack is not the only electrical source to the system unit Follow the steps below to remove the battery pack Make sure ...

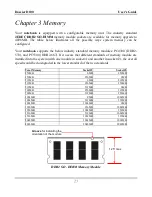
Page 29: ...different standards of memory module are installed into the system with one module in socket 1 and another in socket 2 the overall speed would be downgraded to the lower standard of the two standards Total Memory Socket 1 Socket 2 256MB 0MB 256MB 256MB 256MB 0MB 512MB 0MB 512MB 512MB 256MB 256MB 512MB 512MB 0MB 768MB 256MB 512MB 768MB 512MB 256MB 1024MB 0MB 1024MB 1024MB 512MB 512MB 1024MB 1024MB ...

Page 30: ... upside down as shown Remove the battery pack as shown in Chapter 2 Remove the screw as shown by 1 Remove the compartment door as shown by 2 You can see two memory sockets with one socket overlapping the other socket Press the spring locks sideways as shown by 1 The first memory module would pop up as shown by 2 Remove the first memory module as shown by 3 Memory Modules ...

Page 31: ... User s Guide 25 Press the spring locks sideways as shown by 1 The second memory module would pop up as shown by 2 Remove the second memory module as shown by 3 To insert the memory modules reverse the steps above ...

Page 32: ...system upside down as shown Remove the battery pack as shown in Chapter 2 Remove the three screws as shown by 1 Remove the compartment door as shown by 2 Disconnect the two cables as shown by 1 Remove the two screws as shown by 2 The Mini PCI Express module would pop up as shown by 3 Remove the Mini PCI Express module as shown by 4 Note there are different types of mini PCI Express module External...

Page 33: ...Dossier D100 User s Guide 27 Note Depend on the different types of mini PCI Express module some modules are with two cables while some modules are with three cables ...

Page 34: ... is the procedure on how to remove the hard disk drive Make sure the system is properly shutdown Flip the system upside down as shown Remove the battery pack as shown in Chapter 2 Remove the three screws as shown by 1 Remove the compartment door as shown by 2 Remove the two screws as shown by 3 Pull the belt in a lateral direction to unlock the HDD module as shown HDD Drive ...

Page 35: ...00 User s Guide 29 Tilt up the HDD module as shown by 1 Remove the HDD module as shown by 2 Remove the four screws as shown by 1 Remove the HDD drive as shown by 2 To insert the HDD drive reverse the steps above ...

Page 36: ...tegrated stereo sound Speakers Stereo 1 5 watts Audio Amplifier Maxim MAX9789A Modem Agere 56k bps V 92 ODD 12 7mm PATA CD ROM RW DVD ROM combo LCD Display 15 4 WXGA 1280x800 HDD 9 5mm 2 5 SATA Capacity 80 200G 5400 7200rpm Bluetooth USI BCM92045NMD Factory Fit only WLAN Support Intel Mini Express Card Wireless LAN 802 11N 4965AGN Intel Mini Express Card Wireless LAN 802 11a b g 4965AG Intel Mini ...

Page 37: ...tware is sometimes referred to as CMOS Setup BIOS Setup or simply the SETUP Note The SETUP can be activated by pressing F2 during system boot up You are requested to perform the following one time procedure immediately after you have upgraded reprogrammed your BIOS Press F2 during system boot up to get into the SETUP Go to the EXIT sub menu and choose Load Setup Defaults Press Enter Now you can cu...

Page 38: ...ighted and a brief explanation would be displayed in the Item Specific Help box located on the right side of the screen The followings are some of the most commonly used keys Press F1 to enter the menu of Help Press F9 to enter the menu of Setup Defaults then press Enter to continue or press Esc to abort Press F10 to enter the menu of Save And Exit This would save modifications you have made Then ...

Page 39: ... Tab or Enter keys to move around these fields To change the value press or key Set any date from year 1981 to 2099 It will automatically keep track of leap years The system date can also be set from the operating system BIOS Version This is for display only This shows the version of the BIOS KBC Version This is for display only This shows the version of the KBC Keyboard Controller CPU Type This i...

Page 40: ... IDE Removable CD ROM ATAPI Removable and None In general you should choose the default value Auto to let the system to automatically detect the type of optical drive you have in the system If Auto fails to recognize your optical drive you can choose the User option then enter the parameters according to the specifications of your optical drive SATA Port Enter its submenu by pressing Enter In this...

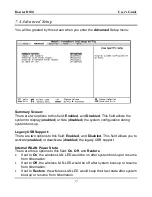
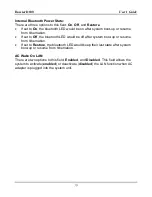
Page 41: ...re are two options to this field Enabled and Disabled This field allows you to activate enabled or deactivate disabled the legacy USB support Internal WLAN Power State There are three options to this field On Off and Restore If set to On the wireless LAN LED would be on after system boot up or resume from hibernation If set to Off the wireless LAN LED would be off after system boot up or resume fr...

Page 42: ... set to Off the bluetooth LED would be off after system boot up or resume from hibernation If set to Restore the bluetooth LED would keep their last state after system boot up or resume from hibernation AC Wake On LAN There are two options to this field Enabled and Disabled This field allows the system to activate enabled or deactivate disabled the LAN function when AC adapter is plugged into the ...

Page 43: ... s user password has been set Set or not Clear Set Supervisor Password Press Enter to get into its sub menu In this sub menu not shown here you can set system Supervisor Password The Supervisor Password controls the access to system boot up the access to BIOS setup and all settings within the BIOS setup Set User Password Press Enter to get into its sub menu In this sub menu not shown here you can ...

Page 44: ...s HDD password has been set Set or not Clear HDD Password Press Enter to get into its sub menu In this sub menu not shown here you can set system HDD Password The sole purpose of this HDD password is to guard against information theft namely installing this HDD into another system unit Therefore system would not prompt for this password if this password is set and the HDD is resided in the same sy...

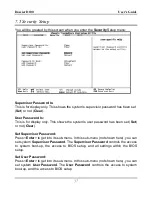
Page 45: ... is for determining the priority of which the system would boot from This version of BIOS supports the following boot devices 1 IDE CD 2 SATA HDD 3 USB CD ROM 4 USB Key 5 USB HDD 6 USB FDC and 7 Boot to LAN Use and to select the device to work on Then use and to escalate or downgrade the boot priority of the selected device ...

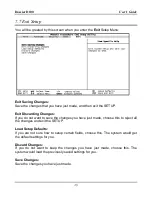
Page 46: ...do not want to save the changes you have just made choose this to reject all the changes and exit the SETUP Load Setup Defaults If you are not sure how to setup certain fields choose this The system would get the default settings for you Discard Changes If you do not want to keep the changes you have just made choose this The system would load the previously saved settings for you Save Changes Sav...

Page 47: ... use liquid or sprayed detergent for cleaning Use a clean moistened cloth CAUTION The wall socket used should be positioned near the equipment and should be easily accessible CAUTION Please keep this equipment free from humidity CAUTION Place the equipment on a reliable surface at all times A drop or fall can cause severe damage WARNING The openings of the enclosure are for air ventilation and are...

Page 48: ...nto any openings a fire or electrical shock is possible WARNING For safety reasons other than pre designated ports doors and the equipment should be opened only through qualified service personnel CAUTION If one of the following situations should arise the equipment should be checked by an authorized technician a The power cord or plug is damaged b Liquid has penetrated into the equipment c The eq...

Page 49: ...ess the modem telephone line has been disconnected at the network interface CAUTION Use caution when installing or modifying modem telephone lines WARNING Avoid using a modem telephone other than a cordless type during an electrical storm There may be a remote risk of electric shock from lightning WARNING This computer contains an internal lithium battery powered real time circuit There is a risk ...

Page 50: ...he outside of the CD ROM DVD ROM drive with the following wordings CLASS 1 LASER PRODUCT KLASSE 1 LASER PRODUKT WARNING Danger of explosion if battery is incorrectly replaced Replace only with the same or equivalent type recommended by the manufacturer Dispose of used batteries according to the manufacturer s instructions Explosionsgefahr bei unsachgemäßen Austausch der Batterie Ersatz nur durch d...

Page 51: ...are unsure whether your power source is compatible please contact the local dealer for assistance CAUTION To reduce the risk of fire use only No 26 AWG or larger telecommunication line cord CAUTION For continued protection against risk of fire Replace only with same type and rating of fuse CAUTION If the computer is not sold to German area please use only the local recognized power supply cords th...

Page 52: ...e interference by one or more of the following measures Reorient or relocate the receiving antenna Increase the separation between the equipment and receiver Connect the equipment into an outlet on a circuit different from that to which the receiver is connected Consult the dealer or an experienced radio or television technician for help This device complies with part 15 of the FCC Rules Operation...

Page 53: ...llowing safety precautions should be observed Do not touch or move antenna while the unit is transmitting or receiving Do not hold any component containing the radio such that the antenna is very close or touching any exposed parts of the body especially the face or eyes while transmitting Do not operate the radio or attempt to transmit data unless the antenna is connected if not the radio may be ...

Page 54: ... les exigences du Reglement sur le materiel brouilleur du Canada Canada Radio Frequency Interference Requirements This Class B digital apparatus complies with Canadian ICES 003 Issue 2 and RSS 210 Issue 4 Dec 2000 To prevent radio interference to the licensed service this device is intended to be operated indoors and away from windows to provide maximum shielding Equipment or its transmit antenna ...

Page 55: ...quipment the following additional standards apply ETSI301489 17 General Emissions for Radio Equipment EN60950 Safety ETSI300328 2 Technical Requirements for Radio Equipment CE Caution Due to the fact that the frequencies used by 802 11b 802 11g wireless LAN devices may not yet be harmonized in all countries 802 11b 802 11g products are designed for use only in specific countries or regions and are...

Page 56: ...ne 21 Côte d Or 61 Orne 90 Territoire de Belfort 24 Dordogne 63 Puy du Dôme 91 Essonne 25 Doubs 64 Pyrénées Atlantique 92 Hauts de Seine 26 Drôme 65 Haute Pyrénées 93 Seine St Denis 27 Eure 66 Pyrénées Orientales 94 Val de Marne 32 Gers 67 Bas Rhin 35 Ille et Vilaine 68 Haut Rhin The wireless LAN device cannot currently be used in any departments of mainland France other than those listed above Ma...

Page 57: ... as possible You will be informed of your right to file a compliant with the FCC Your telephone company may make changes in its facilities equipment operations or procedures that could affect proper operation of your equipment If they do you will be notified in advance to give you an opportunity to maintain uninterrupted telephone service The FCC prohibits this equipment to be connected to party l...

Page 58: ...made by another person and that period of notification has expired This modem is suitable for use only on telephone lines proved with Loop Disconnect or Multi Frequency Dialing Facilities Users of this modem are advised that the approval is for connection to the PSTN via the telephone line interface supplied with it Connection of a modem to the PSTN by any other means will invalidate the approval ...

Page 59: ...e speech band services This modem does not support an automatic re dial function Any other usage will invalidate the approval of your modem if as a result it then ceases to confirm to the standards against which approval was granted The approval of this modem is invalidated if the apparatus is subject to modification in any material way not authorized by the BABT or if it is used with or connected...

Reviews: