


5/12
6.
OBS Operation Instructions
The OBS (Open Broadcaster Software) Studio
software must be installed on your PC before
video capture. After the device connection, you
can follow the steps below to process the OBS
settings.
Step 1:
Download the “OBS” application to your
computer first.
Step 2:
Double-click the OBS shortcut to open the
application.
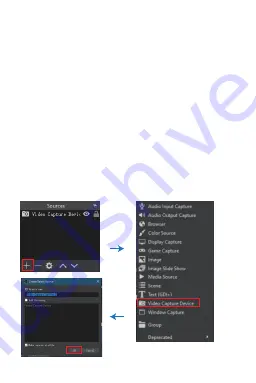
Step 3:
Click “+” at the right-bottom corner of the
Source window, and select “Video Capture Device,”
then click “OK” to select a source video as shown
below.


