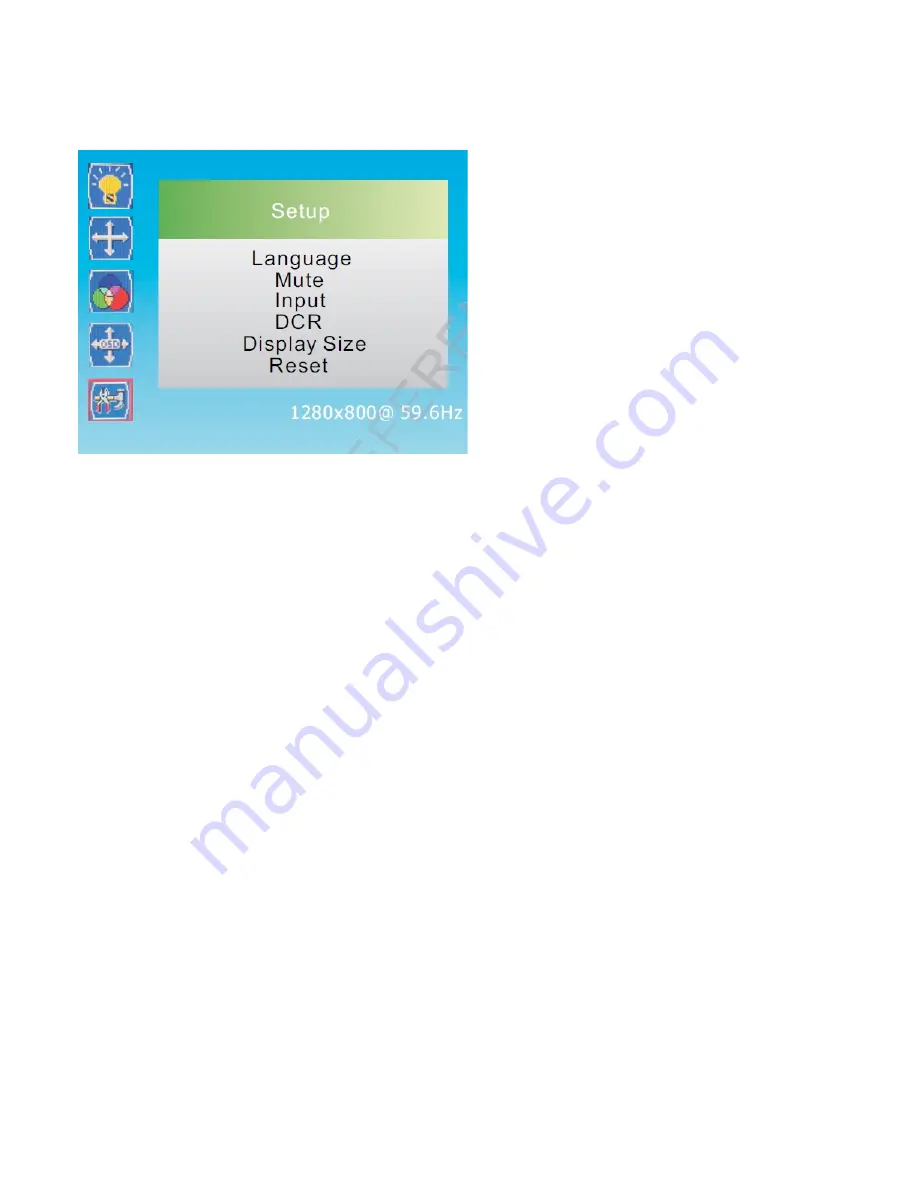
Vigilant Vision PD195WHV Operation Manual Download Page 10

2.2.4 Setup Menu


1. Press -/+ button to select 

Setup 

in the main menu, then press 

MENU 

button to enter. 

2. You can also enter 

Setup 

menu from the 

Main 

menu. 


Language 

Press 5” and “6”


button to select 

Language

, then press 

MENU 

button to confirm the choice . 

Press 5” and “6” button to select required language, then press Auto button to return to the previous menu. 
Language: English, Italiano, 

한국의

  , 

简体中文

, Español, Deutsch, Français , 


Mute: 

Press 5” and “6”


button to select 

Mute

, then press 

MENU 

button to confirm the choice and enter the sub-menu. 

Press 5” and “6”


button to choose on/off. 


Input: 

Press 5” and “6”


button to select 

Input

, then press 

MENU 

button to confirm the choice and press “3” and 

“4”button to choose VGA, DVI or HDMI. 
 

DCR: 

Press 5” and “6”


button to select 

DCR

, then press 

MENU 

button to confirm the choice and press “3” and “4”


button 

to choose ON or OFF. 
This item can judge the picture’s overall brightness automatically; it will make different homochromy step level 
return to original state, and allow the details and level of picture be clearer and sharper by weakening the dark 
region brightness. 


4.      LED MONITOR QUALITY AND PIXEL 


The  TFT  monitor  uses  high-precision  technology,  manufactured  according  to  industry  standards,  to  guarantee 
trouble-free performance. Nevertheless, the display may have cosmetic imperfections that appear as small bright or 
dark spots. This a common matter related to the specific nature of TFT technology which determines the possible 
presence of discontinuity on the screen and is not specific to products.   


Summary of Contents for PD195WHV

Page 1: ...LED Monitor Operation Manual...

Page 2: ...box 1 1 3 Warnings 2 1 3 1 Power 2 1 3 2 Safety precautions 2 1 3 3 Installation precautions 2 1 3 4 Cleaning the device 2 1 3 5 Privacy and copyright 2 2 Controls and settings 3 2 1 Controls 3 2 2 OS...

Page 3: ...lay LCD 1 1 1 GENERAL FEATURES Display area Wall mounting bracket not included audio input output HDMI video input Two computer input channels of DVI VGA Wide inclination to allow viewing either from...

Page 4: ...the cabinet are provided for ventilation These openings must not be blocked or covered Do not place heavy or heat generating objects on top of the device this could damage the casing and or increase i...

Page 5: ...socket Power BUTTON This is used to switch the monitor on and off The blue LED lights up when the monitor is on When it is red it shows standby condition VOLUME BUTTONS 3 4 AND CONFIRM 1 They allow to...

Page 6: ...Menu press the 2 button In order to select the Menus of the horizontal bar press the 3 buttons In order to select each single Menu press the 5 or 6 button In order to change a value once the option is...

Page 7: ...2 Position Menu 1 Press button to select Position in the main menu then press MENU button to enter 2 You can also enter Position menu from the Main menu Phase Press 5 and 6 button to select Phase the...

Page 8: ...s 3 and 4 buttons to change the values of this parameter Red Press 5 and 6 button to select Red then press MENU button to confirm the choice and press 3 and 4 button to adjust the value of the primary...

Page 9: ...ons to horizontally move the image VERTICAL POSITION It allows the changing of vertical position of the display image Press 3 and 4 buttons to vertically move the image TRANSPARENCY It allows the sett...

Page 10: ...and 4 button to choose VGA DVI or HDMI DCR Press 5 and 6 button to select DCR then press MENU button to confirm the choice and press 3 and 4 button to choose ON or OFF This item can judge the picture...

Page 11: ...e Colour Temperature 9300K 6500K 5800K User Video Compatibility Multi Standard for NTSC PAL Aspect Ratio 16 9 Speaker Multimedia Speakers Right x 1 Left x 1 2 5W Sound Demodulation Stereo Audio Mute Y...

Reviews: