background image

14

E

N

G

L

I

S

H

ViewSonic 

VP151 ViewPanel

®

Operation

ViewMeter

®


displays information regarding the current input signal coming

from the graphics card in your computer.

NOTE: 

See your graphics card user guide for more information about

changing the resolution and refresh rate.
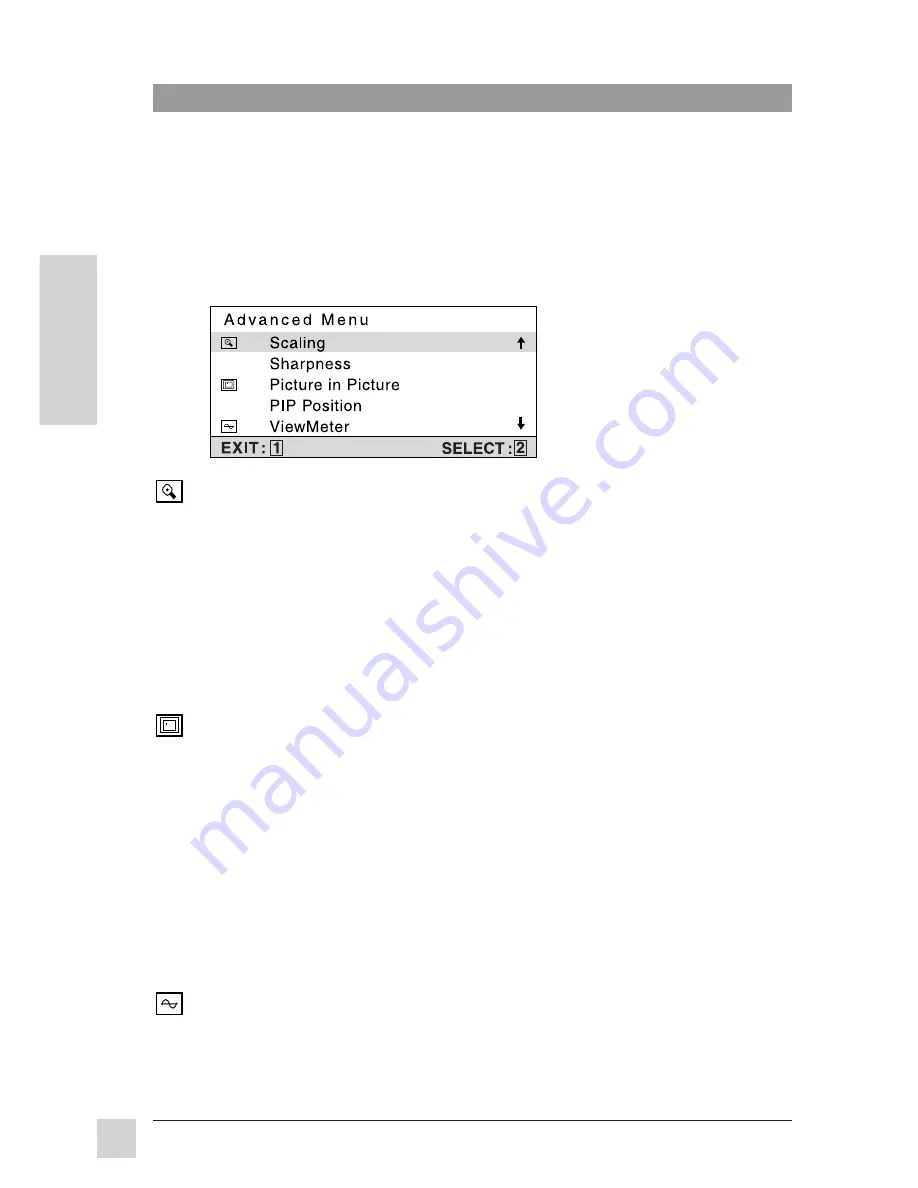
Scaling 

 adjusts the video input signal to the screen size using the following

options. Press  [

] or [

] to select from the following options:

1:1


adjusts the video signal so that the height and width of the

picture are the same.

Fill all


adjusts the video signal to fill the screen.

Fill Aspect Ratio 

maintains the correct video signal proportions

for  different  resolutions.

Sharpness

 adjusts the clarity of a non-XGA (1024 x 768) RGB signal.

Press  [

] or [

] to adjust.

Picture in Picture

 allows the user to review a composite video signal within

the primary screen image.
Press  [

] or [

] to adjust the size of the picture from the following options:

Small, Medium, or Large.

PIP Position 

allows the user to place the Picture-in-Picture window anywhere

on the screen.


Press [

] or  [

]


to select from the following options:

H. Adj 

moves the second video signal horizontally.

[

]


moves second signal to left, [

] moves second signal to right.

V. Adj 

moves the second video signal vertically.

[

] moves second signal down, [

] moves second signal up.

Bass/Treble 

adjusts the high (treble) and low (bass) frequency audio output.

Press  [

] or [

] to adjust treble.

Press [2] button to select bass adjustment.

Press  [

] or [

] to adjust bass.

Advanced Menu

To save changes and exit Main Menu, press the [1] button

Summary of Contents for ViewPanel VP151

Page 1: ...Modes User s Guide Guide de l utilisateur Bedienungsanleitung Latin American Spanish Italian Brazilian Portuguese Swedish Russian Polish Japanese Traditional Chinese Taiwan Simplified Chinese China K...

Page 2: ...al safety standards Copyright ViewSonic Corporation 1999 All right reserved Macintosh and Power Macintosh are registered trademarks of Apple Computer Inc Microsoft Windows Windows NT and the Windows l...

Page 3: ...where persons could walk on the power cord 9 If you use an extension cord with this product make sure the total ampere rating of the product s plugged into the extension cord does not exceed the ampe...

Page 4: ...ient or relocate the receiving antenna Increase the separation between the equipment and receiver Connect the equipment into an outlet on a circuit different from that to which the receiver is connect...

Page 5: ...all Mount 9 Operation Landscape Portrait Modes 10 Front Control Panel 10 OnView Main Menu 11 Other Information Specifications 16 Troubleshooting 17 Cleaning the ViewPanel 18 Limited Warranty 19 Custom...

Page 6: ...t is dangerous to continue using theViewPanel Never remove the rear cover The display unit contains high voltage parts You may suffer electric shock if you touch these parts Always handle your ViewPan...

Page 7: ...head Small USB cable connects base to head pre attached Joins USB hubs in base and head for dual operation User will need a separate USB cable to connect to computer for dual hub operation step 3 pg...

Page 8: ...for an analog data CPU connection composite video connection VCR camera etc audio connection and a USB connection The steps for a desk installation of theVP151 are presented on pages 7 and 8 4 Connec...

Page 9: ......

Page 10: ...ower supply from the base of the ViewPanel see steps 3 and 4 page 6 and connect to the ViewPanel head see step 3 in figure below 4 USB Installation optional Remove the USB cable connecting the base to...

Page 11: ...indicating theViewPanel is ready to use To turn theViewPanel off set the power switch OFF The power light will turn red To completely power down the ViewPanel turn off the power switch on the DC Power...

Page 12: ...OTE Main menu shown below and menus on following pages are available only when connected to an analog source Digital source uses only the brightness control on ViewPanel head see page 10 for location...

Page 13: ...2 button to select H orV Position Horizontal Position moves screen image left or right moves screen image toleft moves screen image toright Press the 2 button to toggle between H or V Position Vertica...

Page 14: ...input to be active VOLUME increases the volume decreases the volume and mutes the audio BALANCE adjusts the proportion of sound coming from each speaker directs more of the sound to the first speaker...

Page 15: ...ess adjusts the clarity of a non XGA 1024 x 768 RGB signal Press or to adjust Picture in Picture allows the user to review a composite video signal within the primary screen image Press or to adjust t...

Page 16: ...l OSD position Horizontal OSD Position horizontally repositions all On Screen Display OSD screens moves OSD left moves the OSD right Vertical OSD Position vertically repositions all On Screen Display...

Page 17: ...16 E N G L I S H Other Information ViewSonic VP151 ViewPanel...

Page 18: ...to the video output port on the back of the computer If the other end of the video cable is not attached permanently to the ViewPanel tightly secure it to the ViewPanel Adjust brightness Wrong or abn...

Page 19: ...es that can scratch the screen 2 If still not clean blow on the screen and gently wipe with a soft clean lint free cloth DISCLAIMER ViewSonic does not recommend the use of any liquid cleaners on theVi...

Page 20: ...port See the back cover of this user s guide You will need to provide your monitor s serial number 2 To obtain service under warranty you will be required to provide a the original dated sales slip b...

Page 21: ...20 E N G L I S H Other Information ViewSonic VP151 ViewPanel NOTES...

Page 22: ...a only 1 800 688 6688 From outside U S and Canada 909 869 7976 From Europe 44 1293 643 900 FromAsian Pacific Rim countries 886 22 248 4072 Other Options Technical Support Questions vstech viewsonic co...

Reviews: