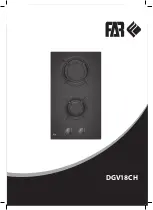
background image

Induction hob

Induktionskochfeld

Plaque à induction

Piano cottura a induzione

Placa de inducción

Inductiekookplaat

Instruction manual / Gebrauchsanleitung / Manuel d‘utilisation 

Istruzioni per l’uso / Manual de instrucciones / Handleiding

KEN001AKI

18.09.2017 • v09

MODEL

Viesta I2Z

Viesta I3Z

Viesta I4Z

[English] [Deutsch] [Français] [Italiano] [Español] [Nederlands]

  [p. 2 - 29] 

[S. 30 - 57] 

[p. 58 - 85] 

[p. 86 - 113] 

[p. 114 - 141] 

[p. 142 - 169]


Summary of Contents for Viesta I2Z

Page 1: ...ductiekookplaat Instruction manual Gebrauchsanleitung Manuel d utilisation Istruzioni per l uso Manual de instrucciones Handleiding KEN001AKI 18 09 2017 v09 MODEL Viesta I2Z Viesta I3Z Viesta I4Z English Deutsch Français Italiano Español Nederlands p 2 29 S 30 57 p 58 85 p 86 113 p 114 141 p 142 169 ...

Page 2: ...g the right cookware 11 Using your induction hob 12 Using the touch controls 12 Locking the controls 14 Using the timer 16 Cooking guidelines 19 Heat settings 20 Care and cleaning 21 Hints and tips 22 Technical specification 23 Installation 24 Before locating the fixing brackets 26 Connecting the hob to the mains power supply 27 ...

Page 3: ...d on this appliance at any time Please make this information available to the person responsible for installing the appliance as it could reduce your installation costs In order to avoid a hazard this appliance must be installed according to these instructions for installation This appliance is to be properly installed and earthed only by a suitably qualified person This appliance should be connec...

Page 4: ...cookware contact the Induction glass until the surface is cool Metallic objects such as knives forks spoons and lids should not be placed on the hob surface since they can get hot Keep children away Handles of saucepans may be hot to touch Check saucepan handles do not overhang other cooking zones that are on Keep handles out of reach of children Failure to follow this advice could result in burns...

Page 5: ...liance Children climbing on the cooktop could be seriously injured Do not leave children alone or unattended in the area where the appliance is in use Children or persons with a disability which limits their ability to use the appliance should have a responsible and competent person to instruct them in its use The instructor should be satisfied that they can use the appliance without danger to the...

Page 6: ...nded cooking on a hob with fat or oil can be dangerous and may result in fire NEVER try to extinguish a fire with water but switch off the appliance and then cover flame e g with a lid or a fire blanket WARNING Danger of fire do not store items on the cooking surfaces WARNING If the surface is cracked switch off the appliance to avoid the possibility of electric shock for hob surfaces of glass cer...

Page 7: ...nstallation please read the installation section Read all the safety instructions carefully before use and keep this Instruction Installation Manual for future reference Product overview Viesta I4Z Top view 1 2000 W zone Ø 180mm 2 1500 W zone Ø 180mm 3 2000 W zone Ø 180mm 4 1500 W zone Ø 180mm 5 Glass plate 6 Control panel Control panel 1 Heating zone selection controls 2 Power Timer regulating ke...

Page 8: ...rview Viesta I3Z Top view 1 2000 W zone Ø 180mm 2 1500 W zone Ø 180mm 3 2000 W zone Ø 280mm 4 Glass plate 5 Control panel Control panel 1 Heating zone selection controls 2 Power Timer regulating key 3 keylock control 4 ON OFF control 5 Timer control ...

Page 9: ...rview Viesta I2Z Top view 1 2000 W zone Ø 180mm 2 1500 W zone Ø 180mm 3 Glass plate 4 ON OFF control 5 Control panel Control panel 1 ON OFF control 2 Power Timer regulating controls 3 Heating zone selection controls 4 Timer control 5 keylock control ...

Page 10: ...lass plate induction coil induced currents Before using your new induction hob Read this guide taking special note of the Safety Warnings section Remove any protective film that may still be on your Induction hob Using the touch controls The controls respond to touch so you don t need to apply any pressure Use the ball of your finger not its tip You will hear a beep each time a touch is registered...

Page 11: ... cooking zone Always lift pans off the Induction hob do not slide or they may scratch the glass Only use cookware with a base suitable for induction cooking Look for the induction symbol on the packaging or on the bottom of the pan You can check whether your cookware is suitable by carrying out a magnet test Move a magnet towards the base of the pan If it is attracted the pan is suitable for induc...

Page 12: ...re the bottom of the pan and the surface Of the cooking zone are clean and dry 3 Touching the heating zone selection control and the indicator next to the key will flash 3 Touching the heating zone selection control and the indicator next to the key will flash 4 Select a heat setting by touching the or control If you don t choose a heat setting within 1 minute the Induction hob will automatically ...

Page 13: ...disappear when the surface has cooled down to a safe temperature It can also be used as an energy saving function if you want to heat further pans use the hotplate that is still hot If the display flashes alternately with the heat setting This means that you have not placed a pan on the correct cooking zone or the pan you re using is not suitable for induction cooking or the pan is too small or no...

Page 14: ... To lock the controls Touch the keylock control The timer indicator will show Lo To unlock the controls 1 Make sure the Induction hob is turned on 2 Touch and hold the keylock control for a while 3 You can now start using your Induction hob When the hob is in the lock mode all the controls are disable except the ON OFF you can always turn the induction hob off with the ON OFF control in an emergen...

Page 15: ... to standby in 1 minute The fan will keep cooking down the induction hob for a further 1 minute People with a heart pace maker should consult with their doctor before using this unit Auto shutdown protection Auto shut down is a safety protection function for your induction hob It shut down automatically if ever you forget to turn off your cooking The default working times for various power levels ...

Page 16: ...utes If you are not selecting any cooking zone 1 Make sure the cooktop is turned on Note you can use the minute minder even if you re not selecting any cooking zone 2 Touch timer control The minder indicator will start flashing and 00 will show in the timer display 3 Set the time by touching the or control of the timer Hint Touch the or control of the timer once to decrease or increase by 1 minute...

Page 17: ...0 will show in the timer display 3 Set the time by touching the or control of the timer Hint Touch the or control of the timer once will decrease or increase by 1 minute Touch and hold the or control of the timer will decrease or increase by 10 minutes 5 When the time is set it will begin to count down immediately The display will show the remaining time and the timer indicator will flash for 5 se...

Page 18: ...t down immediately The display will show the remaining time and the timer indicator flash for 5 seconds NOTE The red dot next to power level indicator will illuminate indicating that zone is selected 6 When cooking timer expires the corresponding cooking zone will be switch off automatically Other cooking zone will keep operating if they are turned on previously ...

Page 19: ... oil Drizzle a small amount of oil into the hot pan and then lower the meat onto the hot pan 4 Turn the steak only once during cooking The exact cooking time will depend on the thickness of the steak and how cooked you want it Times may vary from about 2 8 minutes per side Press the steak to gauge how cooked it is the firmer it feels the more well done it will be 5 Leave the steak to rest on a war...

Page 20: ...t you are cooking Experiment with the induction hob to find the settings that best suit you Heat setting Suitability 1 2 delicate warming for small amounts of food melting chocolate butter and foods that burn quickly gentle simmering slow warming 3 4 reheating rapid simmering cooking rice 5 6 pancakes 7 8 sauteing cooking pasta 9 stir frying searing bringing soup to the boil boiling water ...

Page 21: ...on glass cooktops but beware of hot cooking zone surfaces 1 Switch the power to the cooktop off at the wall 2 Hold the blade or utensil at a 30 angle and scrape the soiling or spill to a cool area of the cooktop 3 Clean the soiling or spill up with a dish cloth or paper towel 4 Follow steps 2 to 4 for Everyday soiling on glass above Remove stains left by melts and sugary food or spillovers as soon...

Page 22: ... does not indicate a fault The induction hob makes a low humming noise when used on a high heat setting This is caused by the technology of induction cooking This is normal but the noise should quieten down or disappear completely when you decrease the heat setting Fan noise coming from the induction hob A cooling fan built into your induction hob has come on to prevent the electronics from overhe...

Page 23: ...bnormality comes up the induction hob will enter the protective state automatically and display corresponding protective codes The above are the judgment and inspection of common failures Please do not disassemble the unit by yourself to avoid any dangers and damages to the induction hob Cooking Hob Viesta I4Z Viesta I3Z Viesta I2Z Cooking Zones 4 Zones 3 Zones 2 Zones Supply Voltage 220 240V 50 6...

Page 24: ... surface material to avoid larger deformation caused by the heat radiation from the hotplate As shown below Under any circumstances make sure the induction cooker hob is well ventilated and the air inlet and outlet are not blocked Ensure the Induction cooker hob is in good work state As shown below Model L mm W mm H mm D mm A mm B mm X mm Viesta I4Z Viesta I3Z 590 520 62 58 560 490 50 mini Viesta ...

Page 25: ... is incorporated in the permanent wiring mounted and positioned to comply with the local wiring rules and regulations The isolating switch must be of an approved type and provide a 3 mm air gap contact separation in all poles or in all active phase conductors if the local wiring rules allow for this variation of the requirements the isolating switch will be easily accessible to the customer with t...

Page 26: ...r is installed below the base of the hob the isolating switch is easily accessible by the customer Before locating the fixing brackets The unit should be placed on a stable smooth surface use the packaging Do not apply force onto the controls protruding from the hob Adjusting the bracket position Fix the hob on the work surface by screw four brackets on the bottom of hob see picture after installa...

Page 27: ...onnecting the hob to the mains power supply Installation This hob must be connected to the mains power supply only by a suitably qualified person Before connecting the hob to the mains power supply check that 1 the domestic wiring system is suitable for the power drawn by the hob 2 the voltage corresponds to the value given in the rating plate 3 the power supply cable sections can withstand the lo...

Page 28: ...o the mains an omnipolar circuit breaker must be installed with a minimum opening of 3mm between contacts The installer must ensure that the correct electrical connection has been made and that it is compliant with safety regulations The cable must not be bent or compressed The cable must be checked regularly and replaced by authorised technicians only Installation L N L N L L N b la c k b r o w n...

Page 29: ...ist waste disposal For further information regarding the treatment recover and recycling of this product please contact your local council your household waste disposal service or the shop where you purchased it For more detailed information about treatment recovery and recycling of this product please contact your local city office your household waste disposal service or the shop where you purch...

Page 30: ...l des richtigen Kochgeschirrs 39 Gebrauch Ihres Induktionskochfelds 40 Touch Bedienfeld Anleitung 40 Tastensperre 42 Verwendung der Zeitschaltuhr 44 Richtlinien zum Kochen 47 Temperatureinstellungen 48 Reinigung und Pflege 49 Hinweise und Tipps 50 Technische Daten 51 Einbau 52 Vor dem Positionieren der Halterungen 54 Anschließen des Kochfelds an die Stromversorgung 55 ...

Page 31: ...ien oder Produkte abgelegt werden Bitte stellen Sie diese Informationen der für den Einbau des Geräts verantwortlichen Person zur Verfügung Sie können dadurch die Installationskosten senken Zur Vermeidung von Gefahren muss das Gerät entsprechend dieser Einbau anleitung installiert werden Dieses Gerät darf nur von einer ausreichend qualifizierten Person angeschlossen und geerdet werden Dieses Gerät...

Page 32: ... Kontakt kommen wenn die Oberfläche abgekühlt ist Gegenstände aus Metall wie Messer Gabeln Löffel und Deckel dürfen nicht auf das Kochfeld gelegt werden da sie heiß werden können Halten Sie Kinder fern Die Griffe von Kochtöpfen könnten zu heiß zum Berühren sein Überprüfen Sie die Griffe der Kochtöpfe und lassen Sie sie nicht über andere eingeschaltete Kochzonen ragen Halten Sie die Griffe außerhal...

Page 33: ...r auf das Kochfeld klettern können sie sich schwer verletzen Lassen Sie Kinder nicht alleine oder unbeaufsichtigt in dem Bereich wo das Gerät in Gebrauch ist Kinder oder Personen mit einer Behinderung die ihre Fähigkeit zur Benutzung des Geräts einschränkt müssen von einer verantwortlichen und kompetenten Person in seiner Anwendung geschult werden Die anleitende Person muss davon überzeugt sein da...

Page 34: ...nn gefährlich sein und zu einem Brand führen Versuchen Sie NIEMALS einen Brand mit Wasser zu löschen Schalten Sie das Gerät aus und decken Sie die Flammen z B mit einem Deckel oder einer Löschdecke ab WARNUNG Brandgefahr Lagern Sie keine Gegenstände auf den Kochflächen WARNUNG Wenn die Oberfläche gerissen ist schalten Sie das Gerät aus Es besteht Stromschlaggefahr denn die Oberflächen von Kochfeld...

Page 35: ...tallation bitte den Abschnitt Einbau Lesen Sie alle Gefahrenhinweise vor der Anwendung sorgfältig durch und bewahren Sie diese Bedienungs Einbauan leitung zum späteren Nachschlagen auf Produktinformation Viesta I4Z Draufsicht 1 2000 W Zone Ø 180mm 2 1500 W Zone Ø 180mm 3 2000 W Zone Ø 180mm 4 1500 W Zone Ø 180mm 5 Glasplatte 6 Bedienfeld Bedienfeld 1 Kochfeld Auswahlregler 2 Temperatur oder Zeitsc...

Page 36: ...ormation Viesta I3Z Draufsicht 1 2000 W Zone Ø 180mm 2 1500 W Zone Ø 180mm 3 2000 W Zone Ø 280mm 4 Glasplatte 5 Bedienfeld Bedienfeld 1 Kochfeld Auswahlregler 2 Temperatur oder Zeitschaltuhrsteuerung 3 Tastensperre 4 Ein Ausschalter 5 Zeitsteuerung ...

Page 37: ...nformation Viesta I2Z Draufsicht 1 2000 W Zone Ø 180mm 2 1500 W Zone Ø 180mm 3 Glasplatte 4 Ein Ausschalter 5 Bedienfeld Bedienfeld 1 Ein Ausschalter 2 Temperatur oder Zeitschaltuhrsteuerung 3 Kochfeld Auswahlregler 4 Zeitsteuerung 5 Tastensperre ...

Page 38: ...res neuen Induktionskochfeldes Lesen Sie diese Anleitung und beachten Sie besonders den Abschnitt Gefahrenhinweise Entfernen Sie die eventuell noch auf Ihrem Kochfeld vorhandene Schutzfolie vollständig Bedienung der Tasten Die Tasten reagieren auf Berührung daher müssen Sie keinen Druck ausüben Verwenden Sie Ihre Fingerkuppe nicht die Fingerspitze Jedes Mal wenn eine Berührung registriert wird hör...

Page 39: ...Zentrieren Sie immer Ihre Pfanne auf der Kochzone Heben Sie Töpfe immer vom Kochfeld ab durch Schieben kann das Glas zerkratzen Verwenden Sie nur Kochgeschirr nur mit einem für Induktionskochen geeigneten Boden Suchen Sie nach dem Induktions symbol auf der Verpackung oder auf dem Boden der Pfanne Sie können überprüfen ob Ihr Kochgeschirr Induktionsgeschirr ist indem sie ein Magnet Test machen Bewe...

Page 40: ...topf auf die Kochzone die Sie verwenden möchten Vergewissern Sie sich dass der Boden des Kochtopfs und die Kochzone sauber und trocken sind 3 Beim Berühren der Taste der Heizzone blinkt die Anzeige neben der Taste 4 Wählen Sie durch Berühren von oder eine Temperatureinstellung aus Wenn Sie nicht innerhalb von 1 Minute eine Heizzone auswählen schaltet sich das Induktionskochfeld automatisch ab Sie ...

Page 41: ...n sich die Oberfläche auf eine sichere Temperatur abgekühlt hat Das kann auch als Energiesparfunktion verwendet werden Wenn Sie weitere Kochtöpfe erhitzen möchten verwenden Sie das Kochfeld das immer noch heiß ist Wenn die Anzeige im Wechsel mit der Wärmeeinstellung blinkt Das bedeutet Sie haben den Topf nicht auf die richtige Kochzone gestellt oder Der Topf den Sie benutzen ist nicht für das Indu...

Page 42: ...Taste für die Tastensperre Die Zeitschaltuhranzeige zeigt Lo an Zum Entsperren der Tasten 1 Stellen Sie sicher dass das Kochfeld eingeschaltet ist 2 Berühren und halten Sie die Taste für die Tastensperre einen Moment 3 Nun können Sie Ihr Kochfeld benutzen Wenn das Kochfeld gesperrt ist ist nur noch die Ein Ausschalttaste aktiv Im Notfall können Sie das Kochfeld jederzeit mit der Ein Ausschalttaste...

Page 43: ... nach einer Minute automatisch auf Stand by Der Lüfter wird noch eine weitere Minute weiter laufen Menschen mit einem Herzschrittmacher sollten Arzt konsultieren bevor Sie mit diesem Gerät arbeiten Automatisches Abschalten Eine andere Sicherheitsfunktion des Induktionskochfelds ist das automatische Abschalten Das geschieht wenn Sie vergessen eine Kochzone auszuschalten Die voreingestellten Abschal...

Page 44: ...uten einstellen Wenn Sie keine Kochzone auswählen 1 Stellen Sie sicher dass das Kochfeldfeld eingeschaltet ist Hinweis Sie können den Kurzzeitmesser auch verwenden wenn Sie keine Kochzone ausgewählt haben 2 Tippen Sie auf Zeitsteuerung die Minutenanzeige beginnt zu blinken und 00 wird in der Timer Anzeige angezeigt 3 Stellen Sie die Zeit indem Sie die oder Taste des Timers drücken Hinweis Berühren...

Page 45: ...Berühren der Zeitschaltuhrtaste ein Hinweis Berühren Sie die Zeitschaltuhrtaste ein Mal um die Einstellung um 1 Minute zu senken oder zu erhöhen Berühren und halten Sie die Zeitschaltuhrtaste um die Einstellung um 10 Minuten zu senken oder zu erhöhen Wenn die Einstellung über 99 Minuten hinaus geht stellt es sich automatisch wieder 0 5 Der Countdown startet sofort nachdem die Zeit eingestellt wurd...

Page 46: ...rde Auf dem Bedienfeld wird die verbleibende Zeit angezeigt und die Zeitschaltuhranzeige blinkt 5 Sekunden lang auf HINWEIS Der erleuchtete rote Punkt neben der Temperaturanzeige zeigt die ausgewählte Zone an 6 Wenn beim Kochen der Timer abgelaufen ist wird der entsprechende Kochbereich automatisch ausgeschaltet Andere Kochbereiche werden weiter in Betrieb bleiben wenn diese zuvor eingeschaltet wu...

Page 47: ...l in die heiße Pfanne und legen Sie dann das Fleisch hinein 4 Drehen Sie das Steak während des Bratens nur ein Mal um Die genaue Garzeit hängt von der Dicke des Steaks und dem gewünschten Garpunkt ab Die Zeit kann pro Seite zwischen 2 und 8 Minuten variieren Drücken Sie auf das Steak um festzustellen wie gar es ist je fester es sich anfühlt desto mehr ist es durchgegart 5 Lassen Sie das Steak vor ...

Page 48: ... Sie zubereiten Experimentieren Sie mit dem Induktionskochfeld um die für Sie am besten geeigneten Einstellungen zu finden Temperatureinstellung Eignung 1 2 sanftes Aufwärmen von geringen Speisemengen Schmelzen von Schokolade und Butter Lebensmittel die schnell anbrennen sanftes Köcheln langsames Erwärmen 3 4 Aufwärmen schnelles Köcheln Reis kochen 5 6 Pfannkuchen 7 8 Sautieren Nudeln kochen 9 Pfa...

Page 49: ...es Induktionskochfelds an der Wand aus 2 Halten Sie die Klinge oder das Utensil in einem Winkel von 30 und schaben Sie die Verschmutzung oder das Verschüttete in einen kalten Bereich des Induktionskochfelds 3 Wischen Sie die Verschmutzung oder die verschüttete Flüssigkeit mit einem Spül oder Papiertuch auf 4 Befolgen Sie die vorstehenden Schritte 2 bis 4 für Alltägliche Verschmutzungen auf dem Gla...

Page 50: ...ibrieren unterschiedlich Das ist bei Kochgeschirr normal und kein Anzeichen für einen Mangel Das Induktionskochfeld macht ein leises Brumm geräusch wenn sie auf eine hohe Kochstufe verwenden Dies wird durch die Technik des Induktionskochens verursacht Das ist normal aber der Lärm soll sich verringern oder komplett abklingen wenn Sie die Kochstufe verringern Lüftungsgeräusche aus dem Induktionskoch...

Page 51: ...eine Unregelmäßigkeit aufkommt wird das Induktionskochfeld zum Schutz automatisch in den Fehlermodus geschaltet und zeigt einen entsprechenden Code an Oben aufgeführt ist die Beurteilung und Beobachtung von gemeinsamen Ausfällen Um mögliche Gefahren und Schäden am Induktionskochfeld zu vermeiden nehmen Sie das Gerät bitte nicht selbst auseinander Kochfeld Viesta I4Z Viesta I3Z Viesta I2Z Anzahl Ko...

Page 52: ...ch die Wärmestrahlung des Induktionskochfelds nicht zu größeren Deformierungen kommt Siehe unten Stellen Sie unter allen Umständen sicher dass das Induktionskochkochfeld gut belüftet wird und Lufteinlass und auslass nicht blockiert sind Stellen Sie sicher dass sich das Induktionskochkochfeld in gutem Funktionszustand befindet Siehe unten Model L mm W mm H mm D mm A mm B mm X mm Viesta I4Z Viesta I...

Page 53: ...riften befolgen ein geeigneter Notschalter bietet eine vollständige Trennung von der Stromversorgung montiert und positioniert nach den örtlichen Regeln und Vorschriften Der Notschalter muss von einem zugelassenen Typ sein und eine 3 mm Luftspalt Kontakttrennung in allen Polen vorweisen der Trennschalter soll dem Kunden am Kochfeld leicht zugänglich sein Konsultieren Sie die örtliche Baubehörde un...

Page 54: ...Barriere unterhalb der Basis des Kochfeldes installiert der Trennschalter ist dem Kunden leicht zugänglich Vor dem Positionieren der Halterungen Das Gerät muss auf einer stabilen glatten Oberfläche platziert werden verwenden Sie die Verpackung Üben Sie auf die aus dem Induktionsfeld ragenden Tasten keine Krafteinwirkung aus Befestigen Sie das Induktionskochfeld nach der Installation durch Anschrau...

Page 55: ...ständig sein Anschließen des Kochfelds an die Stromversorgung Einbau Das Kochfeld muss an die Stromversorgung durch eine entsprechend qualifizierte Person angeschlossen werden Bevor Sie das Kochfeld an das Stromnetz anschließen überprüfen Sie 1 ob die übliche 230 Volt Stromversorgung für den Anschluss geeignet ist 2 die Spannung dem Wert in der Produktbeschreibung entspricht 3 das Stromversorgungs...

Page 56: ... mehrpoliger Trennschalter mit einem Mindestabstand von 3 mm zwischen den Kontakten eingebaut werden Der Installateur muss sicherstellen dass der elektrische Anschluss richtig vorgenommen wurde und mit den Sicherheitsvorschriften übereinstimmt Das Kabel darf weder gebogen noch zusammengedrückt werden Das Kabel muss regelmäßig geprüft werden und der Austausch darf nur durch eine ordnungsgemäß quali...

Page 57: ...muss als Sondermüll entsorgt werden Setzen Sie sich für mehr Informationen über Behandlung Aufbereitung und Recycling dieses Produkts bitte mit Ihrer Gemeinde Ihrem Abfallentsorgungs unternehmen oder dem Geschäft in dem Sie es gekauft haben in Verbindung Setzen Sie sich für mehr Informationen über Behandlung Aufbereitung und Recycling dieses Produkts bitte mit Ihrer Stadtverwaltung Ihrem Abfallent...

Page 58: ...tériel de cuisine 67 Utiliser votre plaque à induction 68 Instructions commande tactile 68 Verrouiller les commandes 70 Utiliser le minuteur 72 Directives de cuisine 75 Réglages de chaleur 76 Entretien et nettoyage 77 Tuyaux et astuces 78 Spécification technique 79 Installation 80 Avant de localiser les supports de fixation 82 Brancher la plaque de cuisson à l alimentation électrique 83 ...

Page 59: ...r un matériau ou produit combustible sur cet appareil Veuillez mettre cette information à disposition de toute personne responsable de l installation de l appareil cela pouvant réduire les coûts d installation Afin d éviter les risques cet appareil doit être installé conformément à ces instructions d installation Cet appareil doit être installé correctement et relié à la terre uniquement par une p...

Page 60: ...re plaque vitro céramique tant que la surface n est pas froide Les objets métalliques tels que les couteaux les fourchettes les cuillers et les couvercles ne doivent pas être placés sur la surface de la plaque puisqu ils peuvent chauffer Tenez les enfants à distance Les poignées des casseroles peuvent être chaudes au toucher Vérifiez les poignées des casseroles et ne les laissez pas en surplomb d ...

Page 61: ...reil Les enfants qui montent sur la plaque de cuisson peuvent se blesser gravement Ne laissez pas les enfants seuls ou sans surveillance dans la zone où l appareil fonctionne Les enfants ou personnes avec un handicap limitant leur capacité à utiliser l appareil doivent avoir une personne responsable et compétente pour leur apprendre comme l utiliser L instructeur doit être convaincu qu ils peuvent...

Page 62: ...u de l huile sur une plaque chauffante sans surveillance peut être dangereux et entraîner un feu N essayes JAMAIS d éteindre un feu avec de l eau éteignez l appareil puis couvrez la flemme par ex avec un couvercle ou une couverture antifeu Avertissement Danger de feu ne stockez pas des objets sur les surfaces de cuisson Avertissement Si la surface est fendue éteignez l appareil pour éviter le risq...

Page 63: ... veuillez lire la section d installation Lisez attentivement les instructions de sécurité avant toute utilisation et conservez ce manuel d instructions d installation pour pouvoir vous y référer dans le futur Vue d ensemble Viesta I4Z 1 2000 W zone Ø 180mm 2 1500 W zone Ø 180mm 3 2000 W zone Ø 180mm 4 1500 W zone Ø 180mm 5 Plaque de verre 6 Paneau de commande Paneau de commande 1 Contrôles de séle...

Page 64: ...a I3Z 1 2000 W zone Ø 180mm 2 1500 W zone Ø 180mm 3 2000 W zone Ø 280mm 4 Plaque de verre 5 Paneau de commande Paneau de commande 1 Contrôles de sélection de zone de chauffage 2 Power Timer 3 Contrôle de la serrure 4 Contrôle ON OFF 5 Contrôle de la minuterie ...

Page 65: ...sta I2Z 1 2000 W zone Ø 180mm 2 1500 W zone Ø 180mm 3 Plaque de verre 4 Contrôle ON OFF 5 Paneau de commande Paneau de commande 1 Contrôle ON OFF 2 Power Timer 3 Contrôles de sélection de zone de chauffage 4 Contrôle de la minuterie 5 Contrôle de la serrure ...

Page 66: ...tre nouvelle plaque à induction Lisez ce guide en faisant particulièrement attention à la section avertissements de sécurité Retirez tous les films de protection se trouvant éventuellement encore sur votre plaque de cuisson à induction Utiliser les commandes tactiles Les commandes sont tactiles vous n avez besoin d appliquer aucune pression Utilisez le plat du doigt pas le bout Vous allez entendre...

Page 67: ...ne de cuisson Utilisez uniquement des ustensiles avec un sol adapté de cuisson à induction Recherchez le symbole d induction sur l emballage ou sur le fond de la casserole Vous pouvez vérifier si votre batterie de cuisine est adaptable à l induction en faisant un test magnétique Déplacer un aimant sur le fond de la casserole S il est attiré la casserole est bon pour l induction Si vous ne disposez...

Page 68: ...uisson que vous voulez utiliser Assurez vous que le fond de la casserole et la surface de la zone de cuisson soient propres et secs 3 Toucher la commande de sélection de zone de chauffage et le voyant à côté de la touche clignote 4 Sélectionnez un chauffage avec la commande ou Si vous ne choisissez pas une zone de chauffage en 1 minute la plaque de cuisson à plaque à induction s éteindra automatiq...

Page 69: ...ra refroidi à une température sans danger Cela peut également être utilisé comme une fonction pour économiser de l énergie si vous voulez chauffer d autres casseroles utilisez la plaque encore chaude Si l affichage clignote en alternance avec le réglage de chaleur Cela signifie que Vous n avez pas placé la casserole sur la zone de cuisson choisi ou la casserole que vous utilisez ne convient pas à ...

Page 70: ...ur de minuteur affichera Lo Pour déverrouiller les commandes 1 Assurez vous que la plaque de cuisson à induction soit allumée 2 Restez appuyez sur la commande de verrouillage quelques instants 3 Vous pouvez maintenant commencer à utiliser votre plaque de cuisson à induction Quand la plaque est en mode verrouillé toutes les commandes sont désactivées sauf ON OFF Vous pouvez toujours éteindre la pla...

Page 71: ...uisson la zone de cuisson automatiquement va en mode veille en 1 minute Le ventilateur reste allumé pendant une autre minute Les personnes ayant un stimulateur cardiaque devraient consulter leur médecin avant d utiliser cet appareil Arrêt automatique Une autre fonction de sécurité de la plaque de cuisson est l arrêt automatique Il se produit quand vous oubliez d éteindre une zone de cuisson Les dé...

Page 72: ...99 minutes Si vous ne sélectionnez aucune zone de cuisson 1 Assurez vous que la plaque de cuisine est allumée Note vous pouvez utiliser le bip minute même si vous ne sélectionnez aucune zone de cuisson 2 Touchez le control de minuterie l indicateur des minutes se met à clignoter et 00 va montrer dans l affichage de la minuterie 3 Réglez l heure en touchant le boutton ou du minuteur Astuce Appuyez ...

Page 73: ...r 3 Réglez le temps en touchant la commande ou du minuteur Astuce Touchez la commande ou du minuteur une fois pour augmenter ou diminuer d une minute Restez appuyé sur la commande ou du minuteur pour diminuer ou augmenter de 10 minutes Si le réglage excède 99 minutes le minuteur retournera automatiquement à 0 minute 5 Quand le temps est réglé le compte à rebours commencera immédiatement L affichag...

Page 74: ...ment L affichage montrera le temps restant et l indicateur de minuteur clignotera 5 secondes REMARQUE Le point rouge près de l indicateur de niveau de puissance s éclairera indiquant que la zone est sélectionnée 6 Lorsque la minuterie de cuisine expire la zone de cuisson sera arrêtée automatiquement Les autres zones de cuisson continuent à fonctionner si elles ont été activées auparavant ...

Page 75: ...au sur les deux côtés du steak Versez une petite quantité d huile dans le poêle chaud puis posez y la viande 4 Tournez le steak une fois seulement pendant la cuisson Le temps de cuisson approprié dépendra de l épaisseur du steak et de la cuisson que vous voulez Les temps peuvent varier de 2 à 8 minutes par côté Appuyez sur le steak pour estimer sa cuisson plus il est ferme plus il sera à point 5 L...

Page 76: ...our de petites quantités de nourriture faire fondre du chocolat du beurre et des aliments brûlant vite faire mijoter doucement réchauffer doucement 3 4 réchauffer faire mijoter rapidement cuire du riz 5 6 pancakes 7 8 faire revenir cuire des pâtes 9 faire des sautés griller faire bouillir de la soupe faire bouillir de l eau ...

Page 77: ...aques de cuisson à induction mais faites attention aux surfaces des zones de cuisson chaudes 1 Coupez l alimentation de la plaque de cuisson sur le mur 2 Tenez la lame ou ustensile à un angle de 30º et grattez les tâches ou les souillures d une zone froide de la plaque de cuisson 3 Nettoyez les tâches ou salissures avec un chiffon ou une serviette en papier 4 Suivez les étapes 2 à 4 pour les tâche...

Page 78: ...différemment C est une chose normal pour les instruments de cuisine et n indique pas un défaut La table de cuisson à induction fait un bruit de bourdonnement faible si on utilise un réglage de température élevé Cela est causé par la technologie de cuisson par induction C est normal mais le bruit devrait être réduit ou disparaît complète ment si vous réduisez le réglage de températur Bruit de la ve...

Page 79: ...r et inspection Si une irrégularité survient la table à induction passe automatiquement dans le mode d erreur et affiche un code correspondant pour protéger l appareil Mentionné ci dessus est l évaluation et le suivi des pannes communs Pour éviter les risques potentiels et les dommages à la table de cuisson à induction ne démontez pas l appareil Modèle Viesta I4Z Viesta I3Z Viesta I2Z Zone de cuis...

Page 80: ...afin d éviter toute déformation due aux rayonnements de chaleur de la plaque de cuisson chaude Comme montré ci dessous Assurez vous à tout moment que la plaque de cuisson à induction soit bien ventilée et que l admission et l évacuation d air ne soient pas bloqués Assurez vous que la plaque de cuisson à induction soit en bon état Comme montré ci dessous Modèle L mm W mm H mm D mm A mm B mm X mm Vi...

Page 81: ...d arret d urgence assure une séparation complète de l alimentation électrique monté et positionné conformément aux réglementations locales Le bouton d arret d urgence doit être d un type agréé et avoir un espace d air de 3 mm de séparation de contact sur tous les pôles le disjoncteur doit être facile d accès pour le client En cas de doute consultez les autorités locales et la réglementation munici...

Page 82: ...iroir ou une armoire une protection thermique est installé au dessous de la base de la table de cuisson Avant de localiser les supports de fixation Cette unité doit être placée sur une surface stable et lisse utilisez l emballage Ne pas appliquer de coup sur les commandes dépassant de la plaque de cuisson Fixez la plaque de cuisson sur la surface de travail en vissant 4 supports sur le dos de la p...

Page 83: ...vent être résistants à la chaleur Brancher la plaque de cuisson à l alimentation électrique Installation La table de cuisson doit être connectée à l alimentation électrique par une personne qualifiée Avant de raccorder la table de cuisson au réseau vérifiez 1 Une alimentation de 230 volts est adaptée pour la connexion 2 La tension correspond à la valeur dans la description du produit 3 Le câble d ...

Page 84: ...électrique principale un disjoncteur omnipolaire doit être installé avec un interstice minimum de 3 mm entre les contacts L installeur doit s assurer que le bon branchement électrique a été fait et qu il respecte les règlements de sécurité Le câble ne doit pas être plié ou compressé Le câble doit être vérifié régulièrement et doit être remplacé par une personne qualifiée seulement Installation L N...

Page 85: ...plus d informations concernant le traitement la récupération et le recyclage de ce produit veuillez contacter votre conseil local votre service de collecte de déchets domestiques ou le magasin où vous l avez acheté Pour plus d informations concernant le traitement la récupération et le recyclage de ce produit veuillez contacter votre bureau local votre service de collecte de déchets domestiques ou...

Page 86: ...Utilizzo del suo piano cottura a induzione 96 Istruzioni per l uso comandi touch screen 96 Blocco tasti 99 Utilizzo del timer 100 Linee guida per la cottura 103 Regolazione della temperatura 104 Pulizia e manutenzione 105 Avvertenze e suggerimenti 106 Dati tecnici 107 Montaggio 108 Prima del posizionamento dei supporti 110 Allacciamento del piano cottura all alimentazione elettrica 111 ...

Page 87: ...to apparecchio Si prega di fornire tali informazioni alla persona incaricata dell installazione dell apparecchio questo potrebbe ridurre i costi di installazione L installazione dell apparecchio deve avvenire secondo le istruzioni qui fornite per evitare possibili pericoli L allaccio e il collegamento dell apparecchio all impianto di terra devono essere eseguiti soltanto da personale sufficienteme...

Page 88: ...ramica soltanto una volta che la superficie si è raffreddata fatta eccezione per le apposite stoviglie Gli oggetti in metallo come coltelli forchette cucchiai e coperchi non devono essere appoggiati sul piano cottura in quanto possono diventare bollenti Tenere i bambini lontani Le maniglie delle pentole potrebbero essere bollenti al tatto Verificare che le maniglie delle pentole non sporgano su al...

Page 89: ...ressanti per i bambini I bambini potrebbero riportare gravi ferite nel tentativo di arrampicarsi sul piano cottura Non lasciare i bambini da soli o non sorvegliati nell area in cui si trova l apparecchio in funzione I bambini o le persone con una disabilità che limita la loro capacità di utilizzare l apparecchio devono essere istruite sul suo utilizzo da una persona competente Chi si occupa di ist...

Page 90: ...endio Non tentare MAI di spegnere un incendio con l acqua Spegnere l apparecchio e coprire le fiamme ad es con un coperchio o una coperta antifiamma ATTENZIONE Pericolo di incendio Non depositare nessun oggetto sulla superficie dei fuochi ATTENZIONE Qualora la superficie fosse danneggiata spengnere l apparecchio Le superfici dei piani cottura in vetroceramica o in materiali simili contengono parti...

Page 91: ...allazione si rimanda al paragrafo Installazione Si prega di leggere attentamente le indicazioni di pericolo prima dell utilizzo e di conservare le presenti istruzioni per l utilizzo successivo Informazioni sul prodotto Viesta I4Z Vista dall alto 1 Fuoco 2000 W Ø 180mm 2 Fuoco 1500 W Ø 180mm 3 Fuoco 2000 W Ø 180mm 4 Fuoco 1500 W Ø 180mm 5 Lastra in vetro 6 Comandi Comandi 1 Tasto di selezione del f...

Page 92: ...o Viesta I3Z Vista dall alto 1 Fuoco 2000 W Ø 180mm 2 Fuoco 1500 W Ø 180mm 3 Fuoco 2000 W Ø 280mm 4 Lastra in vetro 5 Comandi Comandi 1 Tasto di selezione del fuoco desiderato 2 Regolazione temperatura o timer 3 Blocco tasti 4 Accensione Spegnimento 5 Contaminuti ...

Page 93: ... Viesta I2Z Vista dall alto 1 Fuoco 2000 W Ø 180mm 2 Fuoco 1500 W Ø 180mm 3 Lastra in vetro 4 Accensione Spegnimento 5 Comandi Comandi 1 Accensione Spegnimento 2 Regolazione temperatura o timer 3 Tasto di selezione del fuoco desiderato 4 Contaminuti 5 Blocco tasti ...

Page 94: ... è necessario esercitare nessuna pressione Utilizzare i polpastrelli non la punta delle dita Ogni volta che viene rilevato un contatto sentirà un bip Si assicuri che i pulsanti siano sempre puliti e asciutti e che non siano coperti da un oggetto ad es uno strofinaccio o un elettrodomestico Anche un sottilissimo strato d acqua può creare malfunzionamenti nell utilizzo dei tasti La cottura a induzio...

Page 95: ...ll acqua nella padella da verificare 2 Se la spia non lampeggia e l acqua si riscalda significa che la padella è adatta Non utilizzare pentole realizzate nei seguenti materiali acciaio inox alluminio o rame senza fondo magnetico vetro legno porcellana ceramica e terracotta Assicurarsi che il fondo della pentola sia liscio che poggi bene sul vetro e che sia delle stesse dimensioni del fuoco selezio...

Page 96: ...oco una pentola adeguata che si desidera utilizzare Accertarsi che il fondo della pentola e il fuoco siano puliti e asciutti 3 Toccando il tasto relativo al fuoco desiderato l indicatore vicino al tasto lampeggia 4 Utilizzare i pulsanti e per regolare la temperatura Se non si seleziona un fuoco entro 1 minuto il piano cottura a induzione si spegne automaticamente In questo caso bisogna ricominciar...

Page 97: ...uando la superficie ha raggiunto una temperatura sicura È utilizzabile anche come funzione di risparmio energetico Se si desidera riscaldare altre pentole utilizzare il fuoco ancora bollente Se la spia lampeggia alternandosi alla regolazione della temperatura Significa che la pentola non è posizionata sul fuoco giusto oppure la pentola che sta utilizzando non è adatta per la cottura sul piano a in...

Page 98: ...e il tasto per bloccare i tasti sull indicatore del timer compare il testo Lo Sbloccare i tasti 1 Assicurarsi che il piano cottura sia acceso 2 Tenere premuto un momento il tasto per il blocco bambini 3 Ora è possibile utilizzare il piano cottura Quando il blocco è attivo soltanto il tasto di on off funziona Se necessario è possibile in qualunque momento spegnere il piano cottura con il tasto di o...

Page 99: ... questo entra automaticamente in modalità stand by dopo un minuto La ventola continuerà a funzionare ancora un minuto Le persone che portano un pacemaker devono consultare il medico prima di utilizzare l apparecchio Spegnimento automatico Un altra funzione di sicurezza del piano a induzione è lo spegnimento automatico Questo accade quando ci si dimentica di spegnere un fuoco I tempi di spegnimento...

Page 100: ... Nessun fuoco selezionato 1 Assicurarsi che il piano cottura sia acceso Nota Il contaminuti può essere utilizzato anche se non è stato selezionato nessun fuoco 2 Premere sul tasto di regolazione del timer l indicatore dei minuti inizia a lampeggiare e compare 00 3 Impostare il timer attraverso i tasti oppure Nota Toccare brevemente i tasti oppure per ridurre o aumentare la durata preimpostata di 1...

Page 101: ...mer toccando il tasto timer Nota Toccare il tasto timer una volta per ridurre o aumentare la durata di 1 minuto Tenere premuto il tasto timer per ridurre o aumentare la durata preimpostata di 10 minuti Se si supera la durata di 99 minuti il timer torna automaticamente a 0 5 Il conto alla rovescia inizia subito dopo aver impostato la durata Sul display viene mostrato il tempo rimanente e la spia de...

Page 102: ...to la durata Sul display viene mostrato il tempo rimanente e la spia del timer lampeggia per 5 secondi NOTA Il puntino rosso illuminato accanto all indicatore della temperatura indica il fuoco selezionato 6 Durante la cottura allo scadere del timer l area corrispondente si spegne automaticamente Gli altri fuochi restano in funzione se erano stati precedentemente azionati ...

Page 103: ...della bistecca con olio Versare un piccolo quantitativo di olio nella padella bollente e adagiare quindi la carne al suo interno 4 Girare la bistecca soltanto una volta durante la cottura I tempi di cottura dipendono dallo spessore della bistecca e dal tipo di cottura desiderato I tempi di cottura variano dai 2 agli 8 minuti per lato Premere sulla bistecca per verificarne il grado di cottura quant...

Page 104: ...itativi preparati Fare delle prove con il piano a induzione per trovare le impostazioni giuste Regolazione della temperatura Uso 1 2 riscaldare leggermente piccoli quantitativi sciogliere cioccolata e burro alimenti che si bruciano rapidamente bollire leggermente riscaldare lentamente 3 4 riscaldare bollire rapidamente cuocere il riso 5 6 crêpes 7 8 saltare in padella cuocere la pasta 9 cottura in...

Page 105: ...peratura 1 staccare l alimentazione del piano a induzione tramite l interruttore a parete 2 Tenere la lama o l utensile utilizzato formando un angolo di 30 e spingere lo sporco o il liquido traboccato verso un area fredda del piano a induzione 3 Raccogliere lo sporco o il liquido traboccato con un panno o con della carta da cucina 4 Seguire quindi i passi 2 4 riportati sopra alla voce Sporco quoti...

Page 106: ...e pentole e non rappresenta un difetto Il piano cottura a induzione emette un leggero ronzio quando si seleziona una temperatura elevata Questo è causato dalla tecnologia che permette il funzionamento del piano a induzione Questo è normale ma il rumore dovrebbe diminuire o scomparire del tutto riducendo la temperatura Si sente il rumore di una ventola provenire dal piano a induzione Una ventola di...

Page 107: ...ttings Ispezione e indicazione di guasto Quando si verifica un anomalia il piano a induzione entra automaticamente in modalità errore e riporta il codice corrispondente Sopra vengono valutati e analizzati guasti comuni Per prevenire possibili pericoli e guasti al piano a induzione si prega di non smontare l apparecchio da soli Piano cottura Viesta I4Z Viesta I3Z Viesta I2Z Numero di fuochi 4 fuoch...

Page 108: ...ente al calore così da prevenire che le radiazioni termiche del piano a induzione causino deformazioni considerevoli Si veda sotto Assicurarsi in ogni caso che il piano cottura a induzione sia ben ventilato e che l ingresso e l uscita dell aria non siano bloccati Assicurarsi che il piano cottura a induzione funzioni bene Si veda sotto Modello L mm W mm H mm D mm A mm B mm X mm Viesta I4Z Viesta I3...

Page 109: ...icabili durante l installazione sia garantita la completa interruzione dell alimentazione tramite un interruttore di emergenza adeguato installato e posizionato secondo le norme e le disposizioni locali Venga utilizzato un interruttore di emergenza omologato con separazione dei contatti di 3mm in ciascun polo l interruttore sia facilmente accessibile al cliente dal piano cottura Consultare le auto...

Page 110: ... si installi il piano cottura al di sopra di un cassetto o di un armadietto l interruttore sia facilmente accessibile dal cliente Prima del posizionamento dei supporti L apparecchio deve essere posizionato su una superficie stabile e liscia utilizzare l imballaggio Non fare forza sui tasti che spuntano dal piano a induzione Dopo l installazione fissare il piano a induzione avvitando nel piano di l...

Page 111: ...alore Allacciamento del piano cottura all alimentazione elettrica Montaggio L allacciamento del piano cottura all alimentazione elettrica deve avvenire per mezzo di una persona qualificata Prima di collegare il piano cottura alla rete verificare che 1 la normale alimentazione a 230 V sia indicata per l allaccio 2 la tensione effettiva corrisponda al valore riportato nella descrizione del prodotto ...

Page 112: ...rrente di rete è necessario installare un sezionatore multipolo con una distanza minima di 3 mm tra i contatti Il tecnico incaricato dell installazione deve verificare che l allaccio elettrico sia stato realizzato correttamente e nel rispetto delle disposizioni di sicurezza Il cavo non deve essere né piegato né schiacciato Il cavo deve venire verificato regolarmente e sostituito soltanto da una pe...

Page 113: ...ere smaltito come rifiuto speciale Per ulteriori informazioni sul trattamento la separazione e il riciclaggio di questo prodotto contattare il comune la società che si occupa della gestione dei rifiuti locali o il negozio in cui è stato acquistato Contattare il comune l amministrazione comunale la società che si occupa della gestione dei rifiuti nella sua zona o il negozio in cui è stato acquistat...

Page 114: ...correcta 123 Cómo utilizar su placa de cocina de inducció 124 Instrucciones del panel de control táctil 124 Bloqueo de botones 126 Cómo utilizar el temporizador 128 Guía para cocinar 131 Ajustes de temperatura 132 Limpieza y cuidados 133 Advertencias y consejos 134 Características técnicas 135 Montaje 136 Antes de colocar los soportes 138 Conectar la placa de cocina al suministro eléctrico 139 ...

Page 115: ...este aparato Nunca coloque materiales o productos inflamables sobre el aparato Remita esta información a la persona encargada de montar el aparato De este modo reducirá los costes de instalación Instale el aparato siguiendo las indicaciones de este manual de instrucciones para evitar riesgos El aparato deberá ser conectado y puesto a tierra exclusivamente por una persona suficientemente cualificad...

Page 116: ...n contacto con la vitrocerámica una vez que la superficie se haya enfriado No coloque objetos metálicos como cuchillos tenedores cucharas y tapaderas sobre la placa de cocina ya que estos pueden calentarse Mantenga a los niños alejados del aparato Las asas de las ollas podrían calentarse hasta tal punto que no sería posible tocarlas Compruebe los mangos de las ollas y no deje que sobresalgan sobre...

Page 117: ...nte heridos si se suben encima de la placa No deje a los niños solos o sin vigilancia en la zona en la que se esté utilizando el aparato Los niños y personas con alguna discapacidad cuya facultad para utilizar el aparato esté limitada deberán ser instruidos por parte del personal responsable y competente sobre cómo emplear la placa El encargado de la formación deberá asegurarse de que estas person...

Page 118: ...so y podría ocasionar un incendio NUNCA intente sofocar un incendio con agua En tal caso apague el aparato y cubra la llama con por ejemplo una tapadera o una manta ignífuga ATENCIÓN Peligro de incendio No acumule objetos sobre la superficie de la placa de cocina ATENCIÓN Si detecta que la superficie está agrietada apague el aparato Existe riesgo de descarga eléctrica ya que la superficie de las p...

Page 119: ...ntamente todas las indicaciones de seguridad antes de utilizar la placa y conserve este manual de instrucciones y montaje para poder consultarlo en el futuro Información del producto Viesta I4Z Vista superior 1 Zona 2000 W Ø 180mm 2 Zona 1500 W Ø 180mm 3 Zona 2000 W Ø 180mm 4 Zona 1500 W Ø 180mm 5 Placa de vidrio 6 Panel de control Panel de control 1 Reguladores de las placas 2 Ajuste de temperatu...

Page 120: ...ista superior 1 Zona 2000 W Ø 180mm 2 Zona 1500 W Ø 180mm 3 Zona 2000 W Ø 280mm 4 Placa de vidrio 5 Panel de control Panel de control 1 Reguladores de las placas 2 Ajuste de temperatura o temporizador 3 Bloqueo de botones 4 Interruptor de encendido y apagado 5 Ajuste de tiempo ...

Page 121: ...erior 1 Zona 2000 W Ø 180mm 2 Zona 1500 W Ø 180mm 3 Placa de vidrio 4 Interruptor de encendido y apagado 5 Panel de control Panel de control 1 Interruptor de encendido y apagado 2 Ajuste de temperatura o temporizador 3 Reguladores de las placas 4 Ajuste de tiempo 5 Bloqueo de botones ...

Page 122: ...as Antes de utilizar su nueva placa de inducción Lea este manual y preste especial atención al apartado Indicaciones de seguridad Retire si es necesario la lámina de protección de la que está provista su placa Cómo utilizar los botones Los botones reaccionan al tacto por lo que no es necesario ejercer presión alguna Utilice la yema de los dedos y no la punta de los mismos Cada vez que se detecte u...

Page 123: ...zona de cocción Levante siempre la batería de cocina hacia arriba Si la desplaza por la placa esta podría arañarse Utilice exclusivamente batería de cocina con una base adecuada para la cocina de inducción Busque el símbolo de inducción en el empaquetado o en la base de la olla sartén Puede comprobar si su batería de cocina es de inducción realizando una prueba magnética Mueva un imán alrededor de...

Page 124: ...loque una olla apropiada sobre la zona de cocción que desee utilizar Cerciórese de que la base de la olla y la zona de cocción estén limpias y secas 3 Al tocar el botón de la zona calorífica parpadeará el indicador que hay junto al botón 4 Seleccione un ajuste de temperatura pulsando o Si no selecciona una zona térmica en menos de 1 minuto la placa de inducción se apagará automáticamente En tal ca...

Page 125: ...la zona térmica que quiera apagar 2 Apague la placa poniendo el indicador a 0 Asegúrese de que el indicador muestra 0 en primer lugar y luego muestra una H 3 Apague toda la placa tocando el interruptor de encendido apagado Si los indicadores parpadean alternándose con el ajuste de temperatura Esto significa Que no ha colocado la olla sobre la zona de cocción adecuada Que la batería de cocina que e...

Page 126: ...e el botón para bloquear el panel El temporizador marcará Lo Cómo desbloquear los botones 1 Asegúrese de que la placa de cocina esté encendida 2 Pulse y mantenga pulsado el botón de bloqueo durante unos instantes 3 Después podrá utilizar su placa de cocina Mientras la placa esté bloqueada solo estará activo el interruptor de encendido apagado En caso de emergencia usted puede apagar la placa en cu...

Page 127: ... otra pieza pequeña por ej cuchillo tenedor cuchara El ventilador seguirá funcionando durante un minuto más Las personas que porten un marcapasos deberán consultar con su médico antes de emplear el aparato Desconexión automática La placa de inducción dispone de otro mecanismo de seguridad la desconexión automática Esta se activa cuando a usted se le olvida apagar una zona de cocción Los tiempos de...

Page 128: ...or hasta 99 minutos Si no selecciona ninguna zona de cocción 1 Asegúrese de que la placa de cocina esté encendida Nota Puede utilizar el avisador de cocina incluso si no ha seleccionado ninguna zona de cocción 2 Toque sobre el botón de ajuste de tiempo el indicador de minutos empezará a parpadear y el indicador de tiempo mostrará 00 3 Ajuste el tiempo tocando sobre el botón o del temporizador Nota...

Page 129: ...mpo tocando el botón del temporizador Nota Toque los botones del temporizador una vez para disminuir o aumentar el tiempo en 1 minuto Toque y mantenga pulsados los botones del temporizador para disminuir o aumentar el tiempo en 10 minutos Cuando el ajuste sobrepase los 99 minutos se volverá a ajustar automáticamente a 0 5 La cuenta atrás comenzará justo después de regular el tiempo En el panel de ...

Page 130: ...En el panel de control se indicará el tiempo restante y el indicador del temporizador parpadeará durante 5 segundos NOTA El punto rojo iluminado junto al indicador de temperatura mostrará la zona seleccionada 6 Si mientras cocina el tiempo se agota la zona de cocción correspondiente se apagará automáticamente Las demás zonas de cocción que estuviesen encendidas seguirán funcionando ...

Page 131: ...ados del filete con aceite Vierta una pequeña cantidad de aceite en la sartén caliente y luego añada la carne 4 Mientras se cocina gire el filete solo una vez El tiempo de cocción exacto dependerá del grosor de la carne y del punto deseado Este tiempo podrá variar entre 2 y 8 minutos por cada lado Presione el filete para comprobar si está en el punto deseado Cuanto más duro esté más hecho estará 5...

Page 132: ...de alimentos que cocine Experimente con su placa de inducción para encontrar los ajustes más apropiados Ajustes de temperatura Objetivo 1 2 Recalentar lentamente pequeñas cantidades de comida Derretir chocolate y mantequillas alimentos que se quemen fácilmente Cocinar a fuego lento 3 4 Calentar Cocinar a fuego rápido Cocer arroz 5 6 Hacer crepes 7 8 Saltear Cocer pasta 9 Cocinar salteados Freír Ll...

Page 133: ...ga cuidado con las superficies calientes 1 Desconecte la corriente eléctrica de la pared de la placa de inducción 2 Coloque el rascador o el utensilio que vaya a utilizar formando un ángulo de 30º y raspe la suciedad o las salpicaduras de una zona fría de la placa de inducción 3 Limpie la suciedad o el líquido salpicado con un paño o papel 4 Siga los pasos 2 al 4 indicados en Suciedad normal sobre...

Page 134: ...nta Esto es normal en las baterías de cocina y no supone ningún defecto La placa de inducción emite un ligero zumbido cuando se usa en un nivel de cocción alto Esto está causado por la propia técnica de la placa de inducción Esto es normal pero el sonido debería disminuir o cesar por completo cuando reduzca el nivel de cocción Ruidos de ventilación de la placa de inducción El sistema de ventilació...

Page 135: ...na irregularidad en la placa de inducción se activa automáticamente el modo de fallo como medida de protección y se muestra el código correspondiente Estas indicaciones son una recopilación de apreciaciones y observaciones de fallos comunes Para evitar posibles peligros y daños en la placa de inducción nunca desmonte las piezas del aparato usted mismo Placa de cocina Viesta I4Z Viesta I3Z Viesta I...

Page 136: ...que se deforme por la influencia de la radiación térmica de la placa de inducción Ver abajo Asegúrese principalmente de que la placa de inducción esté bien ventilada y que las entradas y salidas de aire no estén bloqueadas Asegúrese de que la placa de inducción se encuentre en buen estado de funcionamiento Ver abajo Modelo L mm W mm H mm D mm A mm B mm X mm Viesta I4Z Viesta I3Z 590 520 62 58 560 ...

Page 137: ... de emergencia independiente permita la desconexión total del suministro eléctrico y que esté montado y colocado según la normativa y directiva locales El interruptor de emergencia sea del tipo autorizado y disponga de 3 mm de espacio de aire entre contactos de los polos El interruptor sea fácilmente accesible para el usuario de la placa Consulte con el departamento de construcción local y la admi...

Page 138: ...jo de la base de la placa si la placa está instalada sobre un cajón o un armario El interruptor sea accesible para el usuario Antes de colocar los soportes Coloque el aparato sobre una superficie estable y plana utilice el embalaje No ejerza ninguna fuerza sobre los botones que sobresalen de la placa de inducción Una vez instalada fije la placa atornillando los cuatro soportes de la base de la pla...

Page 139: ...laca de inducción al suministro eléctrico Montaje La placa de cocina debe conectarse a la corriente por una persona cualificada Antes de conectar la placa de cocina a la corriente eléctrica compruebe 1 Si la conexión está indicada para una corriente eléctrica habitual de 230 voltios 2 Si la tensión corresponde con el valor indicado en la descripción del producto 3 Si el cable de alimentación puede...

Page 140: ...deberá montarse con un interruptor bipolar dejando una distancia mínima de 3 mm entre los contactos El instalador debe asegurarse de que la conexión eléctrica se haya llevado a cabo correctamente y que cumpla con las normas de seguridad No doble ni comprima el cableado Compruebe periódicamente el estado del cable y recuerde que este solo deberá ser reemplazado debidamente por una persona cualifica...

Page 141: ...desea recibir más información sobre la manipulación el tratamiento y el reciclaje de este producto póngase en contacto con su comunidad con la empresa responsable del tratamiento de residuos o con el establecimiento donde haya comprado el producto Si desea recibir más información sobre la manipulación el tratamiento y el reciclaje de este producto póngase en contacto con su comunidad con la empres...

Page 142: ...an het juiste kookgerei 151 Gebruik van uw inductiekookplaat 152 Touch bedieningsveld handleiding 152 Blokkeringstoets 154 Gebruik van de timer 156 Richtlijnen om te koken 159 Temperatuurinstellingen 160 Reiniging en onderhoud 161 Instructies en tips 162 Technische gegevens 163 Montage 164 Voor het plaatsen van de beugels 166 Aansluiten van de kookplaat op de voedingsspanning 167 ...

Page 143: ...alen of producten op dit apparaat worden gelegd Geef deze informatie door aan de voor de montage van het apparaat verantwoordelijke persoon u kunt daarmee de installatiekosten verminderen Om risico s te voorkomen moet het apparaat volgens deze montage handleiding worden geïnstalleerd Dit apparaat mag alleen door een voldoende gekwalificeerd persoon worden aangesloten en geaard Dit apparaat moet op...

Page 144: ...in contact komen wanneer het oppervlak is afgekoeld Voorwerpen zoals messen vorken lepels en deksels mogen niet op de kookplaat worden gelegd omdat ze heet kunnen worden Houd kinderen uit de buurt van de kookplaat De handgrepen van kookpannen kunnen te heet worden om aan te raken Controleer de handgrepen van de kookpannen en laat deze niet over andere kookzones uitsteken Houd de handgrepen buiten ...

Page 145: ... kunnen ze ernstig gewond raken Laat kinderen niet alleen of zonder toezicht in het gebied waar het apparaat wordt gebruikt Kinderen of personen met een handicap die hun vaardigheid voor het gebruik van het apparaat beperkt moeten door een verantwoordelijke en competente persoon worden getraind voor het gebruik van het apparaat De instruerende persoon moet ervan overtuigd zijn dat deze mensen het ...

Page 146: ...an gevaarlijk zijn en leiden tot brand Probeer NOOIT een brand met water te blussen Zet het apparaatuit en dek de vlammen af met een een deksel of blusdeken WAARSCHUWING Brandgevaar Bewaar geen voorwerpen op het kookoppervlak WAARSCHUWING Als het oppervlak gebarsten is schakel het apparaat uit Er bestaat het gevaar van een elektrische schok omdat de oppervlakken van kookplaten uit glaskeramiek of ...

Page 147: ...tallatie de sectie Installatie Lees alle gevaarsinstructies voor het gebruik zorgvuldig door en bewaar deze gebruiks en montagehandleiding voor toekomstig gebruik Productinformatie Viesta I4Z Bovenaanzicht 1 2000 W zone Ø 180mm 2 1500 W zone Ø 180mm 3 2000 W zone Ø 180mm 4 1500 W zone Ø 180mm 5 Glasplaat 6 Gebruiksgebied Gebruiksgebied 1 Keuzeregelaar kookplaat 2 Temperatuur en timerbesturing 3 Bl...

Page 148: ...matie Viesta I3Z Bovenaanzicht 1 2000 W zone Ø 180mm 2 1500 W zone Ø 180mm 3 2000 W zone Ø 280mm 4 Glasplaat 5 Gebruiksgebied Gebruiksgebied 1 Keuzeregelaar kookplaat 2 Temperatuur en timerbesturing 3 Blokkeringstoets 4 Aan uit schakelaar 5 Timerbesturing ...

Page 149: ...matie Viesta I2Z Bovenaanzicht 1 2000 W zone Ø 180mm 2 1500 W zone Ø 180mm 3 Glasplaat 4 Aan uit schakelaar 5 Gebruiksgebied Gebruiksgebied 1 Aan uit schakelaar 2 Temperatuur en timerbesturing 3 Keuzeregelaar kookplaat 4 Timerbesturing 5 Blokkeringstoets ...

Page 150: ...romen Voor het gebruik van uw nieuwe inductiekookplaat Lees deze handleiding en let vooral op de sectie Gevaarsinstructies Verwijder eventueel alle nog op uw kookplaat aanwezige beschermfolie volledig Bediening van de knoppen De toetsen reageren op aanraking daarom hoeft u geen druk uit te oefenen Gebruik uw vingertop niet de vingerpunt Iedere keer dat er een aanraking wordt geregistreerd hoort u ...

Page 151: ...t worden ontdekt Centreer altijd uw pannen in de kookzone Til altijd de pannen van de kookplaat op door schuiven kunnen er krassen op de plaat komen Gebruik alleen kookgerei met een geschikte bodem voor inductiekoken Zoek naar het inductiesymbool op de verpakking of op de bodem van de pan U kunt controleren of uw kookgerei inductiegerei is door een magneettest te doen Beweeg een magneet op de bode...

Page 152: ...eschikte pan op de kookzone die u wilt gebruiken Controleer dat de bodem van de kookpan en de kookzone schoon en droog zijn 3 Bij het aanraken van de knop van de verwarmingszone knippert het display naast de toets 4 Kies door het aanraken van of uit een temperauurinstelling Als u niet binnen 1 minuut een verwarmingszone kiest schakelt de inductiekookplaat automatisch uit U moet dan weer met stap 1...

Page 153: ...t wanneer het oppervlak tot een bepaalde temperatuur is afgekoeld Het kan ook als energiebesparende functie worden gebruikt Als u meer kookpannen wilt verhitten gebruikt u de kookplaat die nog steeds warm is Als het display afwisselend met de warmteinstelling knippert Dit betekent U hebt de pan niet op de juiste kookzone geplaatst of De pan die u gebruikt is niet voor inductiekoken geschikt of De ...

Page 154: ...n Raak de toets aan voor de toetsenblokkering Het timerdisplaygeeft Lo aan Deblokkeren van de toetsen 1 Zorg ervoor dat de kookplaat is ingeschakeld 2 Raak en houd de toets voor de toetsenblokkering even ingedrukt 3 Nu kunt u de kookplaat gebruiken Wanneer de kookplaat is vergrendeld is alleen nog de Aan Uitschakelaar actief In geval van nood kunt u de kookplaat altijd met de Aan Uittoets uitschak...

Page 155: ...n schakelt deze vanzelf naar standby modus De ventilator zal nog een minuut blijven lopen Mensen met een pacemaker moeten contact opnemen met een arts voordat ze dit apparaat gebruiken Automatisch uitschakelen Een ander veiligheidsaspect van de inductiekookplaat is het automatisch uitschakelen Dat gebeurt wanneer u vergeet de inductieplaat uit te schakelen De vooraf ingestelde uitschakeltijden zij...

Page 156: ...uten instellen Wanneer u geen kookzone kiest 1 Zorg ervoor dat de kookplaat is ingeschakeld Opmerking U kunt de kookwekker ook gebruiken als u geen kookzone hebt gekozen 2 Tik op de timer de minutenweergave begint te knipperen en 00 wordt in het timer display weergegeven 3 Stel de tijd in waarbij u de of toets van de timer aanraakt Opmerking Raak kort de of toets aan om de tijd met 1 minuut te ver...

Page 157: ... het aanraken van de timertoets Opmerking Raak de timerschakelaar kort aan om de instelling met 1 minuut te verlagen of te verhogen Raak de timertoets aan en houd deze ingedrukt om de instelling met 10 minuten te verlagen of te verhogen Als de instelling 99 minuten voorbij gaat wordt de instelling automatisch weer 0 5 Het aftellen start direct nadat de tijd is ingesteld Op het bedieningspaneel wor...

Page 158: ...tijd is ingesteld Op het bedieningspaneel wordt de resterende tijd weergegeven en de timer knippert voor 5 seconden OPMERKING De verlichte rode stip naast het temperatuurdisplay geeft de gekozen zone weer 6 Wanneer de timer afgelopen is wordt de bijbehorende kookzone automatisch uitgeschakeld Andere kookgebieden blijven verder werken wanneer ze daarvoor worden ingeschakeld ...

Page 159: ...m 3 Smeer beide zijden van de steak in met olie Doe een klein beetje olie in de hete pan en leg dan het vlees hierin 4 Draai de steak tijdens het braden slechts een keer om De precieze braadtijd hangt af van de dikte van de steak en het gewenste gaarpunt De tijd kan per zijde variëren tussen 2 en 8 minuten Druk op de steak om vast te stellen hoe gaar deze is hoe vaster deze aanvoelt hoe meer deze ...

Page 160: ... hoeveelheid die u voorbereidt Experimenteer met de inductiekookplaat om de beste instellingen voor u te vinden Temperatuurinstel ling Geschiktheid 1 2 langzaam opwarmen van kleine hoeveelheden voedsel smelten van chocolade en boter eten dat snel aanbrandt langzaam sudderen langzaam verwarmen 3 4 opwarmen snel sudderen rijst koken 5 6 pannenkoeken 7 8 sauteren pasta koken 9 roerbakken braden soep ...

Page 161: ...schraapmes of een kookplaatschraper Let echter op hete kookzones 1 Schakel de stroomtoevoer van de kookplaat uit 2 Houd het blad of het gebruiksvoorwerp in een hoek van 30 en schraap het vuil of het gemorste naar een koud gebied van de inductiekookplaat 3 Veeg het vuil of de vrijgekomen vloeistof met een een vaatdoek of keukenpapier weg 4 Volg de boven Staande stappen 2 tot 4 voor Dagelijks vuil o...

Page 162: ... materialen trillen anders Dit is normaal voor kookgerei en wijzen niet op een defect De inductiekookplaat maakt een laag zoemend geluid bij het gebruik van een hoge kookfase Dit wordt veroorzaakt door de techniek van inductiekoken Dat is normaal maar het geluid moet verminderen of volledig verdwijnen wanneer de kookfase wordt verlaagd Ventilatiegeluiden uit de inductiekookplaat Een koelventilator...

Page 163: ...matigheid ontstaat wordt de inductiekookplaat als bescherming automatisch in de foutmodus geschakeld en geeft een bijbehorende code aan Hierboven is de evaluatie en observatie van veelvoorkomend falen genoemd Haal de inductiekookplaat niet zelf uit elkaar om mogelijke risico s en schade aan de inductiekookplaat te vermijden Kookplaat Viesta I4Z Viesta I3Z Viesta I2Z Aantal kookzones 4 zones 3 zone...

Page 164: ...de inductiekookplaat geen grote vervormingen ontstaan Zoals hieronder weergegeven Zorg ervoor dat onder alle omstandigheden de inductiekookplaat goed wordt geventileerd en dat de luchtinlaat en uitlaat niet worden geblokkeerd Zorg ervoor dat de inductiekookplaat zich in een goed werkende staat bevindt Zie hieronder Model L mm W mm H mm D mm A mm B mm X mm Viesta I4Z Viesta I3Z 590 520 62 58 560 49...

Page 165: ...schriften een geschikte noodschakelaar biedt een volledige scheiding van de voeding en is gemonteerd en geplaatst volgens de lokale regelgeving en voorschriften De noodschakelaar moet van een goedgekeurd type zijn en een afstand van 3 mm tussen alle polen hebben de scheidingsschakelaar moet voor de klant bij de kookplaat makkelijk te bereiken zijn Raadpleeg in geval van twijfel de lokale bouwautor...

Page 166: ...basis van de kookplaat is geïnstalleerd de scheidingsschakelaar makkelijk voor de klant is te bereiken Voor het plaatsen van de beugels Het apparaat moet op een stabiel en glad oppervlak worden gelegd gebruik de verpakking Oefen geen kracht uit op knoppen die uit de inductiekookplaat steken Het aanpassen van de positie van de beugel Bevestig de inductiekookplaat na de installatie door het aanschro...

Page 167: ...del hittebestendig zijn Aansluiten van het kookplaat op de voedingsspanning Montage De kookplaat moet aan de voedingsbron worden aangesloten door een gekwalificeerd persoon Voordat u de kookplaat aansluit op het stroomnet moet u controleren 1 of de standaard 230 Volt voeding geschikt is voor de verbinding 2 dat de spanning overeenkomt met de waarde in de productbeschrijving 3 dat de voedingskabel ...

Page 168: ...t een meerpolige scheidingsschakelaar met een minimale afstand van 3 mm tussen de contacten worden ingebouwd De installateur moet garanderen dat de elektrische aansluiting juist wordt uitgevoerd en voldoet aan de veiligheidsvoorschriften De kabel mag niet worden gebogen of samengedrukt De kabel moet regelmatig worden gecontroleerd en het vervangen mag alleen worden uitgevoerd door een geschikt gek...

Page 169: ...n elektrische en elektronische producten worden gebracht Het apparaat moet als speciaal afval worden weggegooid Neem voor meer informatie over de behandeling terugwinning en recycling van dit product contact op met uw gemeente uw afvalverwerkingsbedrijf of de winkel waar u het gekocht heeft Neem voor meer informatie over de behandeling terugwinning en recycling van dit product contact op met uw Ge...

Reviews: