


Quick Guide for the V-Mic
v1.4 © 2020-2021 Vidicode 4/4
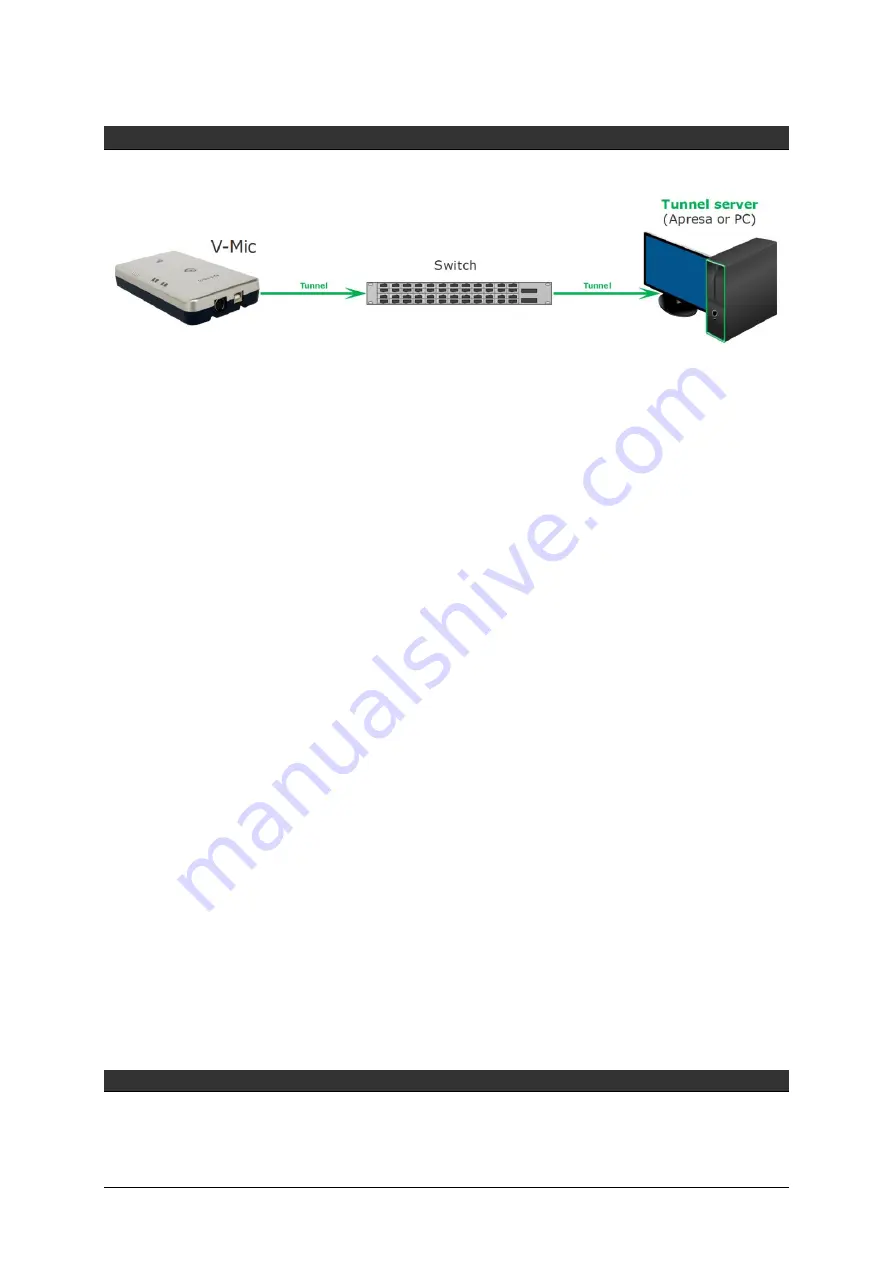
CHECKLIST FOR TUNNEL CONNECTION
A connection between the V-Mic and the V-Archive PC software or an Apresa recorder
is needed to get the recorded data automatically into a user accessible database.
The following checklist can be used to setup this Tunnel connection:
1)
Install the Hardware (see page 2).
2)
Install the V-Archive software on a PC and enable
‘
V-Tap connections
’
(see page 3).
3)
Connect the V-Mic with a network cable to the LAN, or connect using Wi-Fi (see manual).
4)
Open the Settings page of the V-Mic in a browser by entering
http://vmic
XXXXXX
.local
XXXXXX
is the serial number, as found on the bottom of the device.
It may take up to a minute after first connect, before this local name is known to the PC.
5)
On that page, the IP address of the Apresa or the PC with V-Archive must be entered as the
“
External Storage IP Address
”
and the
“
External Storage via Tunnel
”
must be enabled.
6)
Any
firewall
must have a rule that makes it possible to receive from TCP port 2016, the
default
“
External Storage TCP Port
”
.
During installation of V-Archive this port is automatically opened, if permitted by the PC.
7)
To see if the PC receives something from the V-Mic, it is possible to make a network trace for
test purposes.
In V-Archive, go to menu Actions
and select ‘N
etwork
trace’
, press Start, make a short
recording by pressing the button twice, wait 20 seconds, press Stop and then Save. From the
zip file 'tunneltrace.pcap' can be analyzed with Wireshark.
The Apresa recorder has a similar option to make a network trace in menu Tools, System.
8)
The SD card in the V-Mic should contain
“.
WAV
”
files, after recording. The SD card can be
read by the V-Archive software in menu File and
‘
Import from V-Tap
’
.
The WAV files can also be opened using explorer, on a PC with audio playback capability.


