VideoSystemer VSVM-105 User Manual Download Page 16


- 16 - 

    In the event that you experience trouble with your monitor, check the following items before 

contacting the dealer from whom the monitor was purchased. The most common problems usually 

involve an incorrect connection from the Camera or Cables to the monitor. We recommend that you 

also consult your user manuals for your Camera or Cables to the monitor. equipment during the 

troubleshooting procedure. Do not exceed the maximum refresh rate recommended for the monitor. 
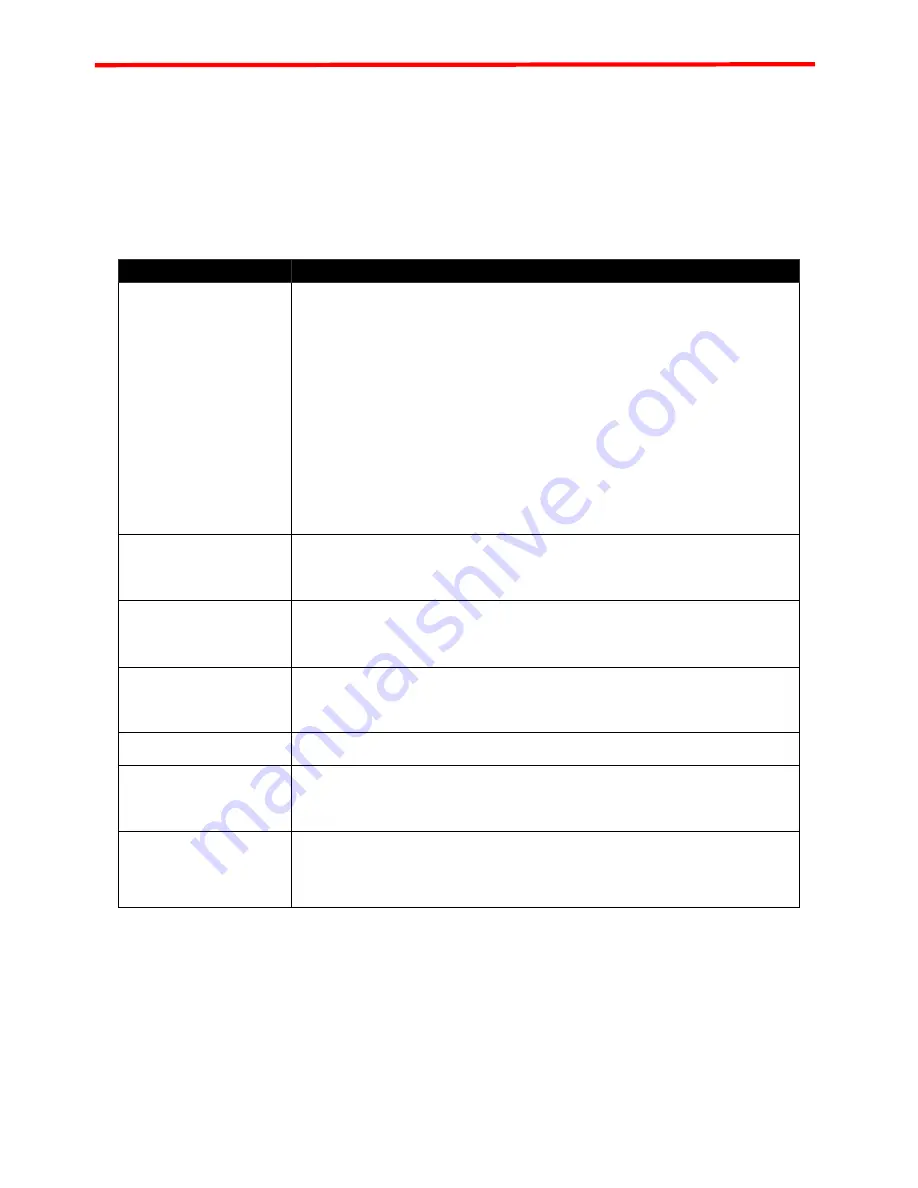


Porblem 

Troubleshooting Tips 

No image on display 

screen  

(power LED does not 

light) 

1.    Check that the power cord of the computer or AV equipment has been 

connected securely to the wall outlet or grounded extension cable or strip.   

2.    Check that the monitor power switch is “on” and the LED on the front of 

the monitor is lit.   

3.    Check that the video (signal) cable from the computer or AV equipment 

has been connected correctly and securely.   

4.    Check to ensure that the video card is firmly seated in the card slot of 

the computer’s motherboard.   

5.    Check that the video input from the video card falls within the timing 

range    of the monitor. 

There is no picture   

(power LED is lit green) 

-Is the monitor properly connected to the signal 

-Is the monitor properly selected signal input mode 

The image appears 

distorted under VGA 

mode 

- Does the signal timing correspond to monitor specifications 

- Perform automatic adjustment 

The remote control 

does not work 

-Have the batteries of the remote control run out? 

-Are the batteries placed in the right direction in the remote control? 

Disturbances on Screen  OSD adjustment is incorrect. 

“Contrast” can not be 

adjusted 

Please check “Image” state , only in “personal” state the contrast, 

brightness etc can be adjustable   

Colors of image on 

screen are   

abnormal 

Check to ensure that the video (signal) cable from the monitor has been 

securely and correctly connected to the DVI, AV, and S-video connector at 

the back of the computer.     

Summary of Contents for VSVM-105

Page 1: ...High Performance Industrial LCD Monitor 12 1 VSVM 105 User s Manual...

Page 2: ...esence of uninsulated dangerous voltage within the product that may shock to person This sign is intended to alert the user to presence of important operating and maintenance servicing instructions TO...

Page 3: ...monitor to direct sunlight or heat Hot air may cause damage to the cabinet and other parts z Do not install this monitor near a motor or transformer where strong magnetism is generated Images on the...

Page 4: ...troduction 5 2 Installation Checklist 6 Installation 7 Connection 9 3 Common operation Definition of the Button board 11 Definition of the Remote controller 12 Select the signal input 13 Usage of the...

Page 5: ...ection Perfect Function Common Function z Low power consumption when standby memory of present state to recover from sudden power off z Many Signals Supported VGA analog S video etc z VGA modes Suppor...

Page 6: ...If you find that any of these items are damaged or missing please contact your dealer immediately mounted on its stand One LCD monitor AC power cord power Adaptor Optional The user manual Remote contr...

Page 7: ...ing parts are prepared For the safety of the LCD panel soft cloth should be prepared to spread on the table the lie the monitor on it fix the stand to the monitor as following instruction Fix the scre...

Page 8: ...8 View effect of wall amount Cabinet Fixing The Wall Amount Fixing Hole can also be used in machine cabinet fixing Fixing Hole...

Page 9: ...and then to a power outlet 4 Connect VGA Cable at the back of the monitor then connect the D sub 15 pin connector located at the back of computer or VCR 5 Tighten the screws of the monitor cable until...

Page 10: ...10...

Page 11: ...D adjustment main menu This button is also used to exit the OSD main menu when the main menu is displayed on the screen DOWN This button is used to scroll through the screen containing items to be adj...

Page 12: ...elect the video 1 signal inputs composite video BNC connectors z BNC2 Select the video 2 signal inputs composite video BNC connectors z S VIDEO Select S VIDEO signal inputs z VGA Select the VGA signal...

Page 13: ...to access the main menu and default to enter PICTRUE setup interface 2 Then press DOWN buttonto access the PICTURE setup sub menu Next press UP DOWN button to select the desired item 3 Press input but...

Page 14: ...he Down button to enter function sub menu press UP DOWN button to select the desired item 3 Press input button monitor or remote control to access the screen for adjusting the elected item Then press...

Page 15: ...m2 600cd m2 Response Time 8ms 8ms 8ms 8ms Color 16 7M 16 7M 16 7M 16 7M View Angle 160 160 160 160 160 160 160 160 Frame Rate 50Hz 60Hz 70Hz Composite signal input Composite signal output SV signal SV...

Page 16: ...ment has been connected correctly and securely 4 Check to ensure that the video card is firmly seated in the card slot of the computer s motherboard 5 Check that the video input from the video card fa...

Reviews: