background image

USB Laptop Camera Installation

& Quick Start Guide

Page 7

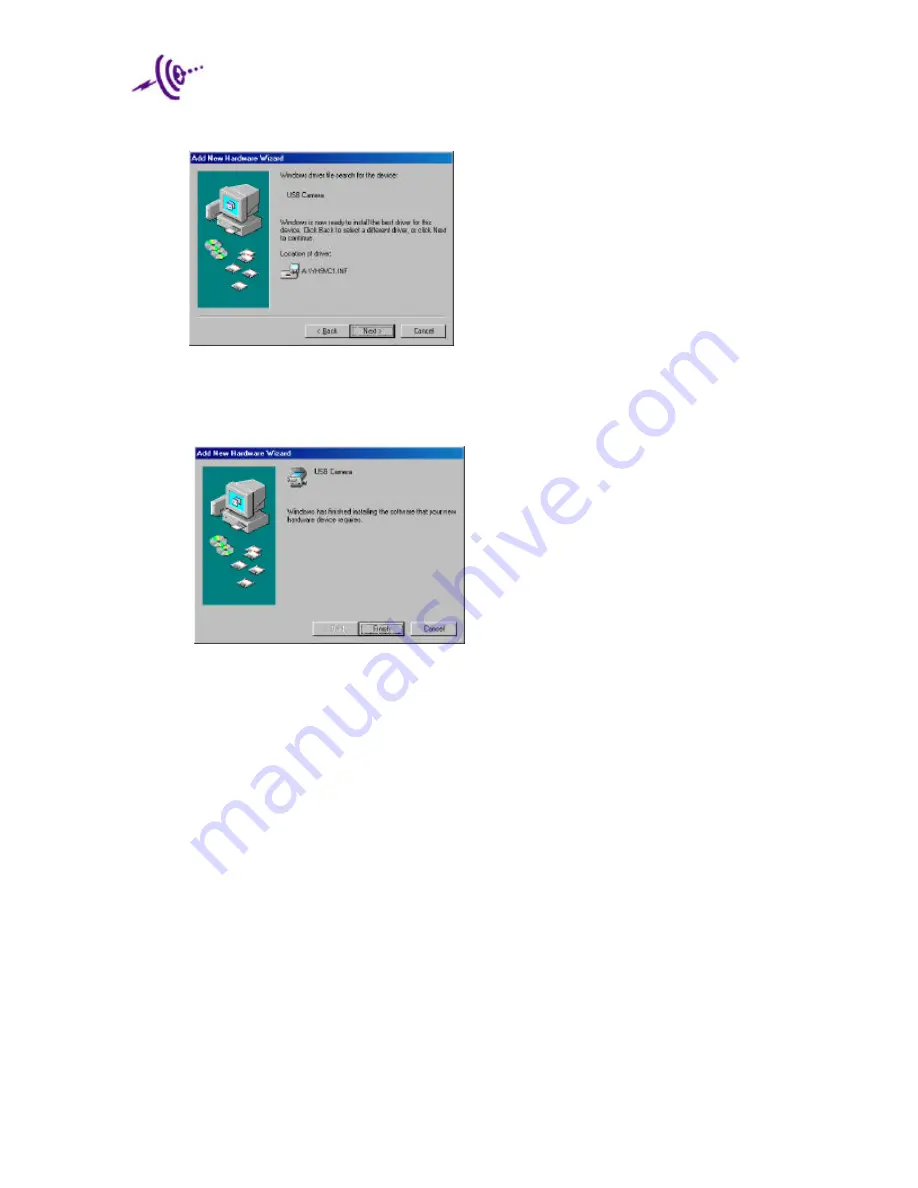
6. The following screen will appear after the search is complete. Click ‘next’.

7. During the driver installation, you will be asked to put the Windows 98 CD into the CDROM

Drive.  Put the correct CD into the drive, wait for it to load, and press OK.

8. The last screen will appear saying that the USB Laptop Camera was installed.  Click ‘finish’.

Summary of Contents for USB Laptop Camera

Page 1: ...USB Laptop Camera Installation And Quick Start Guide VideoLabs Inc 5960 Golden Hills Drive Golden Valley MN 55416 1040 Toll Free U S 800 467 7157 Phone 612 542 0061 Fax 612 542 0069 www videolabs com ...

Page 2: ...ed to VideoLabs Inc from another country VideoLabs Customer Service If the camera is still under warranty VideoLabs will test repair or replace the product without charge If the camera is out of warranty VideoLabs will test then repair the product for the cost of parts and labor Charges will be estimated and confirmed by the customer prior to repair by a VideoLabs technician Repair time for all ca...

Page 3: ...provide reasonable protection against harmful interference in a residential installation This equipment generates uses and can radiated radio frequency energy and if not installed and used in accordance with the instruction may cause harmful interference to radio communication However there is no grantee that interference will not occur in a particular installation If this equipment does cause har...

Page 4: ...tart Guide Page 4 Table of Contents INTRODUCTION 5 PACKING LIST 5 SYSTEM REQUIREMENTS 5 INSTALLATION INSTRUCTIONS 6 DRIVER INSTALLATION 6 SOFTWARE INSTALLATION 8 USB LAPTOP CAMERA VIEWER QUICK START 10 BUTTON DESCRIPTIONS 11 PRECAUTIONS 12 ...

Page 5: ...eoLabs Products Packing List The USB Laptop Camera package should contain the following Camera with attached cable and mounting clip Program Disk 3 Floppy Disk Driver Disk 3 Floppy Disk Documentation System Requirements The USB Laptop Camera has been designed for computer systems with the following Microsoft Windows 98 Pentium MMX 233Mhz minimum USB Interface 20MB Hard Disk Space 32MB RAM 16bit Di...

Page 6: ...SB connector of the USB Laptop Camera to the USB port on the Computer 2 Start up Microsoft Windows 98 3 The following screen will appear during startup Click next 4 Select Search for the best driver for your device on the screen that appears and Click next 5 On the screen check only the Floppy disk drives box Put the Disk Labeled USB Laptop Camera Drivers into the floppy drive Click next ...

Page 7: ...fter the search is complete Click next 7 During the driver installation you will be asked to put the Windows 98 CD into the CDROM Drive Put the correct CD into the drive wait for it to load and press OK 8 The last screen will appear saying that the USB Laptop Camera was installed Click finish ...

Page 8: ...led USB Laptop Camera Program Disk into the floppy drive 2 Click the Start button on the desktop and then click Run 3 Type a setup exe then press enter 4 The following screen will appear click next 5 Enter your name and company information and then click next 6 Click next to accept the default location for program files otherwise click Browse to specify a new location ...

Page 9: ...ext to accept the default entry for program icons or choose the desired location 9 Click finish to complete the installation of the camera software 10 The camera viewer application can then be used to capture full motion video or still images from the USB Laptop Camera Click on the following icon to start the camera viewer ...

Page 10: ...basic functions available in the USB Laptop Camera Viewer program To start the program click on the USB Laptop Camera Viewer Icon When the program is running the following window should appear on the screen Still Mode Button Video Mode Button Camera Settings Button Record Take Picture Button Zoom Button Pan Tilt Buttons Image Window ...

Page 11: ...d Starts recording in Video Mode and Takes Image Window The current camera view is displayed here Zoom Changes cursor to a magnifying glass Clicking the Right mouse button on the Image Window will Zoom In Clicking the Left mouse Button on the Image Window will Zoom out Pan Tilt When the camera is Zoomed In the Pan Tilt buttons allow the picture to move inside of the Image Window For further explan...

Page 12: ...ra toward the sun the camera may be damaged Do not touch the lens If it is becomes dirty wipe gently with a soft dry cloth Do not drop the camera Never touch the connection terminal of the camera as static electricity could render it unusable Also avoid allowing foreign objects to touch the connector Connect or disconnect by grasping the USB connector Do not handle the camera with wet hands Avoid ...

Reviews: