Videofied OSMVC 200 Install Sheet Download Page 4

4

INSTALL SHEET

OSMVC

 OUTDOOR STREAMING MOTION VIEWER

Perimeter protection
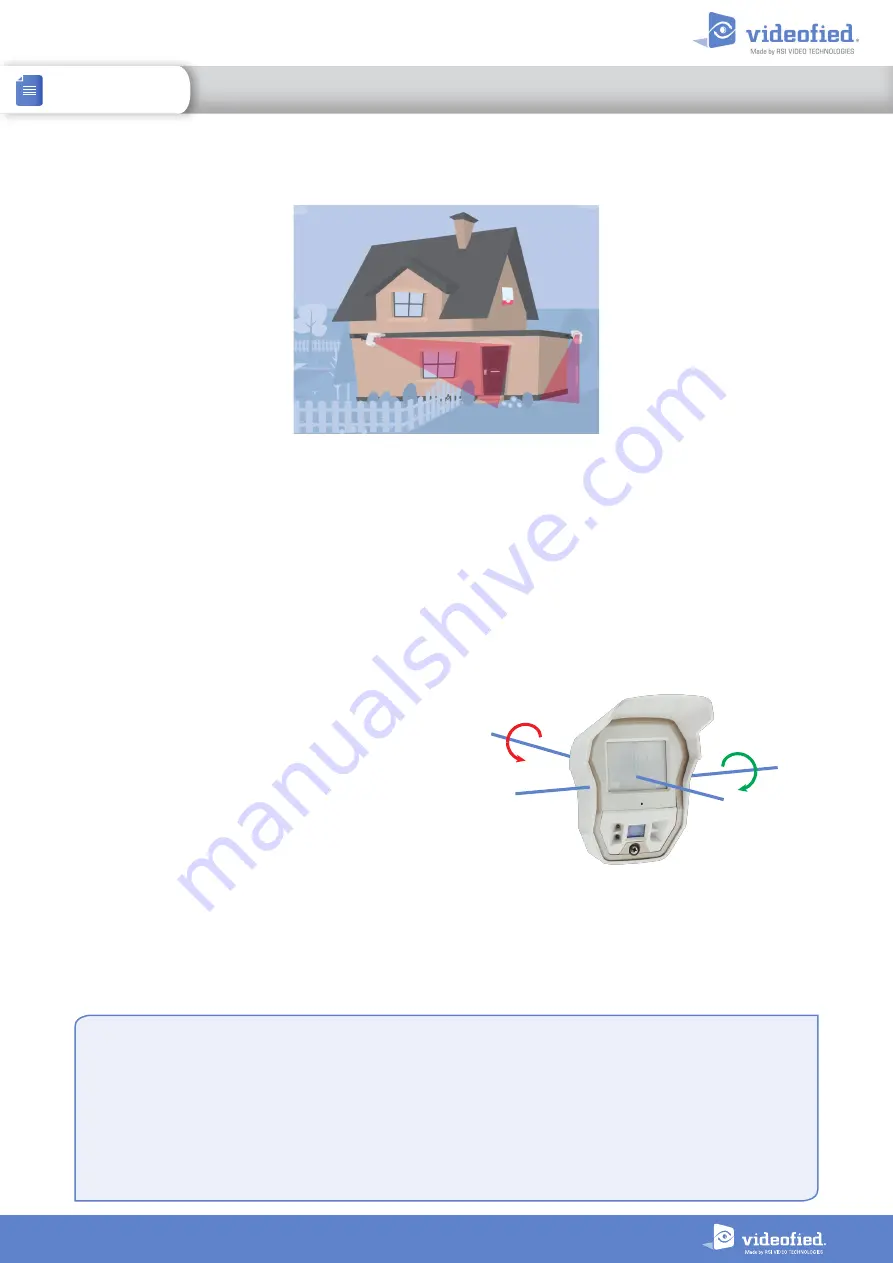
Tilt Tamper

The OSMVC MotionViewer can detect 
manipulation thanks to its built-in electronic 
accelerometer.

This device can detect shocks, movements, 
wall or cover tamper but also changes in its 
orientation.

When a movement of the OSMVC is detected, 
the LED lights up for 3 seconds.

When it is armed for the first time, the OSMVC registers its position in space.

 If its orientation is 

significantly changed on its transverse or longitudinal axis, a tamper alarm is sent to the panel. As for every 
Videofied device, the tamper is active 24/7.

If the detector is moved, 

the TAMPER notification will be displayed on the keypad the next time the 

system is armed

Press OK/YES to acknowledge that notification and confirm the detector new 

position

. If the 

TAMPER

 event is set as 

ALARM/END

, a tamper restoral event is sent to the panel.

Longitudinal axis rotation

Transverse axis rotation

Tilt tamper disabling (only for OSMVC version 07.06.04.XX and later)

The OSMVC Motionviewer must be deleted from the panel memory to disable tamper.

1.  Delete the OSMVC from the device configuration menu.

2.  Press and hold the OSMVC initialization button for 5 seconds. The red LED will turn on for 2 seconds to confirm the 

setting. 

3.  Pair the OSMVC back with your panel.

The re-enabling tamper procedure is the same as described above. When the tamper is enabled however, the red LED 

turns on for 2 seconds, turns off for half a second and turns back on for 2 seconds.

Streaming option

The new OSMVC MotionViewer allow the user to request a live video session.

The OSMVC is the first battery-powered wireless camera detector emitting on 868MHz able to provide a 

live video 

stream from its camera

.

The 868 MHz frequency has excellent range and allow for excellent battery-life.

Summary of Contents for OSMVC 200

Page 1: ...tall the detector and other system devices in the order of the following steps Programming RF Testing program detector and all other devices into the control panel and test RF communication from each intended device location to the control panel Mounting mount detector at the tested location Mounting Use proper tools and hardware Mount camera between 2 5 m to 3 5 m height The OSMVC MotionViewer de...

Page 2: ...ontinuously or you receive a 9 9 indicating good communication with the control panel 9 Press OK YES to end radio range test then press ESC NO 10 The keypad displays AREA ALLOCATION AREA 1 Press either arrow button repeatedly until desired area number appear then press OK YES By default all devices in Area 1 are automatically delayed 11 The display shows NAME LOCATION Enter appropriate device name...

Page 3: ...ng or reducing the tilt even slightly has a big impact on the detection distance and on the blind area under the MotionViewer We recommend to slightly tilt the OSMVC to reduce its detection range and avoid false alarms To precisely determine the tilt angle use a smartphone app like Smart Protector Android or Pitch Gauge iOs Blind angle Max detection distance Tilt Mounting height Max detection dist...

Page 4: ...ion If the TAMPER event is set as ALARM END a tamper restoral event is sent to the panel Longitudinal axis rotation Transverse axis rotation Tilt tamper disabling only for OSMVC version 07 06 04 XX and later The OSMVC Motionviewer must be deleted from the panel memory to disable tamper 1 Delete the OSMVC from the device configuration menu 2 Press and hold the OSMVC initialization button for 5 seco...

Page 5: ...presence of water or moist surfaces Speed and direction of the movement OSMVC setup tilt height sensitivity Important It is essential to monitor the proper functioning of the infrared detection using the FUNCTIONAL TEST feature in the panel MAINTENANCE menu A red status LED lights up when the OSMVC is detecting Use that test to determine the pattern of the detection field Status LED Blind angle De...

Page 6: ...alled to prevent intrusions aim the detector towards an access point sensitivity adjustment will have no effect if the installation doesn t comply with the installation recommendations described in this document Adjust sensitivity for the OSMVC MotionViewer To change the OSMVC sensitivity you need to change the detector name DEVICE CONFIGURATION CHANGE NAME DEVICE OK orYES To select the OSMVC OK o...

Page 7: ...ever there is no guarantee that interference will not occur in a particular installation If this equipment does cause harmful interference to radio or television reception which can be determined by turning the equipment off and on the user is encouraged to try to correct the interference by one or more of the following measures Reorient or relocate the receiving antenna Increase the separation be...

Page 8: ...g height 2 5 m to 3 5 m Mounting angle 5 to 10 Mounting Use mounting kit sold separately Environmental data Operating temperature 25 70 C Max relative humidity 95 without condensing Protection marking IP 65 IK 06 Power requirements Type C 4 Lithium batteries 3 6 V LS14500 Battery life Standard usage up to 5 videos per month 4 years High usage about 30 videos per month 2 years Standby current consu...

Page 9: ...ol on the product or on its packaging indicates that this product should not be treated as household waste It must be handed over to the applicable collection point for the recycling of electrical and electronic equipment By ensuring this product is disposed of correctly you will help prevent potential negative consequences for the environment and human health The recycling of materials will help ...

Reviews: