Vicon I-ONYX VND-970IP Configurator Manual Download Page 4


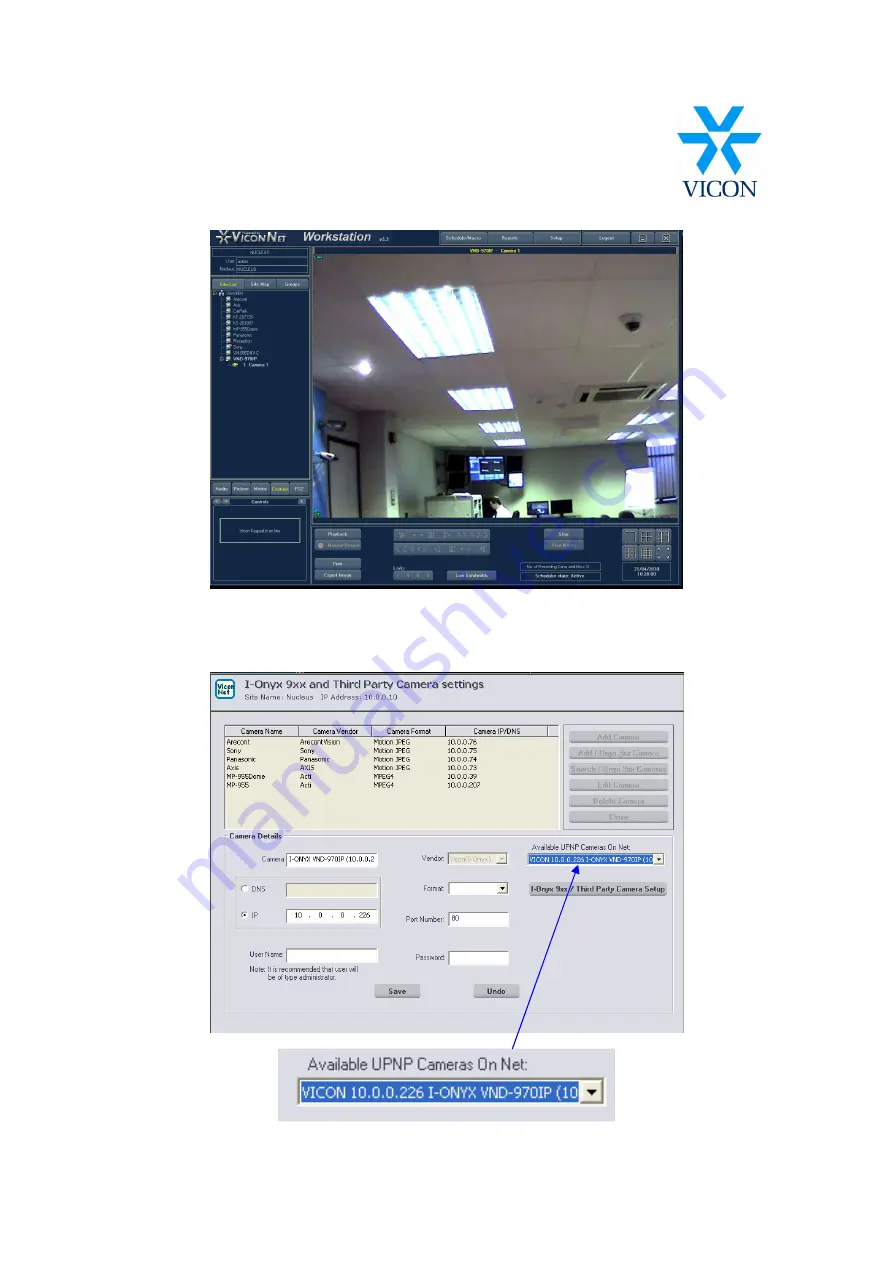
Click on the camera this will now show 1 Camera 1 click this and the camera will now appear on the screen 


This is the camera now setup through the ViconNet. 

When using Viconnet 5.6b adding the camera to the ViconNet instead of add camera you should add I-

onyx 9xx camera 


Summary of Contents for I-ONYX VND-970IP

Page 1: ...that is to be used is different then this IP address will need to be changed to the same range To change this setup use a PC on the same IP range as the camera and then use internet explorer enter th...

Page 2: ...ection in the list and press the select you will now enter the nucleus settings From here click on the I Onyx 9xx and third party camera button This will now enter into I onyx and third party camera s...

Page 3: ...address username password and Vendor name this must be set to VND 970 Once these details have been entered click on the save and the details will now be shown in the camera list Now close this screen...

Page 4: ...how 1 Camera 1 click this and the camera will now appear on the screen This is the camera now setup through the ViconNet When using Viconnet 5 6b adding the camera to the ViconNet instead of add camer...

Page 5: ...indow select the camera it will then display 1 Camera 1 select this and the picture will now be on the screen This is the camera setup onto the ViconNet system The next step will be to set the cameras...

Page 6: ...In the macro editor click on add macro this will then open up the editor for setting up the macro...

Page 7: ...70IP and select record At the bottom you will now have a list of cameras that are available select the VND 970IP and the 1 Camera 1 this will go bold text then select the duration tick the unlimited b...

Page 8: ...tup now press the save and close the macro window that will take you back to the NVR setup Now you will need to setup the schedule for the macro to record click the schedule for macro button this will...

Page 9: ...Click on the Add button and select the created macro in the drop down box Once the macro has been selected click save and close the scheduler and exit the NVR setup back to the main screen...

Page 10: ...This will now be recording the camera and this can be seen at the bottom of the screen This shows that the camera is recording and the schedule is active getting the system to record the VND 970IP...

Reviews: