5 — Installing the drives in your Observer Platform appliance
Installing the drives in your
Observer Platform appliance
Failure to install the drives in the proper location will result in
poor read and write performance until the RAID array volume is
rebuilt.
Follow these instructions to install the drives correctly before
starting the appliance.
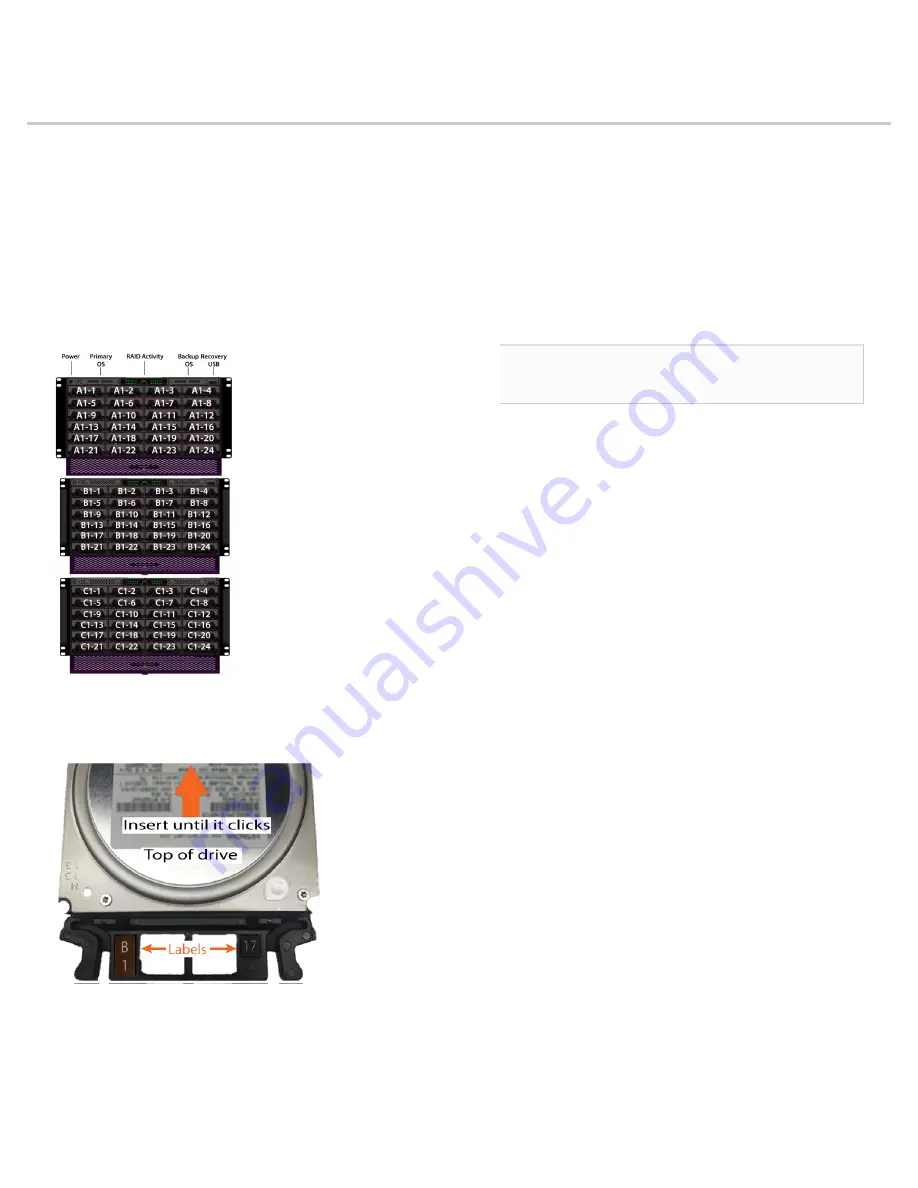
Stickers on each drive identify which slot it should be installed in.
The drive labeled 1 must be installed in the upper left slot of the
appliance.
1.
Make sure that the appliance is turned off.
2.
Locate the drives that comprise the array. The drives are
labeled to show you where they should be installed in the
drive cage. (
Image may not exactly match your product.
)
3.
Gently insert each drive by squeezing the tabs and sliding
the drive into place until the tabs can engage the slots on
both sides of the drive. Do not use force!
Slightly lift the drive tabs to ease insertion.
4.
Repeat until all of the drives are installed as labeled.
You should push each drive slightly to ensure that it is fully
seated. Additionally, you may want to visually inspect all of
the drives from the side to verify that they are all sitting at
the same approximate depth. Check any that are protruding
while the system is turned off.
5.
Turn on the system, and check that every activity LED light
is lit. If not, turn off the system, reinsert the corresponding
drive into its cage, and confirm that it clicks into place.
How to handle hard drives properly
Be especially careful when handling and installing the hard
drives. Proper handling is paramount to the longevity of the
drive. The internal mechanism of the hard drive can be seriously
damaged if the hard drive is subjected to forces outside its
environmental specifications.
Caution:
When transporting the hard drive, always use
an anti-static bag and the shock-absorbing packaging in
which the hard drive was delivered to you.
♦
Always handle only one drive at a time.
♦
Always have one hand under the tray to support the
weight of the drive when removing or inserting it.
♦
Always hold the hard drive by grasping the long sides
that have mounting holes.
♦
Always use an anti-static mat and wrist strap when
handling the hard drive.
♦
Never stack hard drives on top of each other.
♦
Never hit the hard drives in any way.
♦
Never touch the components on the circuit board
assembly.
♦
Never cover the small hole on top of the hard drive.
♦
Never place the hard drive near equipment that
produces strong magnetic fields.
♦
Avoid moving any hard drive that is turned on and
operating.
♦
Avoid exposing the hard drive to extreme changes in
temperature to minimize the risk of condensation.
♦
If the temperature difference between the storage
location and installation location exceeds 50°F/10°C, for
temperature acclimation purposes, leave the hard drive
in the new location overnight (or at least two hours)
before turning it on.


