


VIAVI//Public
T-BERD/MTS 2000 Handheld Modular Test Set
T-BERD/MTS-2000 Handheld Modular Test Set
Q U I C K C A R D
4
R U N T E S T
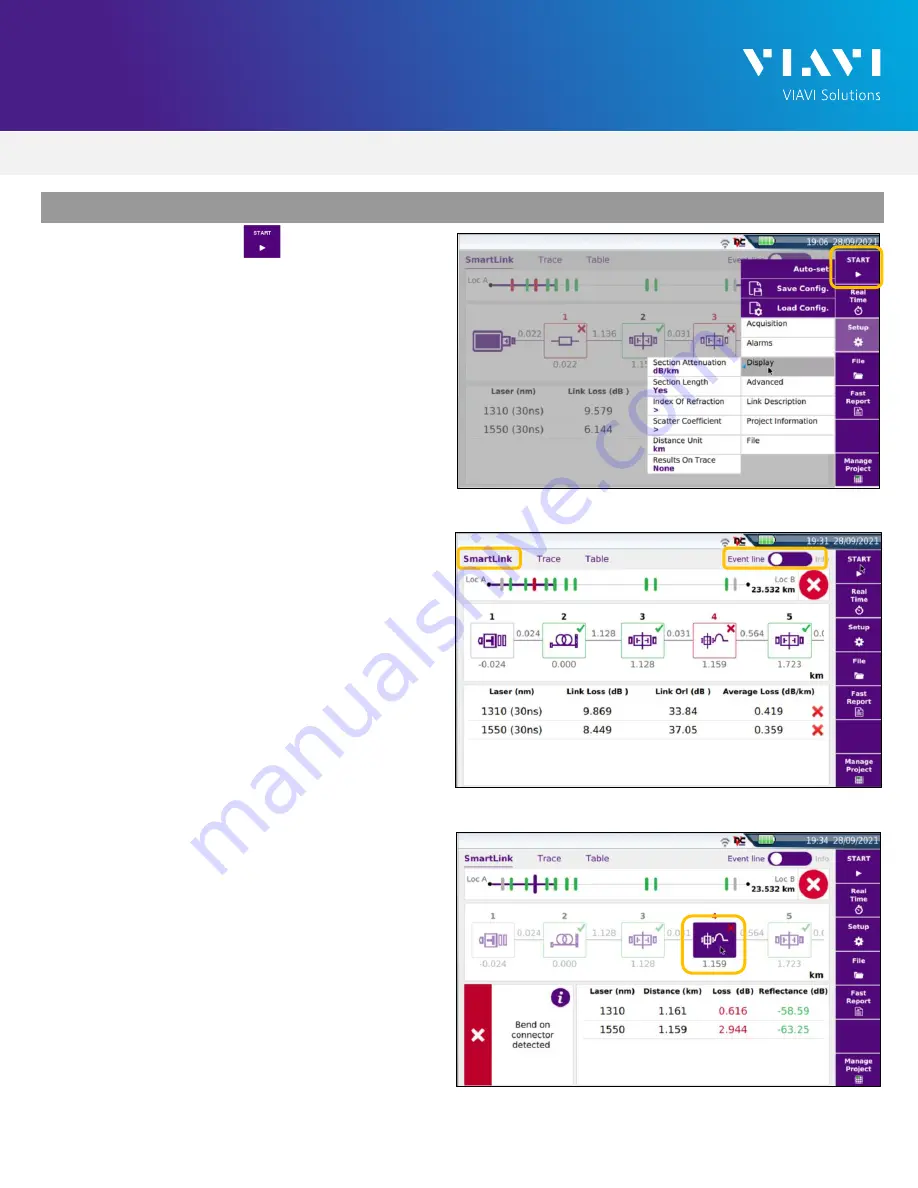
1.
Tap the Start soft-key to start the test.
After auto-configuration, the OTDR will perform
a connection check to ensure that the
connection is
Good
. If the Connection is
Bad
,
disconnect the launch cable, and reconnect as
described on pages 1 and 2, cleaning every
fiber end-face that fails the inspection test.
2.
After connection checks, the OTDR will perform
acquisitions at the configured wavelengths.
3.
Tap the
SmartLink
tab at the left screen top to
select SmartLink view.
4.
Set the toggle switch at the right screen top to
Event Line
.
5.
View SmartLink results:
►
The FUT is displayed as a series of icons
representing events (front connector,
launch cable, connectors, splices, bends,
etc.) and distances. Swipe left or right to
view additional icons on spans with more
than 4 events.
►
The center of the display shows summary
results for the entire span for each
acquisition or wavelength. Tap any event
in the upper display to view detailed
results for that specific event.
►
Events and Acquisitions are marked with
a green check or red
x
based on the
Alarms setting.
Note:
the icon-based view may not be
available on older T-BERD/MTS 2000s when
acquisition Mode = SmartAcq.
Rerun the test with Manual or Auto
Acquisition or contact VIAVI to upgrade your
unit to add this feature.
Figure 11: SmartLink View, Summary Results
Figure 12: SmartLink View, Event Results
Figure 10: Start Test


