background image

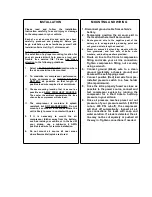
INSTALLATION

Please   read   and   follow   the   Installation 
Instruction carefully to avoid injury or damage 
to the compressor or your vehicle.

Each   of  our  air  source  kits  and  parts  have  been 
carefully   produced   and   packaged.   Before   you 
begin  installation,  please familiarize  yourself  with 
Installation Parts List (Fig. 1) of this manual.

Selecting a Mounting Location:
The selection of a proper mounting location for 
your air source kit will help ensure a long and 
trouble   free   service   life.   Please  pay   close 
attention to the following guidelines:

1.

Select a FLAT AND SECURE location where 
the air source kit can be mounted. 

2.

To   maximize  air   compressor   performance, 
locate   compressor   as  CLOSE   TO   THE 
BATTERY  as   possible   so   that   length   of 
positive lead wire required is at a minimum. 

3.

Choose  mounting  location  that  is as cool as 
possible   and  AWAY  FROM  HEAT   SOURCES. 
The   cooler  the  ambient  temperature  the  less 
chance the compressor will overheat. 

4.

The   compressor   is   moisture   &   splash 
resistant,   but  NOT   WATERPROOF.   Do   not 
mount air source kit in locations where the 
unit is likely to come in contact with water. 

5.

If   it   is   necessary   to   mount   the   air 
compressor further away from the battery, 
such as inside your vehicle or in the bed of 
your   pickup,   use   a   minimum   8   AWG 
positive lead wire for remote installation. 

6.

Do   not   mount   air   source   kit   near   areas 
where flammable liquids are stored. 

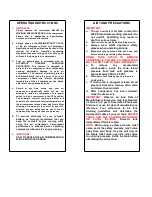
MOUNTING AND WIRING

1. Disconnect ground cable from vehicle’s 

battery.

2. Temporarily  position  the   air  source  kit  in 

the location where it will be mounted. 

3.

Route   ground   wire   to   the   negative   post   of   the 
battery or to an appropriate grounding point and 
cut ground wire to length as needed. 

4.

Mount air source kit at tank leg mounts with the 
four   grommets,   and   four   sets   of   bolts,   nuts, 
washers, and locking washers provided. 

5. Route air line to the 1/2-inch compression 

fitting and make your air line connection. 
Tighten   compression   fitting   nut   securely 
using a wrench. 

6. Connect   ground   (Black)   wire   to   a   clean 

ground, (preferably a chassis ground) and 
secure with a self-tapping screw. 

7. Connect positive (Red) lead wire from pre-

installed pressure switch to a fuse holder 
(20-amp minimum). 

8. Once the kit is properly fused as close as 

possible to the power source, connect and 
test   compressor   system   by   running   the 
compressor   for   a   short   time   to   build   up 
pressure in your air tank. 

9. Once air pressure reaches preset cut out 

pressure of your pressure switch (165 PSI 
cut-on,   200   PSI   cut-off),   the   compressor 
will   shut   off   automatically.   Inspect   all   air 
line   connections   for   leaks   with   soap   and 
water solution. If a leak is detected, the air 
line may not be cut squarely or pushed all 
the way in. Tighten connections if needed. 

Summary of Contents for 20008

Page 1: ...is compressor Close supervision is necessary when this compressor is being used near children This compressor will become very hot during and immediately after use Do not touch any part of this compressor with bare hands other than the ON OFF switch during and immediately after use Do not use this product near flames or explosive materials or where aerosol products are being used Do not operate th...

Page 2: ... minimum 8 AWG positive lead wire for remote installation 6 Do not mount air source kit near areas where flammable liquids are stored MOUNTING AND WIRING 1 Disconnect ground cable from vehicle s battery 2 Temporarily position the air source kit in the location where it will be mounted 3 Route ground wire to the negative post of the battery or to an appropriate grounding point and cut ground wire t...

Page 3: ... using the air compressor Compressor performance is enhanced when operating compressor with vehicle s engine running 6 IMPORTANT ONLY OPERATE THE AIR COMPRESSOR IN WELL VENTILATED AREAS AIR TANK PRECAUTIONS IMPORTANT a The air source kit air tank is rated for 200 PSI maximum working pressure Do not overfill Overfilling may result in death or serious injury b Tank is not to be used as a breathing d...

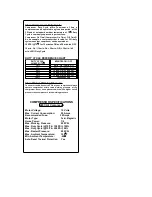
Page 4: ...n 34 Min Off 20 8 Min On 32 Min Off 25 10 Min On 30 Min Off 30 13 Min On 30 Min Off 33 15 Min On 30 Min Off 100 Continuous Duty About Rated Working Pressure To ensure trouble free service life of your compressor always operate compressor within rated working pressure of the compressor Never use a pressure switch with a higher cut off pressure than compressor s rated working pressure COMPRESSOR SPE...

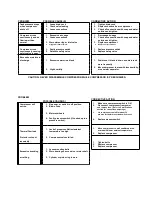
Page 5: ... drain tank more frequently 2 High humidity 2 Move compressor to area with less humidity or use water separator CAUTION NEVER DISASSEMBLE COMPRESSOR WHILE COMPRESSOR IS PRESSURIZED PROBLEM POSSIBLE CAUSE S Compressor will 1 No power or switch in off position not run 2 Blown Fuse 3 Motor overheats 4 Faulty pressure switch if hooked up to a pressure switch Thermal Overload 1 Lack of proper ventilati...

Page 6: ... or for repairs return the complete unit to retailer from whom it was purchased along with proof of purchase Returns should be made within the time period and conditions of the retailer s policy for exchanges If you are unable to contact your dealer contact VIAIR directly for repairs or replacement at our option PLEASE NOTE THIS WARRANTY COVERS PRODUCT DEFECTS ONLY IT DOES NOT COVER INCIDENTAL OR ...

Reviews: