


30
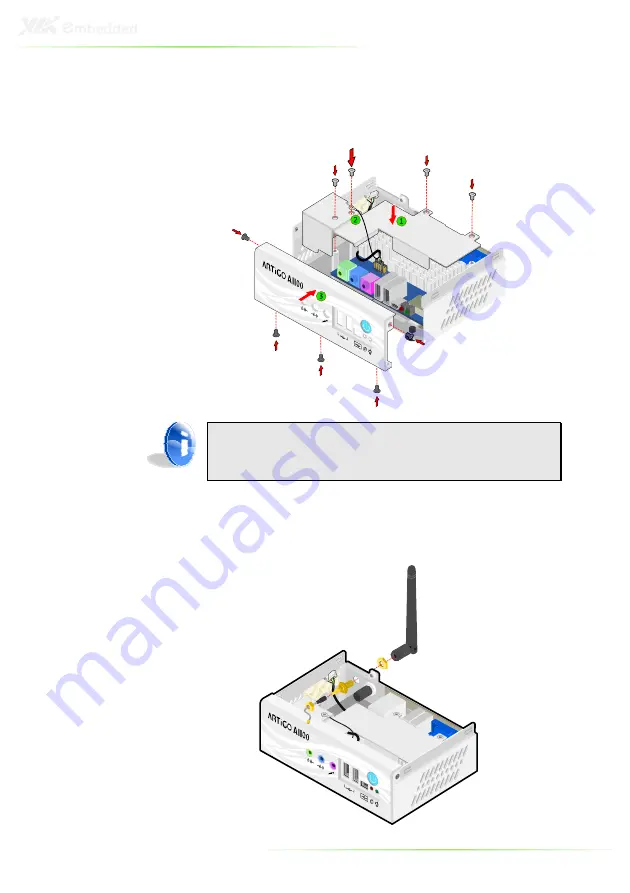
Step 5
Step 5
Step 5
Step 5
First reinstall the fan duct, and connect the grounding cable to one
of the screws of the fan duct as indicated in the figure below. Then
attach the front panel plate and secure it with screws.
Note:
Make sure the WLAN USB cable is properly routed underneath
the fan duct.
Step
Step
Step
Step 6
6
6
6
Locate the WLAN antenna hole at the rear side of the chassis and
install the WLAN antenna.
Summary of Contents for ARTiGO-A1100
Page 10: ...1 1 Product Overview ...
Page 16: ...7 ARTIGO A1100 DIMENSIONS ...
Page 17: ...8 ...
Page 18: ...9 2 Front Rear and Side I O Pin Descriptions and Functionality ...
Page 19: ...10 FRONT I O LAYOUT REAR I O LAYOUT SIDE I O LAYOUT ...
Page 23: ...14 ...
Page 24: ...15 3 Basic installation ...
Page 27: ...18 Step Step Step Step 5 5 5 5 Reinstall the memory access cover and secure it with screw ...
Page 32: ...23 Step Step Step Step 7 7 7 7 Replace the top cover onto the ARTiGO A1100 ...
Page 43: ...34 ...
Page 44: ...35 4 BIOS Setup This chapter gives a detailed explanation of the BIOS setup functions ...
Page 51: ...42 IDE DRIVES Primary IDE Master Primary IDE Slave SATA Device ...
Page 56: ...47 CHIPSET ACPI CONFIGURATION USB Device Wakeup Function Settings Disabled Enabled ...
Page 66: ...57 Interrupt 19 Capture Settings Disabled Enabled ...
Page 73: ...64 PCI Delay Transaction Settings Disabled Enabled WATCH DOG Settings Disabled Enabled ...
Page 75: ...66 ...