


Digital Video Recorder Quick Start
Guide
16
Chapter 3 Menu Operation
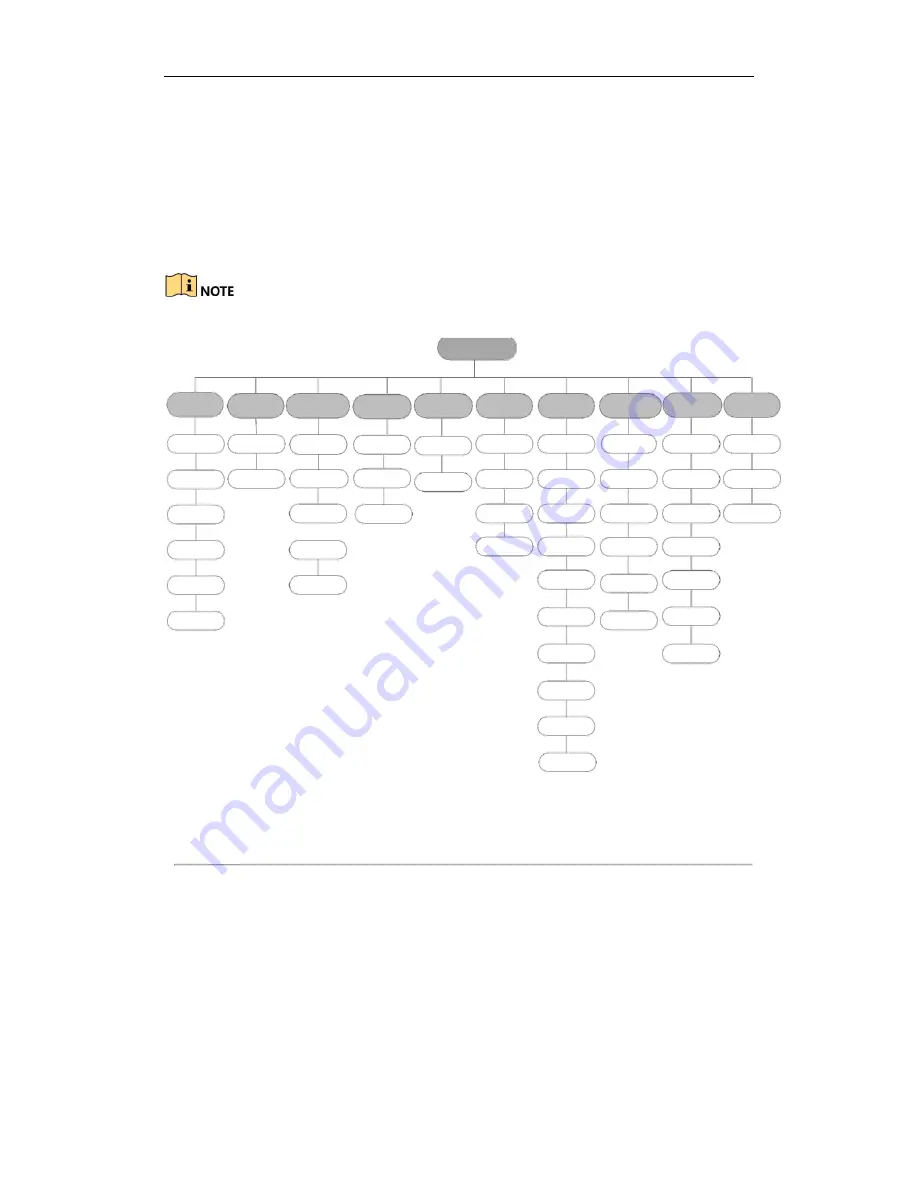
3.1 Menu Structure
The menu structure varies according to different models.
Figure 3. 1 Menu Structure
3.2 Startup and Shutdown
Proper startup and shutdown procedures are crucial to expanding the life of the DVR. To start your DVR:
1.
Check the power supply is plugged into an electrical outlet. It is HIGHLY recommended that an
Uninterruptible Power Supply (UPS) be used in conjunction with the device. The Power button) on
the front panel should be red, indicating the device is receiving the power.
2.
Press the POWER button on the front panel. The Power LED should turn blue. The unit will begin to start.
Menu
Playback
Export
VCA Search
Manual
HDD
Record
Camera
Configuration Maintenance
Shutdown
Normal
Normal
Behavior
Search
Record
General
Schedule
Camera
General
System Info
Logout
Event
Event
Face Search
Alarm
Advanced
Parameters
OSD
Network
Log
Information
Shutdown
Plate
Search
Manual Video
Tag
Quality
D
s
Advanced
Image
Alarm
iagnostic
Import/
Export
Reboot
Smart
People
Counting
Holiday
PTZ
Live View
Upgrade
Sub-periods
Heat Map
Motion
Exceptions
Default
External
File
Privacy Mask
User
Net Detect
Video
Tampering
HDD Detect
Video Loss
VCA
Video Quality
Diagnostics


