P/N V1407-000
Model V1407
Veterinary Patient Monitor
User Manual
Page 1: ...P N V1407 000 Model V1407 Veterinary Patient Monitor User Manual ...
Page 2: ...s of quality in our manuals we ask for your comments on this manual s accuracy organization clarity and usefulness Please send any comments by mail or e mail to the address below Contact Us Address Vetland Medical Sales and Services L L C 2601 Holloway Road Louisville Kentucky 40299 U S A Phone 502 671 1014 Toll Free Phone USA 1 877 329 7775 Fax 1 502 671 1019 E mail info vetlandmedical com Websit...
Page 3: ...ctrical Safety Precautions 13 Patient Safety Precautions 13 5 Standard and Optional Equipment 14 Standard Accessories 14 Optional Accessories 14 6 How to Set the V1407 15 Precautions for Settings 15 Verify Before Use 15 Maintenance and Cleaning After Use 15 7 V1407 Components 16 Monitor Front Operation Panel 16 Right Side Printer Option 17 Left Side 18 Back Side 19 8 Display Symbols 20 9 Display S...
Page 4: ...gs Optional 40 Printed Data Examples 41 Loading Printer Paper 41 20 Setting Wave Color 42 21 Power Battery Specifications 43 22 ECG Measurement 45 ECG Measurement Procedure 45 ECG Lead Change 47 ECG Out Function Optional 48 23 ST Analysis 49 24 Arrhythmia Display 50 How to Analyze Arrhythmia 50 Arrhythmia Guide 51 25 Pacemaker Detection 52 26 Respiration Measurement 53 How to Measure Respiration 5...
Page 5: ...APG Measurement 68 APG Application 69 31 Temperature Measurement 70 Temperature Measurement Screen 70 How to Measure Body Temperature 70 Temperature Menu Setup Range 70 32 IBP Measurement Optional 71 IBP Measurement Screen 71 Composition of Monitoring Accessories 72 How to Connect the IBP Cable 73 Adjustment of Zero Point of the Converter 76 Table for Labels According to the Site of Measurement 76...
Page 6: ...4 Problems in IBP Measurement 84 Problems in EtCO2 Measurement 85 Problems in the Printer Measurement Optional 85 35 Product Specifications 86 36 Safety 92 Electromagnetic Emission 93 Electromagnetic Immunity 94 Recommended RF Separation Distance 96 Immunity and Compliance Level 96 37 Product Information 97 Product Warranty 97 Payment Terms 98 Shipping 98 Returned Goods Policy 98 Limitation of Lia...
Page 7: ... under the direct supervision of a licensed veterinarian The intended use of this device is to measure parameters that indicate a patient s status during veterinary procedures see Section 2 Features and Options To ensure operator and patient safety use only parts and accessories that meet the manufacturers requirements as recommended by Vetland Medical Sales and Services L L C Parts used which are...
Page 8: ...the following features Standard Features Arrhythmia Measurement ancillary use only SpO2 and Pulse Rate Measurement ECG Lead I II III Selection Body Temperature 1 Temp Pacemaker Detect Function Respiration Measurement 7 day Trend Data Saving 20 Event Data Saving NIBP Measurement ST Level Display Options End tidal Partial Pressure Respiration EtCO2 Trend Data Saving using Data Storage SD Card Body T...
Page 9: ...ymbols WARNING WARNING is used to indicate the presence of a hazard which can cause severe personal injury death or substantial property damage if the warning is ignored CAUTION CAUTION is used to indicate the presence of a hazard which will or can cause minor personal injury or equipment damage if the caution is ignored Note Symbol NOTE NOTE is used to notify the user of installation operation or...
Page 10: ...void exposure to direct sunlight Avoid placing in an area where there is a high variation of temperature Operating temperature ranges from 10 C to 35 C Operating humidity ranges from 30 to 85 Avoid using in the vicinity of an electric heater Avoid placing in an area where there is an excessive humidity rise or ventilation problem Avoid placing in an area where there is an excessive shock or vibrat...
Page 11: ...hPa 20 95 Avoid placing in an area where chemicals are stored or where there is danger of gas leakage Avoid getting dust and especially metal material into the equipment Do not modify or disassemble the equipment When not in use power off system when not connected to live AC Otherwise equipment could be damaged Disconnect the power cord by holding the plug not the cord ...
Page 12: ... it off and secure all electrical cords cables and accessories for transport Damaged cords or cables may cause fire or electric shock The computerized ECG analysis should be judged by qualified veterinary professionals and should not be the sole basis in determining necessity of treatment for a patient Data Interference may occur if the V1407 is operated in close proximity to an electrosurgical un...
Page 13: ...Compatibility Requirements The Protection grade against water is IPX 2 Patient Safety Precautions To protect the patient observe the following precautions CAUTION The analysis of arterial blood pressure measurements should be judged by qualified veterinary professionals Arterial blood pressure may be influenced by a patient s posture physical condition and other factors such as a patient s movemen...
Page 14: ... Sensor Rectal Type Pediatric 1 ea NIBP Hose 1 ea User s Manual 1 ea Blood Pressure Cuff Type 2 3 4 Total 3 pieces Power Cord 1 ea Optional Accessories ECG Cable 5 lead type SpO2 Extension Cable SpO2 Rectal Sensor IBP Sensor Printer Module Roll Paper EtCO2 Kit Set EtCO2 Module Product Battery Trolley Cart Wall Mount Cuff for a small patient dog cat Temperature Sensor Disposable SpO2 Sensor Ground ...
Page 15: ...s well as any products noted in 4 Safety Precautions Verify Before Use Verify the following before measuring the patient s condition Verify that there is no mechanical risk Verify all cable and sensor attachments are secure Maintenance and Cleaning After Use Clean the monitor at least once a month using a soft cloth Do not use thinner ethylene oxidant or lacquer since these may damage the product ...
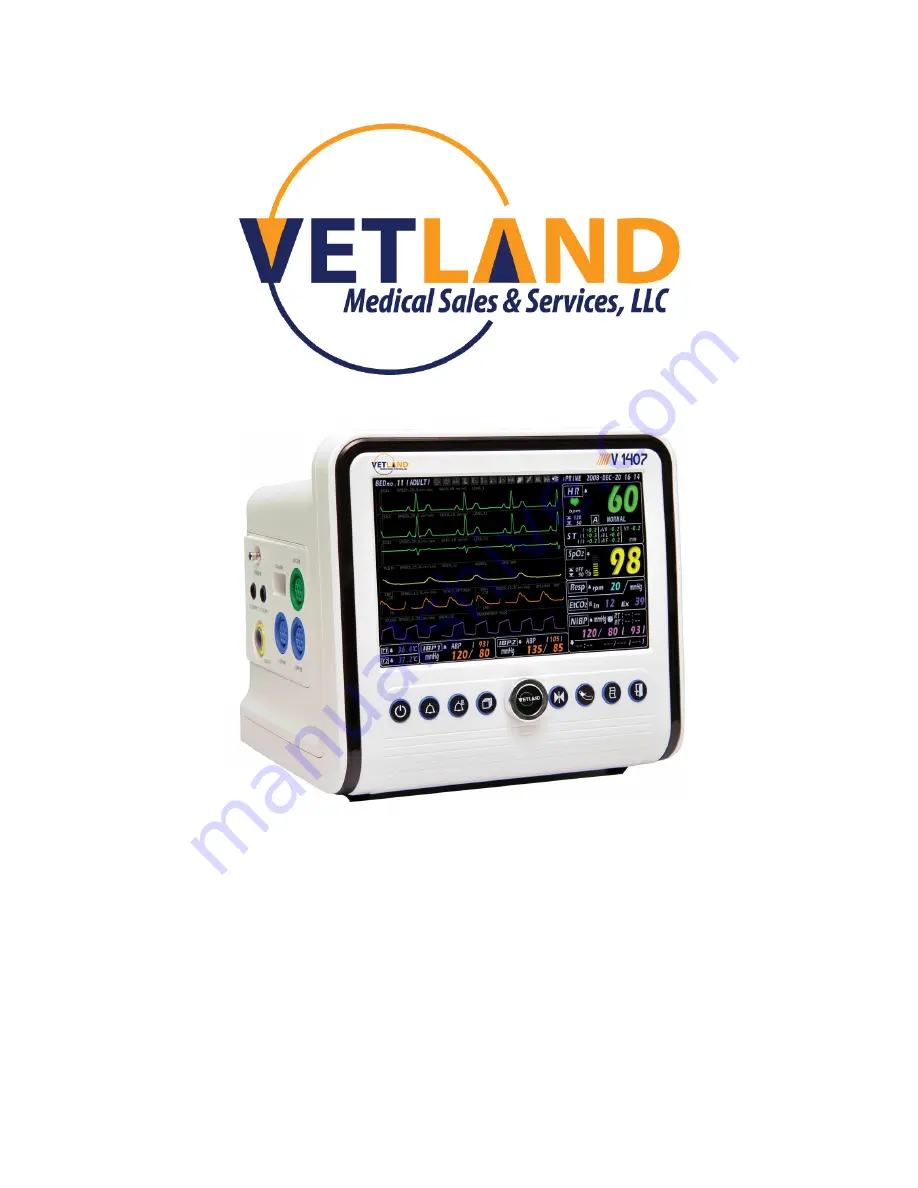
Page 16: ...nitor Front Operation Panel No Description No Description 1 Power Button 6 Freeze Button 2 Alarm ON OFF Button 7 NIBP Start Stop Button 3 Event Save Button 8 Print Start Stop Button 4 Screen Button 9 Exit Button 5 Menu Button 7 1 2 3 4 5 6 8 9 ...
Page 17: ...V1407 User Manual 17 Right Side Printer Option No Description No Description 1 Print Feed Button 3 Print Power LED 2 Print Error LED 4 Print Door 1 2 3 4 ...
Page 18: ... RESP Connection Terminal 5 TEMP 2 Connection Terminal Option 2 SpO2 Connection Terminal 6 CO2 Module Connection Terminal Option 3 NIBP Connection Terminal 7 IBP1 Connection Terminal Option 4 TEMP 1 Connection Terminal 8 IBP2 Connection Terminal Option 1 3 4 5 6 7 8 2 ...
Page 19: ...V1407 User Manual 19 Back Side No Description No Description 1 Handle 5 RS232 Port 2 Ground Pole 6 LAN Port 3 MAIN Power Switch 7 ECG Out Port Option 4 AC Power Input Port 8 SD Card Slot 1 2 3 4 5 6 7 8 ...
Page 20: ...ention Warning Consult Accompanying Documents Stop Waveforms Freeze IPX 7 Liquid Protection Grade Non Invasive Blood Pressure Manual Measurement NIBP TEMP 1 2 Temperature Start Printing Printer CO2 Input Gas Input Initial Screen Exit IBP 1 2 Invasive Blood Pressure Ground ECG RESP Electrocardiograph Respiration COM1 Use for Program Upgrade NIBP Non Invasive Blood Pressure LAN Use for Central Monit...
Page 21: ... 4 Date Time 14 NIBP Measurement end time 24 Temp Measurement 5 Heart Rate Measurement 15 NIBP Systolic 25 RESP Wave 6 Heart Rate Alarm Limits 16 NIBP Diastolic 26 IBP Wave 7 Arrhythmia Pacemaker Detect 17 NIBP Mean 27 SpO2 Wave 8 ST Segments Detect 18 NIBP PR Measurement 28 ECG Wave 9 SpO2 Alarm Limits 19 NIBP before Measurement 10 SpO2 Measurement 20 IBP PR Measurement 1 2 3 4 5 6 7 8 9 10 11 12...
Page 22: ...een Use for ECG 5 Leads Cable 3 ESN Screen 4 Numeric Screen 5 Trend Screen 6 Event Screen NOTE Main Screen Displays Full parameters ECG 7 Leads Screen Displays 7 Lead I II III aVR aVL aVF V Waveforms ESN Screen Displays ECG SpO2 NIBP Respiration and Temperature Parameters Trend Screen Displays Trend Data Event Screen Displays Alarm Data Points for up to 20 Events ...
Page 23: ...interval O V P NIBP Over Pressure Flashes at 1 second interval NIBP Auto Pressurization Fixed IBP1 Lead Fault Flashes at 1 second interval IBP2 Lead Fault Flashes at 1 second interval Temp1 Lead Fault Flashes at 1 second interval Temp2 Lead Fault Flashes at 1 second interval EVENT Save During the save Fixed If data saved Flashes at 1 second interval Alarm OFF Fixed when Alarm OFF is set Alarm Susp...
Page 24: ...t is displayed as values and waveforms on the LCD screen 4 Refer to the table below for the details of how to measure each parameter Parameter Page ECG Measurement 45 Respiration Measurement 53 Blood Pressure Measurement NIBP 57 SpO2 Measurement 65 Body Temperature Measurement 70 IBP Press Measurement Option 71 EtCO2 Measurement Option 78 5 To turn the monitor off press the power button for 1 2 se...
Page 25: ...s the alerting sounds are repeated Low Alarm In Low alarm Alert sound rings 2 times After 20 seconds the alerting sounds are repeated Information Alarm The information alarm rings to notify you of any announcements or if there has been an error measurement The information alarm resembles a chime bell and rings at an interval of 15 seconds to alert the user The information alarm rings for the follo...
Page 26: ...wise or counterclockwise to select the parameter To change from high to low alarm range press the Menu button 3 To set the priority level of the alarm choose Lowest Middle or High and press the Menu Button 4 Press the Exit button when finished NOTE Each patient parameter being measured may have its alarm settings adjusted as described above ...
Page 27: ...g Systolic 50 350 OFF OFF 50 350 Diastolic 50 350 OFF OFF 50 350 Mean 50 350 OFF OFF 50 350 IBP 2 mmHg Systolic 50 350 OFF OFF 50 350 Diastolic 50 350 OFF OFF 50 350 Mean 50 350 OFF OFF 50 350 RESP bpm 0 200 OFF OFF 0 200 Apnea OFF 10 40 every 5 seconds NIBP mmHg Systolic 5 275 OFF OFF 0 275 Diastolic 5 275 OFF OFF 0 275 Mean 5 275 OFF OFF 0 275 TEMP 1 2 C 0 1 C 50 C OFF OFF 0 1 C 50 C EtCO2 mmHg ...
Page 28: ...g Date and Time 4 Trace 3 2 Trace 1 5 Trend Data 3 Trace 2 6 Selection Bar NOTE Alarm interval displays in red Data prints out 5 previous readings and 5 subsequent readings as well as the current reading Example If setting is 10 minutes 11 data will print out every 10 minutes 1 2 3 4 5 6 ...
Page 29: ...ress the Menu button and select TRACE on the Trend menu NOTE The V1407 supports graph trend data allowing you to easily check a patient s status Trend data can be saved for 7 days in 1 minute intervals You may utilize an SD Card to save more patient data 3 To set the trend data interval time select the 1 5 or 10 minute interval on the Trend menu ...
Page 30: ...cting this option 5 To change to the Main screen after the trend data check select RETURN and press the Screen button one time TREND Menu Range Description TRACE TRACE 1 3 Select Select the Wave Trend Data INTERVAL 1 5 10 Minute Search bar select the time interval unit INITIAL EXECUTE Delete Trend data TREND LOAD SAVE LOAD Loads Trend Data on the SD Card SAVE Saves Trend Data to the SD Card ...
Page 31: ...t TREND SAVE Note A FAIL NO SD CARD message is displayed if an SD CARD is not inserted 2 To load Trend Data from SD Card insert SD Card to the SD Card port on the back of the monitor Then press the Menu button on the Trend screen and select TREND LOAD Note When the SD CARD is not inserted a FAIL NO SD CARD message is displayed A FAIL NO FILE message is displayed if data was not saved to the SD Car...
Page 32: ...Trace 3 wave 4 Event Date and Time 10 Trace 2 Wave 5 Arrhythmia Display Window 11 Trace 1 Wave 6 Event Data Note Data is saved for up to 20 events The event data for the 21st event overwrites the 1st event When an alarm occurs event data is automatically saved To save manually press Event Save button Event wave data points are saved for 15 seconds 1 2 3 4 5 6 8 9 11 7 12 ...
Page 33: ...utton and pressing the Menu button one time 2 Check the saved wave at 0 2 second intervals by rotating the Menu button clockwise or counterclockwise 3 Pressing the Menu button scrolls through each Event logged Note Pressing the Menu button displays screens in the following order Event Data List Wave Window Event Menu Wave Window 3 To select the desired parameter select TRACE on the Event menu ...
Page 34: ... the length of the printer paper You can print in 25 mm increments from a length of 150 mm to 300 mm 5 To delete Event Data select INITIAL on the Trend menu Caution If you select EXECUTE all of the trend data will be deleted Make sure you intend to delete the data before selecting EXECUTE 6 To change to the Main screen after an event data check select Return and press the Screen button once ...
Page 35: ...wise By following the steps above you can change the setting of each parameter within the SETUP menu Setup Menu Range Description BED NUMBER 01 99 Input Bed Number SOUND VOL 0 100 10 unit increments Set Beep and Alarm Sound BEEP SIGNAL ECG SpO2 BEEP SIGNAL setting TIME DATE YEAR 2000 2100 MONTH 1 12 DATE 1 31 HOUR 0 23 MINUTE 0 59 Input Date and Time PATIENT INFO Input hospital name patient name d...
Page 36: ..._Large VET_Small WEIGHT 15Kg Large WEIGHT 15Kg Small OPTION SET Password Select Function EtCO2 2IBP 2Temp COLOR 18 Colors Select Color of Wave Numerical Value DEMO ON OFF Demo Setting LANGUAGE English French German Italian Spanish Portugal Brazil Turkish Russian Czech Rumania Polish Select Language S W UPGRADE EXECUTE CANCEL Select to upgrade to the new software in SD card ...
Page 37: ...0 mm mV 10 mm mV SPEED 1st CH 25 mm sec 25 mm sec CONFIG CABLE 3 LEAD 3 LEAD NOTCH START START AREA 60Hz 60Hz FILTER PATIENT PATIENT ST J 80ms J 80ms ARRHYTHMIA STOP STOP PACEMAKER STOP STOP HR CALC 4 4 DEFIB SYNC OFF OFF QRS DETECT AUTO AUTO ALARM HIGH Limit 140 bpm 180 bpm LOW Limit 70 bpm 70 bpm TYPE HIGHEST HIGHEST ST LEVEL ALARM HIGH 5 0 5 0 LOW 5 0 5 0 TYPE HIGHEST HIGHEST SpO2 GAIN X1 X1 SP...
Page 38: ... 60 bpm 60 bpm LOW 5 bpm 5 bpm TYPE HIGHEST HIGHEST RESP APNES Time OFF OFF NIBP MODE MANUAL MANUAL INTERVAL 30 MIN 30 MIN STAT TIME 5 MIN 5 MIN SCREEN OFF OFF PRESSURE MAX LIMIT 280 280 VENOUS STAT 160 100 UNIT mmHg mmHg TREND SCREEN OFF SCREEN OFF ALARM HIGH 160 90 110 160 90 110 LOW 90 50 60 90 50 60 TYPE HIGHEST HIGHEST EtCO2 Gain x2 x2 Speed 6 25 mm sec 6 25 mm sec UNIT mmHg mmHg TRACE TRACE ...
Page 39: ...5 20 35 55 20 35 TYPE HIGHEST HIGHEST Central Venous Arterial Label Group CVP ALARM HIGH 10 2 4 10 2 4 LOW 2 4 0 2 4 0 TYPE HIGHEST HIGHEST Pulmonary Arterial Label Group PAP ALARM HIGH 60 4 26 60 4 26 LOW 24 4 12 24 4 12 TYPE HIGHEST HIGHEST Intracranial Group ICP ALARM HIGH 10 2 4 10 2 4 LOW 2 4 0 2 4 0 TYPE HIGHEST HIGHEST UNIT mmHg mmHg TRACE 1st CH TRACE ON TRACE ON 2nd CH TRACE ON TRACE ON ...
Page 40: ... detailed above you can select the function you want for the Printer mode Setting Mode Range of change Description SYNC Alarm Manual Alarm When exceeding the range of Alarm the patient s information is automatically printed out Manual Manual Print MODE Both Wave Trend Both The wave and text data is simultaneously printed out Wave The wave is printed out Trend Text data is printed out SOURCE Wave 1...
Page 41: ...per roll making sure that it is properly oriented Pull the paper out towards you until approximately 2 inches of paper is visible and align the paper Close the printer door CAUTION When the printer door is not perfectly closed the printer may not operate or the printout may be blurred When printing for more than 1 minute the printer may overheat In this case stop printing for at least 3 minutes Tr...
Page 42: ...olor change method 1 To change the wave color and numeric value press the Menu switch one time on the Main screen and select SETUP COLOR 2 Select the color of each parameter 18 Colors are available 3 After changing the color of each parameter you can save it by selecting USER1 USER2 SAVE You can recall the saved color by selecting USER1 USER2 LOAD at the menu ...
Page 43: ...y Status Indicators Battery Status Description Battery full After use 30min Requiring recharging Low battery requiring recharging Battery Recharge Operating Time Division Standard 3S1P Optional 6S1P Recharging time 6 Hours or more 9 Hours or more Operating time 90 min 180 min CAUTION During operation using AC power noise may occur in the waveform If this occurs verify that the unit is properly gro...
Page 44: ... it is not 100 recharged for use The charge discharge ration is described in the table below Charge Discharge Ration Number of Times Used 100 1200 50 500 30 200 The battery is recharged when AC power is confirmed and the main switch is on at the back of the monitor How to Change the Battery The life expectancy of the battery is nearing its end when 30 charge discharge ration is occurring Please co...
Page 45: ... performance and or provide inadequate protection during defibrillation It is possible for a patient to receive a burn due to an improperly connected electrosurgical unit Additionally the monitor could be damaged or measurement errors could occur CAUTION Disposable electrodes are not recommended as the signal will be diminished and noise will be present on the wave trace Wash patient s skin before...
Page 46: ...he candidate lead for measurement among the chest leads NOTE The pulse may be chosen from the ECG or SpO2 sensor if both are on If one of the sensors is off then the pulse reading from the remaining sensor is displayed in both ECG and SpO2 areas of the display The default setting of ECG Filter PATIENT The default setting of ECG Lead is Lead II When using an ECG 5 lead cable you need to set the Men...
Page 47: ...2 5 25 50 mm sec Sets the velocity of the ECG wave CONFIG CABLE 3 LEAD 5 LEAD Sets the type of ECG cable NOTCH START STOP Synchronizes the monitor with the frequency of the power being supplied AREA 50Hz 60 Hz Establishes the frequency being used by the monitor s power input FILTER 0 5 40 Hz Sets the analog and digital filter for the ECG wave 0 5 80 Hz 0 05 40 Hz 0 05 80 Hz MONITORING ST J 0 20 30...
Page 48: ...nnect the cable to the rear radio connector of the V1407 2 The blue waveform indicates an ECG analog signal It can be measured at the analog pin with a 1mV mV unit The pink waveform indicates an ECG pulse detect signal It can be measured at a defibrillator sink pin with a 0 5V unit 3 The ECG waveform out cable recommended by the manufacturer is described below ECG Analog Signal Defibrillator Sync ...
Page 49: ...dia for example or the presence of a pacemaker may cause distortion of the ST waveform NOTE Although studied widely in human medicine arrhythmia measurements have not been validated in veterinary medicine and are offered only as an ancillary tool NOTE The 1407 is designed to independently display the ST level for each lead view ST Level Displaying START Screen WARNING The ST level analysis should ...
Page 50: ...ncel the audible arrhythmia alarm press the EXIT button once However the message will display continuously on the arrhythmia screen CAUTION Because there are a great variety of species and rhythms do vary between species the V1407 arrhythmia analysis is only intended to be a helpful tool for which a trained qualified veterinary professional should ultimately decipher and prescribe intervention bas...
Page 51: ... state of the ventricular Ventricular Fibrillation VFIB A fibrillatory wave for 4 consecutive seconds Couplet CPT Abnormal heart rate is two times Triplet TPT Abnormal heart rate is more than three times Missed Beat MIB ECG wave is missed intermediately R on T PCV is detected before finishing T wave in the normal ECG wave NOTE The V1407 provides 13 types of arrhythmia display in two alarm levels H...
Page 52: ...as follows 1 Press the MENU button once and select ECG CONFIG PACEMAKER Select START 2 When detecting a pacemaker the pacemaker icon in the upper screen is flashing and a red bar is displayed on the ECG wave WARNING The Pacemaker detection feature should only be activated when detecting the presence of a pacemaker Note When detecting a pacemaker an alarm sounds at 1 minute intervals ...
Page 53: ... the electrodes for respiration measurement by referring to the figure below Sites for 3 lead attachment IEC AAMI Attaching site Lead Color of electrode Lead Color of electrode R Red RA White Just below the clavicle scapula near the right shoulder L Yellow LA Black Just below the clavicle scapula near the left shoulder F Green LL Red Lower area of the left side of the abdomen N Black RL Green Lowe...
Page 54: ... OFF 10 40 seconds every 5 seconds If an EtCO2 signal is detected by the monitor the Respiration Rate will be determined and displayed via the EtCO2 data as a priority over ECG respiration data Changing the Respiration Waveform 1 To change the gain of the respiration waveform press the Menu button one time and select RESP SIZE 2 To change the speed of respiration waveform press the Menu button one...
Page 55: ...rmonized with each other The beat to beat interval is a physiological phenomenon that is analyzed for possible indication of the health of the cardiac system as well as external influences to the body such as pain How to Set Up the HRV Distribution Graph 1 To set up the HRV distribution graph press the Menu button one time and select SETUP HRV SET HRV ON 2 The HRV distribution graph displays after...
Page 56: ...ser Manual 56 How to Interpret the HRV Distribution Graph Normal status Hypertension stressed sympathomimetic status Arrhythmia excitation sympathomimetic status Overstrain geriatric parasympathomimetic status ...
Page 57: ...ration equipment Choose the cuff type which is appropriate to the patient The NIBP module has an auto calibration feature which is designed to sense the ambient atmospheric air pressure every 0 5 seconds whenever the patient monitor is turned on Attention Any excessive or unnecessary pressure on the NIBP hose and NIBP cuff during power up may influence the measurement value In the case of an inacc...
Page 58: ...easurements are being taken Eliminate any outlier readings that will distort the average readings The chosen cuff size is crucial in obtaining accurate blood pressure measurements For dogs the cuff width should be approximately 40 of the appendage circumference For cats the cuff width should be approximately 30 of the appendage circumference Cuffs that are too wide will lead to false low readings ...
Page 59: ...TION Wrapping the cuff too tightly or too loosely on the measuring site may cause errors in the value Note During NIBP measurement the NIBP icon is flashing 1 Connect one end of the NIPB hose to the V1407 and the other end to the NIBP cuff 2 Position the NIBP cuff in the appropriate location for the patient being monitored See Blood Pressure Basics on page 58 3 To start measurement press the NIBP ...
Page 60: ...nterval set up by the user NOTE Automatic measurement stops and RT time converts to Stand By Mode if you press the button while automatic measurement is in progress If you want to continue automatic measuring press the button again 1 To start the automatic AUTO NIBP measurement press the Menu button once and select NIBP INTERVAL Select the desired automatic measuring time interval 2 Select AUTO ON...
Page 61: ...NIBP measurement time STAT 5 15 min 1 min interval Set the STAT MODE measurement time SCREEN Set ON OFF PRESSURE MAX LIMIT VENOUS STAT MAX LIMIT Limit value for pressure VENOUS STAT Pressure value of VENOUS STAT MODE LEAKAGE Engineer Mode UNIT mmHg kPa Set the unit of blood pressure Caution Max Limit must be matched to the patient and set above anticipated systolic pressure to allow for proper rea...
Page 62: ...et time interval 1 To start the automatic AUTO NIBP measurement select NIBP STAT TIME at Menu and select the desired measuring time 2 To measure NIBP automatically select NIBP MODE STAT 3 On the lower side of the screen the NIBP STAT screen appears and shows the measured values in order 4 Close the NIBP STAT screen by selecting NIBP STAT SCREEN OFF ...
Page 63: ...sure value 2 To exit the VENOUS STAT mode press NIBP Caution The VENOUS STAT function is only for patients whose veins are difficult to find Avoid using this function for normal patients After using the VENOUS STAT function set to AUTO or MANUAL for measurement Note VENOUS STAT controls flow of the vein for 170 seconds for VET_ Large and 85 seconds for VET_Small VENOUS STAT is able to be set to be...
Page 64: ...hod Using NIBP Trend Screen 1 Select NIBP TREND SCREEN ON on the Menu 2 The NIBP TREND SCREEN displays NIBP Trend Data Delete Method 1 Select NIBP TREND INITIAL EXECUTE on the Menu Note A total of 12 000 TREND DATA measurements can be saved on the NIBP Trend Screen ...
Page 65: ...nnected High humidity environments may damage the sensor and cause erroneous readings CAUTION Sensor accuracy may be compromised in poorly perfused patients Accuracy of the SpO2 sensor may be compromised in patients with abnormalities in the peripheral nervous system including hypothermia hypovolemia hyperdynamia of vessels or reduction in heart rate Accuracy may be compromised with patients havin...
Page 66: ...o the equipment and attach the SpO2 sensor to the patient s tongue toe webbing lip prepuce vulva or ear 2 For stable measurement minimize patient movement NOTE If measured with NIBP at the same time the SpO2 probe should be positioned on the opposite limb Concurrent use of other medical devices affecting blood flow should be avoided The probe should be attached at a site that avoids those affected...
Page 67: ...2 To change SpO2 waveform speed Press Menu button one time and select SpO2 SPEED SpO2 Menu Setup Range Setting Range for Change Description GAIN X0 25 X0 5 X1 X2 X3 X4 AUTO Set the size of SpO2 waveform SPEED 6 25 12 5 25 50 mm sec Set the speed of SpO2 waveform APG APG ON APG OFF APG display setup TRACE ON OFF Set the display of the waveform ...
Page 68: ...arterial sites altered PTT is an indirect indicator of various hemodynamic pathologies associated with aging hypertension cardiovascular disease and diabetes mellitus Accelerated plethysmography APG uses the second derivative of the photoplethysmograph SDPTG which allows more detailed analysis of the primary plethysmogram SDPTG consists of four systolic waves the a or early positive wave b or earl...
Page 69: ...he APG is expressed as a number from 1 8 The higher the number the less elastic the vessel CAUTION APG measurements should only occur in patients with heart rates below 100 BPM Heart Rates above 100 BPM are unable to be accurately compared The APG measurement has not been validated and is only a tool for diagnostic assessments ...
Page 70: ...e screen after a series of calculations Temperature Measurement Screen NOTE The temperature sensor should be sterilized between patients How to Measure Body Temperature 1 Connect the temperature sensor to the connection terminal of the measurement module and the sensor to the patient Temperature Menu Setup Range Mode Setting Range Description UNIT C F Set the unit of temperature Measured Temperatu...
Page 71: ... While the heart is contracting and relaxing the sensor measures the variations in pressure WARNING Do not reuse the disposable transducer CAUTION Only the transducer specified by Vetland Medical can be used Each IBP operates independently and requires independent setups IBP Measurement Screen No Description No Description 1 IBP Alarm Range 6 IBP LABEL 2 IBP waveform Speed 7 Maximum Pressure Systo...
Page 72: ...V1407 User Manual 72 Composition of Monitoring Accessories ...
Page 73: ...or interface NOTE To remove the converter from the cable press the tab gently inside the clear cover and then separate the reusable interface cable 3 In a clean environment open the package to check if all parts are well connected and if the handle of the stopcock is positioned properly All side ports of the stopcock are protected by the outlet plugs and may not be removed until the system is full...
Page 74: ...et or a needle inserted into the injection port in the back Air should not be allowed to enter the patient line 3 Before inputting the solution into the infusion set press both sides and fill the drip chamber partially 4 Operate the flush device gently Since air rises from the bottom make sure that the solution is in the bottom at all times 5 Prime the side ports and the plug of the zero point sto...
Page 75: ...Hg if it is completely spread out The solution bag should be placed at a higher position than the converter and the pressing tube in order to prime using gravity CAUTION Air inside the pressure system seriously jeopardizes patient safety and accuracy of readings Care should be taken not to let air bubbles inside the 3 way outlet stopcock or the cannula reflush to the patient To check confirm if th...
Page 76: ...e 2 In the IBP Menu select IBP Zero CH 1 or CH 2 START Table for Labels According to the Site of Measurement Label Site Measurement ABP Arterial Blood Pressure Artery group throughout the whole body systemic CVP Central Venous Pressure Central vein atrium group ICP Intracranial Pressure Intracranial group PAP Pulmonary Arterial Pressure Pulmonary artery group ...
Page 77: ...range according to level UNIT mmHg kPa Set the unit of IBP measurement ZERO ON Adjust the zero point of the transducer SCALE OPTIMUM FIXED Set the wave scale TRACE ON OFF Set the display of waveform Adjust the zero point of the transducer In order to obtain accurate results make sure to adjust the zero point of the transducer before measuring a patient Fixed Basic value according to the establishe...
Page 78: ...e scavenging system to evacuate the anesthetic gases discharged by the patient CAUTION The gas inspiring vacuum pressure negative pressure of the gas elimination system should not exceed the pump outlet standard of the V1407 1 0 mmHg Excessive pressure will display an OCCULSION message and it may damage the V1407 pump During zeroing the air elimination system should be operating Sampling lines and...
Page 79: ...during measurement EtCO2 calibration cannot be performed while in measurement mode Before performing calibration remove the sample line from the patient and verify that a NO BREATHS DETECTED message has appeared before proceeding 1 To set EtCO2 zeroing press the Menu switch one time on the Main screen and select EtCO2 CALIBRATE 2 To operate Calibration select ZERO at the CALIBRATE Menu A ZERO IN P...
Page 80: ...to the CO2 port until you hear a click 3 Respiration data can be achieved via ECG connections or EtCO2 measurements When the EtCO2 sensor is connected to the monitor the measurement is prioritized to pull the respiration data from the EtCO2 sensor 4 The EtCO2 and FiCO2 will be displayed on the V1407 screen 15 seconds after a successful detection of exhaled breath 5 To activate the EtCO2 trace sele...
Page 81: ...nnector into the CO2 port until you hear a click 3 Respiration data can be achieved via ECG connections or EtCO2 measurements When the EtCO2 sensor is connected to the monitor the measurement is prioritized to pull the respiration data from the EtCO2 sensor 4 EtCO2 and FiCO2 will be displayed on the V1407 screen 15 seconds after a successful detection of exhaled breath 5 To activate the EtCO2 trac...
Page 82: ...e range or the sample line is not connected properly NO BREATHS DETECTED Respiration is not detected or the sample line is disconnected from the patient CHECK ADAPTER Verify sampling line is not occluded ZERO IN PROGRESS Zero calibration is in progress ZERO REQUIRED Zero calibration is needed Zero calibration is in progress at this moment SENSOR FAULTY Sensor EtCO2 module is not connected SENSOR D...
Page 83: ...nt with a strong magnetism around the monitor 2 Check if the cable connection is stable 3 Check if the monitor is grounded Problems in ECG Measurement Problem Remedy The message LEAD FAULT is displayed 1 Verify good working condition of ECG cable and proper placement on the patient 2 Replace the ECG cable The ECG waveform is not displayed 1 Check if the cable connection is stable 2 Check if the EC...
Page 84: ...o a patient 5 Limit the patient s movement Sensor will be unable to detect a reading due to motion artifact 6 Check if the probe is damaged Problems in NIBP Measurement Problem Remedy NIBP measurement is unstable 1 Check if air has leaked out due to bending or damage of the NIBP cuff or hose 2 Check if the proper type of cuff is used for a patient 3 Check if the posture of a patient or the measure...
Page 85: ...questionable operation or possible leaks in the line Problems in the Printer Measurement Optional Problem Remedy No printing 1 Check if the message PRINTER is displayed on the screen 2 Check if the power LED lights up on the printer 3 Check if the paper is set normally 4 Check if the printer door is closed Noise during printing 1 Check if the roller is contaminated with foreign materials or if the...
Page 86: ...ation or EtCO2 Waveform Traces 7 Traces Measurement Value Display Heart Rate SpO2 Pulse Rate NIBP 2 IBP 2 Temp EtCO2 ECG Measurement ECG Wave 3 leads I II III 1 Channel 5 leads I II III aVR aVL aVF V 3 Channel 7 Channel Input Installed the circuit for protecting from the high frequency electric potential of ESU Defibrillator and so on Frequency Filter High frequency noise remove filter Install the...
Page 87: ... 2 50 69 SpO2 3 0 49 SpO2 Unspecified Alarm Range High limit 0 100 OFF Low limit OFF 0 100 Pulse Range 0 300bpm Pulse Measurement Accuracy 20 240bpm 2 bpm 241 300bpm 3 bpm NIBP Non invasive Blood Pressure Measurement Measurement Method Oscillometric Automatic measurement Display Value Systolic Diastolic Mean Pressure Measurement Range 0 300 mmHg Accuracy 8 mmHg SYSTOLIC DIASTOLIC 5 mmHg MEAN Alarm...
Page 88: ...2 channels Accuracy 1 mmHg Auto zero balancing range 200mmHg Alarm Range IBP 1 2 mmHg Display High Low Systolic 50 350 OFF OFF 50 350 Diastolic Mean TEMP Optional Measurement Range 0 50 0 Accuracy 0 C 24 9 C 0 2 C 25 0 C 50 0 C 0 1 C Alarm Range High alarm limit 0 C 50 0 C OFF Low alarm limit OFF 0 C 50 0 C EtCO2 End Tidal CO2 Optional Mainstream Initial time less than 15 seconds 25 C CO2 measurem...
Page 89: ...d only Sidestream Initial time less than 20 seconds 25 C CO2 measurement range 0 150 mmHg 0 19 7 0 20 kPa at 760mmHg CO2 resolution 0 69 mmHg 0 1mmHg 70 150 mmHg 0 25 mmHg CO2 accuracy 0 40 mmHg 2 mmHg 41 70 mmHg 5 of reading 71 100 mmHg 8 of reading 101 150 mmHg 10 of reading More than 80 BPM 12 Respiration Measurement Range 2 150 BPM Respiration Accuracy 1 BPM Required voltage 0 5 VDC 5 Temperat...
Page 90: ...CO2 7 Days trend data save Interface RS 232 port LAN Port Central Monitor SD CARD ECG Output port Option Physical Specifications Size 200 x 180 x 190 mm W x D x H Weight 3 5 kg with battery Power Requirement 1 2A 100 240V 50 60Hz Power consumption 70VA MAX BATTERY 1 Cell 11 1V 2200mAh Recharge Time 6 hours Discharge Time 90 min Operating Environment Temperature Operating 10 C 35 C Storage 10 C 50 ...
Page 91: ...e Sensor Reusable 1 ea TEMP Sensor 1 ea Operation Manual 1 ea Optional Accessories SpO2 Extension Cable SpO2 Rectal Sensor Esophageal ECG Temp Sensor IBP Sensor Printer Module Roll Paper 18M Ground Cable CUFF for a small patient dog cat Temperature sensor EtCO2 Kit set EtCO2 when installing Disposable SpO2 Sensor Battery 11 1V 4400 mAh Trolley Cart Wall Mount ...
Page 92: ...m in the presence of an electromagnetic field can cause momentary degradation of the vital signal If this occurs often Vetland suggests a review of the environment in which the system is being used to identity possible sources of radiated emissions These emissions could be from other electrical devices used within the same room or an adjacent room Communication devices such as cellular phones and ...
Page 93: ... Electromagnetic Environment Guidance RF emissions CISPR 11 Group 1 The V1407 uses RF energy only for its internal function Therefore its RF emissions are very low and are not likely to cause any interference in nearby electronic equipment RF emissions CISPR 11 Class B Harmonic emissions IEC 61000 3 2 Class A Voltage fluctuations Flicker emissions IEC 61000 3 3 Complies ...
Page 94: ...a typical commercial or hospital environment Voltage Dips Short Interruptions and Voltage Variations On Power Supply Input Lines IEC 61000 4 11 5 UT 95 dip in UT for 0 5cycle 40 UT 60 dip in UT for 5 cycle 70 UT 30 dip in UT for 25 cycle 5 UT 95 dip in UT for 5s 5 UT 95 dip in UT for 0 5cycle 40 UT 60 dip in UT for 5 cycle 70 UT 30 dip in UT for 25 cycle 5 UT 95 dip in UT for 5s Main power quality...
Page 95: ...evel in each frequency rangeb Interference may occur in the vicinity of equipment marked with the following symbol NOTE 1 At 80MHz and 800 MHz the higher frequency range applies NOTE 2 These guidelines may not apply in all situations Electromagnetic propagation is affected by absorption and reflection from structures objects and people a Field strengths from fixed transmitters such as base station...
Page 96: ... 0 1 0 37 0 36 0 06 0 73 0 11 1 1 17 1 16 0 18 2 33 0 35 10 3 69 3 68 0 55 7 37 1 11 100 11 66 11 66 1 75 23 33 3 50 For transmitters rated at a maximum output power not listed above the recommended separation distance d in meters m can be estimated using the equation applicable to the frequency of the transmitter where p is the maximum output power rating of the transmitter in watts W according t...
Page 97: ...is subject to the following conditions Merchandise returned for warranty credit or replacement must have been purchased from Vetland within the specified warranty period or proof of installation within that time will be required Vetland must promptly be notified upon detection of the defective product or material If the defective product or material cannot be repaired at the customer s site it mus...
Page 98: ...uthorization number will be issued by Vetland This number must appear on the label packing slip and any other related documents Goods received without authorization will be refused at Vetland s receiving dock and retuned at customer s expense Returned Goods Policy When requesting authorization to return merchandise the following information should be provided Customer purchase order number and dat...
Page 99: ...ts are ONLY to be used for VETERINARY purposes Vetland products are not designed to be used for human patients Vetland s liability whether arising out of or related to manufacture and sale of the goods their installation demonstration sales representation use performance or otherwise including any liability based upon Vetland s Product Warranty is subject to and limited to the exclusive terms and ...