background image

English

   - 57 -

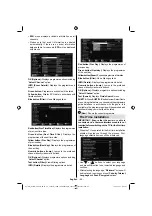
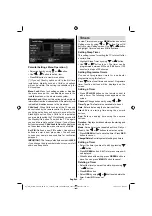
Parental Settings Menu Operation 

(*)

Select an item by using “

• 

” or “ ” button. 

Use “

• 

” or “ ” button to set an item. 

Press

• 

 OK

 button to view more options.

(*) If you set Country option as UK in the 

fi

 rst  time 

installation, Maturity Lock and Child Lock options 
will not be visible. This setting is available only for 
EU countries.

Menu Lock

: Menu lock setting enables or disables 

the menu access. You can disable access to the 
installation menu or the whole menu system. 

Maturity Lock

: When set, this option gets the maturity 

information from the broadcast and if this maturity level 
is disabled, disables access to the broadcast.

Child Lock

: When Child Lock is set, the TV can only 

be controlled by the remote control. In this case the 
control panel buttons will not work, except for the 
Standby/On button. When Child Lock is activated 
you are able to switch the TV into Standby mode with 
the Standby/On button. To switch the TV on again, 
you need the remote control. Hence, if one of those 
buttons is pressed, 

Child Lock Is On

 will be displayed 

on the screen when the menu screen is not visible.

Set PIN

: De

fi

 nes a new PIN number. Use numeric 

buttons to enter a new pin number. You will need 
to code your new pin a second time for veri

fi

 cation 

purposes.

IMPORTANT

: The factory default pin number is 

0000

if you change the pin number make sure you write it 
down and keep it safe.

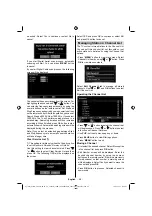
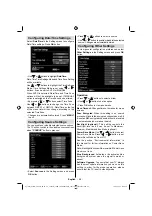
Timers

To view Timers menu, press 

MENU

 button and select 

Settings icon by using “ ” or “ ” button. Press OK 
button to view Settings menu. Use “ ” or “ ” button 
to highlight Timers and press 

OK

 to continue:

Setting Sleep Timer

This setting is used for setting the TV to turn off after 
a certain time.

Highlight Sleep Timer by using “

• 

” or “ ” button.

Use “

• 

” or “ ” button to set. The timer can be 

programmed between 

Off

 and 

2.00

 hours (120 

minutes) in steps of 30 minutes.

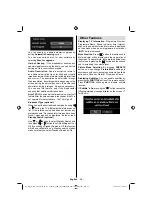
Setting Programme Timers

You can set programme timers for a particular 
programme using this feature.

Press “ ” button to set timers on an event. Programme 
timer function buttons will be displayed on the 
screen.

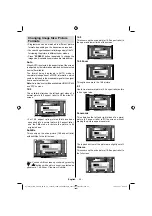
Adding a Timer

Press 

• 

YELLOW

 button on the remote control to 

add a timer. The following menu appears on the 
screen: 

Channel

: Changes channel by using “ ” or “ ”.

Timer Type

: This feature is unavailable to be set.

Date

: Enter a date using the numeric buttons.

Start:

 Enter a starting time using the numeric 

buttons.

End

: Enter an ending time using the numeric 

buttons.

Duration

: Displays duration between the starting and 

ending time.

Mode

: Sets a timer to be repeated as Once, Daily or 

Weekly. Use “ ” or “ ” buttons to select an option.

Press 

• 

GREEN

 button to save the timer. Press 

RED 

button to cancel.

Change/Delete:

Controls parental settings on timers.

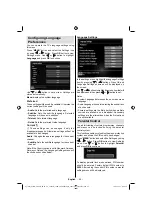
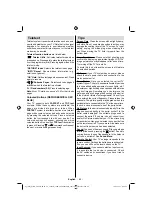
Editing a Timer

Select the timer you want to edit by pressing “

• 

” 

or “ ” button. 
Press 

• 

GREEN

 button. Edit Timer menu screen will 

be displayed.
When 

fi

 nished with editing, press 

• 

GREEN

 button to 

save. You can press “

MENU

” button to cancel.

Deleting a Timer

Select the timer you want to delete by pressing “

• 

” or “ ” button. 
Press 

• 

RED

 button.

Select 

• 

YES

 by using “ ” or “ ” buttons to delete the 

timer. Select 

NO

 to cancel. 

02_[GB]_MB61_5110UK_IDTV_TC_32883W_100Hz_PLATINIUM4_10075207_50199197.indd   57

02_[GB]_MB61_5110UK_IDTV_TC_32883W_100Hz_PLATINIUM4_10075207_50199197.indd   57

18.08.2011   17:40:33

18.08.2011   17:40:33

Summary of Contents for 32PF7883

Page 1: ...2 2 KULLANIM KILAVUZU OPERATING INSTRUCTIONS 32PF7883 32 LCD TV...

Page 2: ...ksiyonlar 17 Kanal Y netimi Kanal Listesini S ralama 17 Ekran Bilgileri 17 Ortam Taray c Kullanarak Medya Oynat c 17 USB zerinden Foto raf G r nt leme 18 Ortam Taray c Ayarlar 19 G r nt Boyutunu De i...

Page 3: ...a satarken veya verirken bu kullan m talimatlar n da mutlaka birlikte verin Bu r n se ti iniz i in te ekk r ederiz Bu k lavuz TV nizi do ru al t rmak i in sizi y nlendirecektir TV yi al t rmadan nce l...

Page 4: ...gerekmektedir Y ld r m F rt na ve y ld r m halinde veya tatile karken g kablosunu prizden kar n z Yedek Par alar Yedek par a gerekti inde servis teknisyeninin retici taraf ndan belirtilen veya asl yl...

Page 5: ...ans Bildirimi opsiyonel Dolby Laboratories in lisans ile retilmi tir T CAR MARKA B LG S Dolby ve ift D sembol Dolby Laboratories in ticari markalar d r Bekleme A ma d mesi bu cihaz n ba lant s n ebeke...

Page 6: ...imini azaltacakt r Uzun s re boyunca televizyondan uzak olacaksan z televizyonun elektrik ba lant s n kesin Televizyonu Enerji Tasarruf Modu ile kullanmak bekleme modunda b rakmak yerine televizyonun...

Page 7: ...23 OK Se Tut TXT modunda Kanal Listesi 24 Sesi Artt r Azalt 25 Y n Tu lar 26 AV Kaynak 27 nceki Program 28 Mavi tu 29 Sar tu 30 lev Yok 31 Altyaz a k kapal TXT Altyaz Analog TV 32 modu Altyaz Ortam T...

Page 8: ...Giri leri YPbPr 3 bile en g r nt ba lant s yapmak i in kullan l r Bile en videosunu ve ses soketlerini bile en k olan bir ayg ta ba layabilirsiniz Bile en video kablolar n TV zerinde bulunan B LE EN...

Page 9: ...kabul edebilir Bir HDMI den HDMI ba lant s i in ses ba lant s na gerek yoktur HDMI 2 HDMI Giri i 9 HDMI 3 HDMI Giri i 10 Ba lant lar Yan Konekt rler CI Yuvas CI kart n yerle tirmek i in kullan l r CI...

Page 10: ...USB giri lerini ayn anda kullanarak TV nize iki USB cihaz ba layabilirsiniz Not Baz hard disk s r c lerin desteklenmiyor olmas m mk nd r Yan HDMI Ba lant s HDMI konekt r olan bir cihaz TV nize ba lam...

Page 11: ...DVD alar LCD TV nize ba lamak isterseniz TV setinizin konekt rlerini kullanabilirsiniz DVD alarlar n farkl konekt rleri olabilir L tfen daha fazla bilgi i in DVD alar n z n talimat kitab na bak n z H...

Page 12: ...lar da vard r Yaln zca dijital teletekst yay n yapan bir kanal izlerkenki izleme oran resim ekli daha nceki g r nt deki izleme oran ile ayn d r tu una yeniden bast n zda dijital teletekst ekran g r nt...

Page 13: ...arak EPG verilerini g sterir Mavi tu Filtre Filtreleme se eneklerini g sterir K rm z tu nceki Zaman Dilimi nceki zaman diliminin programlar n g sterir Ye il tu Sonraki Zaman D limi Sonraki zaman dilim...

Page 14: ...tfen uzaktan kumanda zerinde OK tu una bas n z a a daki mesaj ekranda g r necektir Evet veya Hay r se ene ini se mek i in eyi veya tu lar n kullanarak vurgulay n ve OK tu una bas n Sonras nda ekranda...

Page 15: ...tal etmek i in No Hay r se ene ini se iniz ve daha sonra OK tu una bas n z Otomatik kanal tarama tipi se ilip do ruland ktan sonra kurulum i lemi ba layacak ve ilerleme ubu u g r nt lenecektir lemi ip...

Page 16: ...jital Kablo taramas i lemini ba lat rsan z u ekran g r nt lenir Bu ekrandan frekans aral klar n se ebilirsiniz Sat rlar se mek i in veya d mesini kullanabilirsiniz Uzaktan kumandadaki n merik tu lar k...

Page 17: ...mek se imini kald rmak i in YE L tu a basabilirsiniz bir kanal se mek se imini kald rmak i in SARI tu a basabilirsiniz Silmek istedi iniz kanal se ip Delete Sil se ene ini se iniz Devam etmek i in OK...

Page 18: ...lar bilgi eridinde g r nt lenecektir Bilgi eridi se ilen kanal ve izlenmekte olan programlar hakk nda baz bilgiler verir Kanal ad kanal liste numaras ile birlikte g r nt lenir pucu Program verilerini...

Page 19: ...ullan larak se ilen dosyaya atlan r OK Se ilen resmi tam ekran olarak g r nt ler Slayt g sterisi tu T m resimlerin slayt g sterisini ba lat r KIRMIZI Dosyalar tarih olarak s ralar YE L K k resimlerde...

Page 20: ...ayarlar Alt Yaz Konumu Alt yaz konumunu yukar ya da a a ayarlar Alt Yaz Boyutu Alt yaz yaz boyutunu ayarlar maks 54 punto G r nt Boyutunu De i tirme Resim Formatlar Farkl yak nla t rma modlar nda res...

Page 21: ...mak i in veya tu unu kullan n z kmak i in MEN tu una bas n z Pixellence Tan t m Modu G r nt men s nde Mod se ene i vurgulan rken Pixellence tan t m modu men ekran n n alt nda g sterilecektir Pixellenc...

Page 22: ...un Konumu a k olarak se ildi inde daha iyi g r nt kalitesi alabilmek i in geli tirilmi oyun konumu ayarlar y klenecektir Note Oyun Modu devredeyken G r nt Ayarlar men s ndeki baz eler kullan lamaz Res...

Page 23: ...yesi genellikle programlardan daha y ksektir Dinamik Bas Dinamik Bas TV cihaz n n bas efektini artt rmak i in kullan l r SRS TruSurr HD veya tu una basarak SRS TruSurr HD zelli ini se iniz veya tu una...

Page 24: ...r MEN tu una bas n ve veya tu unu kullanarak simgeyi se in Ayarlar men s n g r nt lemek i in OK tu una bas n z Conditional Access Ko ullu Eri im i vurgulamak i in veya tu una bas n z ve men elerini g...

Page 25: ...de ilken ekranda ocuk Kilidi A k mesaj g r nt lenir PIN ayarlama Yeni bir PIN numaras tan mlar Yeni bir PIN numaras girmek i in rakamsal tu lar kullan n z Do rulama maksad yla yeni PIN numaras n ikinc...

Page 26: ...ih Saat ve Saat Dilimi se enekleri ayarlanamaz MAN ELse ene i se ilirse Saat Dilimi de i tirilebilir veya tu una basarak Zaman Dilimi se ene ini se iniz Saat Dilimini GMT 12 veya GMT 12 aras nda de i...

Page 27: ...anabilirsiniz Otomatik TV Kapama Otomatik kapatma zelli inin zaman a m de erini ayarlayabilirsiniz Zaman a m de erine ula ld ktan ve se ilen zaman boyunca TV al t r lmam sa TV kapanacakt r Yay n T r s...

Page 28: ...ini l tfen unutmay n LCD TV de g r nt ard kl k sa bir zaman sonra kaybolabilir Bir s reli ine TV yi kapatmay deneyiniz Bunu engellemek i in ekran uzun s re boyunca hareketsiz g r nt de b rakmay n z G...

Page 29: ...T 1 PAL 50 60 O NTSC 60 O RGB 50 O RGB 60 O EXT 2 SKART 2 PAL 50 60 O NTSC 60 O RGB 50 X RGB 60 X SIDE AV PAL 50 60 O NTSC 60 O YPbPr 480I 60Hz O 480P 60Hz O 576I 50Hz O 576P 50Hz O 720P 50Hz O 720P 6...

Page 30: ...H 264 MPEG1 2 4 EAC3 AC3 mp4 MPEG4 Xvid 1 00 Xvid 1 01 Xvid 1 02 Xvid 1 03 Xvid 1 10 beta1 2 H 264 PCM MP3 avi MPEG2 MPEG4 PCM MP3 MAKS 1920x1080 30P 20Mbit sn Xvid 1 00 Xvid 1 01 Xvid 1 02 Xvid 1 03...

Page 31: ...eltme modu E er Y kseltme Se enekleri Upgrade Options men s nde Otomatik Tarama varsa TV 03 00 de a l r ve yeni yaz l m y kseltmeleri i in yay n kanallar n arar E er yeni bir yazl m bulunur ve ba ar y...

Page 32: ...35818 6 ve UK DTT profili ile nesne karusel destek uyumlulu u sadece UK Birle ik Krall k Frekans aral Sadece ngiltere modelleri i in 474 850 MHz ii VIDEO H 264 MPEG 4 k s m 10 ana ve y ksek seviye 4 1...

Page 33: ...z ye il veya mavi olabilir Tip 2 S rekli s n k alt piksel siyah bir ekilde g r n r ISO 13406 2 standard na g re a a daki zet tablo alt piksel hatalar i in belirlenmi tir Tipi A klama Adet Not Tip1 Ra...

Page 34: ...u yay nlarda resimde mozaiklenme veya resim netlik ve keskinli i az g r nt de ekranda baz efektler olu abilir Bu bir ar za de ildir E er r n n z y ksek z n rl destekleyen bir r n ise iyi bir g r nt pe...

Page 35: ...ocking a Channel 49 Managing Stations Favourites 49 Button Functions 49 Managing Stations Sorting Channel List 49 On Screen Information 50 Media Playback Using Media Browser 50 Viewing Videos via USB...

Page 36: ...device or giving it away absolutely give these direction for use Thank you for choosing this product This manual will guide you for the proper operation of your TV Before operating the TV please read...

Page 37: ...as sunshine fire or the like Lightning In case of storm and lightning or when going on holiday disconnect the power cord from the wall outlet Replacement Parts When replacement parts are required make...

Page 38: ...n Optional Manufactured under license from Dolby Laboratories TRADEMARK ACKNOWLEDGMENT Dolby and the double D symbol are trademarks of Dolby Laboratories The Standby On button doesn t separate this de...

Page 39: ...will also reduce energy consumption Disconnect power when going away for longer time Note that annually using the TV set in Power Save Mode has more power efficiency than disconnecting the TV from th...

Page 40: ...elect Hold in TXT mode Channel List 24 Volume up down 25 Navigation buttons 26 AV Source 27 Previous programme 28 Blue button 29 Yellow button 30 No function 31 Subtitle on off TXT subtitle analogue T...

Page 41: ...puts YPbPr 3 are used for connecting component video You can connect the component video and audio sockets with a device that has component output Connect the component video cables between the COMPON...

Page 42: ...the 1 channels that you subscribe to For more information see Conditional Access section Side USBs 2 Side HDMI Input is for connecting a device that has an HDMI socket 3 Headphone jack is used for co...

Page 43: ...MI DEVICE SIDE VIEW Connecting the LCD TV to a PC For displaying your computer s screen image on your LCD TV you can connect your computer to the TV set Power off both computer and display before maki...

Page 44: ...h to standby mode To power down the TV completely unplug the power cord from the mains socket Note When the TV is switched to standby mode standby LED can blink to indicate that features such as Stand...

Page 45: ...to select the previous programme Viewing Main Menu Press the V V button at the same time to view main menu In the Main menu select sub menu using AV button and set the sub menu using or buttons To le...

Page 46: ...Zoom Expands programme information Blue button Filter Views filtering options INFO Details Displays the programmes in detail Numeric buttons Jump Jumps to the preferred channel directly via numeric bu...

Page 47: ...sing numeric buttons on the remote control After this operation you can set Search Step as 8000 KHz or 1000 KHz If you select 1000 KHz the Tv will perform search process in a detailed way Searching du...

Page 48: ...x or frequency are entered manually and only that multiplex or frequency are searched for the channels After selecting search type as Digital you can enter the multiplex or frequency number using the...

Page 49: ...be displayed on the screen Select YES and press OK to continue or select NO and press OK button to cancel Managing Stations Channel List The TV sorts all stored stations in the Channel List You can e...

Page 50: ...when the desired channel is highlighted to lock unlock the channel Lock symbol will be displayed next to the selected channel Managing Stations Favourites You can create a list of favourite programme...

Page 51: ...browser screen will be displayed automatically You can play music picture and video files from the connected USB memory stick Use or button to select Videos Photos Music or Settings You can connect t...

Page 52: ...files will be filtered and listed on this screen 0 9 Numeric buttons Jumps to the selected file Play This OK button Plays the selected file Play button Plays all media files starting with the selecte...

Page 53: ...es that have been squeezed into a normal picture 4 3 aspect ratio use the 16 9 mode to restore the picture to its original shape Subtitle This zooms up the wide picture 16 9 aspect ratio with subtitle...

Page 54: ...Sets the desired colour tone Setting Cool option gives white colours a slight blue stress For normal colours select Normal option Setting Warm option gives white colours a slight red stress Noise Red...

Page 55: ...oisy picture on the screen In such a case you can use this item to get a clear picture by trial and error method Configuring Sound Settings Sound settings can be configured according to your personal...

Page 56: ...onditional Access Module IMPORTANT Insert or remove the CI module only when the TV is SWITCHED OFF In order to watch certain digital channels a conditional access module CAM can be necessary This modu...

Page 57: ...the Language Settings item by pressing or buttons Press OK and Language Settings submenu will be displayed on the screen Use or buttonstohighlightthemenuitemthatwill be adjusted and then press or but...

Page 58: ...light Timers and press OK to continue Setting Sleep Timer This setting is used for setting the TV to turn off after a certain time Highlight Sleep Timer by using or button Use or button to set The tim...

Page 59: ...l configuration preferences select Other Settings in the Settings menu and press OK button Operation Press or buttons to select an item Use or button to set an option Press OK button to view a sub men...

Page 60: ...andby Search optional Use or button to select Standby Search and then press or button to set this setting as On or Off If you change Standby Search to Off this function will be unavailable To use Stan...

Page 61: ...may disappear after a short time Try turning off the TV for a while To avoid this do not leave the screen in still picture for extended periods No Power If your TV system has no power please check the...

Page 62: ...60 O NTSC 60 O RGB 50 O RGB 60 O EXT 2 SCART 2 PAL 50 60 O NTSC 60 O RGB 50 X RGB 60 X SIDE AV PAL 50 60 O NTSC 60 O YPbPr 480I 60Hz O 480P 60Hz O 576I 50Hz O 576P 50Hz O 720P 50Hz O 720P 60Hz O 1080I...

Page 63: ...PEG2 mkv H 264 MPEG1 2 4 EAC3 AC3 mp4 MPEG4 Xvid 1 00 Xvid 1 01 Xvid 1 02 Xvid 1 03 Xvid 1 10 beta1 2 H 264 PCM MP3 avi MPEG2 MPEG4 PCM MP3 MAX 1920x1080 30P 20Mbit sec Xvid 1 00 Xvid 1 01 Xvid 1 02 X...

Page 64: ...Options menu is enabled TV wakes up at 03 00 and searches broadcast channels for new software upgrade If new software is found and downloaded successfully with next power up TV opens with new software...

Page 65: ...compliant with ISO IEC 135818 6 and UK DTT profile UK only Frequency range 474 850 MHz for UK models ii VIDEO H 264 MPEG 4 part 10 main and high profile level 4 1 MPEG 2 MP HL video decoder HD displa...

Page 66: ...e consider the following explanation about a possible sub pixel error This problem can be encountered during the production phase as well as during use Sub pixel errors are mainly 2 types Type 1 The s...

Page 67: ...broadcasts mosaic images may occur sharpness and resolution of the image may be low some effects may arise on the screen This is not a failure If your appliance supports high definition it is recommen...

Page 68: ...retici firma Vestel Elektronik Sanayi ve Ticaret A Adres Organize Sanayi B lgesi 45030 Manisa Tel 0236 233 01 31 Fax 0236 233 25 85...

Page 69: ...z n fonksiyonlar n yerine getirebilmesi i in gerekli yedek par a bulundurma s resi 10 y ld r DANI MA MERKEZi 444 4 123 www vestel com tr Vestel Dayan kl T ketim Mallar Pazarlama A Ambarl Petrol Ofisi...

Reviews: