background image

8

7

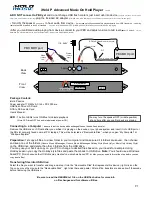
Connection of Phono Terminal And Plug

I n s t a l l a t i o n

1

Connect the output to inputs of amplifier or mixer.

3

Insert the headshell into the front part of the tone-arm. Turn thr
LOCK RING to the directoin of the arrow shown the fig until
fixing the headshell.

4

Adjustment of Overhang

As shown in the illustration, overhang indicates the distance
from the stylus to end of headhshell. Please set the distance to
50mm. If the overhang adjustment is not properly made, the
stylus will not be able to trace the record grooves correctly.

Be share not to touch stylus during adjustment
with finger.

N O T E

Be sure to connect firmly the GND terminal to
the amplifier or mixer, or a power source HUM
will result.

N O T E

Do not place the unit where it is exposed to direct sun light,
high temperature of humidity to prevent possible troubles.

Place the unit in a stable and horizontal position, where there is
little or no vibration.

Locate the unit as far away from the speakers as possible and
isolate the unit from sound radiation from them. 

If the unit is placed too close to the radio, interference to
AM/FM reception may result

INSTALLATION AND CONNECTION

ILLUSTRATION OF CONNECTION

Summary of Contents for PDX-8000

Page 1: ...011 Fax 03 3412 7013 Web www vestax co jp VESTAX America 2750N 29th Avenue Suite 115 Hollywood FL33020 Phone 954 926 6622 Fax 954 926 3304 Web www vestaxdj com VESTAX Europe Ltd Unit 5 Riverwey Industrial Park Alton Hampshire GU34 2QL England U K Phone 0 1420 83000 Fax 0 1420 80040 Web www vestax co uk ...

Page 2: ...y be of sufficient magnitude to consitute a risk of electric shock to persons The exclamation point within an equilateral triangle is intended to alert the user to the presence of important operating and maintenance servicing instructions in the literature accompanying the appliance T0 REDUCE THE RISK 0F FIRE 0R ELECTRlC SHOCK DO NOT EXPOSE THIS APPLIANCE T0 RAIN 0R M0ISTURE C A U T I O N TO PREVE...

Page 3: ... to replace your obsolete outlet Do not defeat the safety purpose of the polarized plug I MP ORTA NT SA FEG UA RD S READ BEFORE OPERATING EQUIPMENT This product was designed and manufactured to meet strict quality and sa fety standa rds T here a re however som e in stallation an d operation precautions which you should be particularly aware of 12 Power Cord Protection Power supply cords should be ...

Page 4: ...o system Accuracy of playing speed and time keeping will be completed The pitch speed is controlled by none center click pitch control fader volume The pitch fader span can be selected between 12 6 3 MOTOR OFF function is provided to cancel servo brake of the motor and REVERSE MODE will reverse the turntable thus provided STICK CONTROLLER is provided for the functions of pitch bend and FAST SLOW s...

Page 5: ...l as the best resistance to howling This new tone arm allowed A S T S to increase the resistance against the howling by over 50 compared to the normal aluminum arm REMOTE CONTROL It is possible to control two turntables remotely 1 Prepare for 3 5mm monaural phone plug cable Turn on Sync ON OFF SW 2 Connect REMOTE OUT JACK at the rear panel with another PDX 8000 REMOTE IN JACK at the rear panel by ...

Page 6: ... EACH PARTS NAME FRONT REAR BEFORE USE This unit includes the following parts 1 Turntable Unit 2 Turntable Platter 3 Slip Mat 4 Shell Weight 5 Headshell 6 Balance Weight 7 Weight Ring 8 RCA Cable 9 GND Cable 10 EP Adaptor ...

Page 7: ... turntable revolving Red R Right Channel Green R Right Channel White L Left Channel Blue L L e f t Channel 1 In accordance with the instructions of the cartridge install a cartridge properly 2 Connect the lead wires to the cartridge terminals The terminals of most cartridges are color corded Connect each lead wire to the terminal of the same color 1 Place the balance weight and weight ring on the ...

Page 8: ... able to trace the record grooves correctly Be share not to touch stylus during adjustment with finger N O T E Be sure to connect firmly the GND terminal to the amplifier or mixer or a power source HUM will result N O T E Do not place the unit where it is exposed to direct sun light high temperature of humidity to prevent possible troubles Place the unit in a stable and horizontal position where t...

Page 9: ...in the up position on the lift adjust the distance between the stylus tip and the record to between 6mm and 7mm Make sure that there is enough clearance between the elevation Arm and the adjustment screw Adjustment of Arm lift Position Be careful not to touch your finger to the stylus tip N O T E In case the balance weight moved do the adjustment of horizontal zero balance again N O T E 2 Turn the...

Page 10: ... playing record RPM Fit the EP ADAPTOR in the center spindle and start to play after fitting EP RECORDS in EP ADAPTOR This unit features a small light for illuminating the stylus It is detachable and you can remove it when not in use 7 Move the tone arm to the armrest when play is finished 8 Push the start stop button and platter will stop 9 Turn off the power In Case Of Playing EP Size Record A m...

Page 11: ...nction is FAST FORWARD FF the pitch speed is up momentarily Moving the stick controller to the right the display indicate SLO SLOW stick controller function is SPEED DOWN the pitch speed is down momentarily In quartzlock this function is still efficiency DIGITAL CONTROL 10 1 FADER PITCH SPAN SELECT SWITCH Pushing the switch fader pitch span can be selected between 3 6 12 while watching the display...

Page 12: ...Vestax Corporation SPECIFICATIONS 2001 2 Ver 02 EX ...

Reviews: