03_11
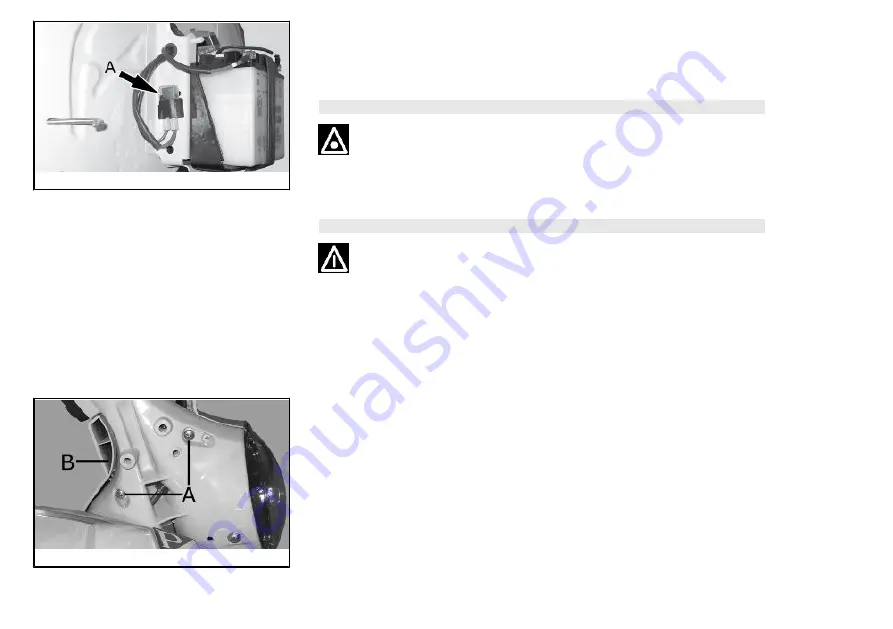
Fuses (03_11)
Both starting system and horn are protected by a 7.5 A fuse «
A
» placed on the battery
mounting left side. Before replacing the blown fuse, find and solve the problem that
caused it to blow. Do not replace the fuse with any alternative form of conductor
CAUTION
BEFORE REPLACING A BLOWN FUSE, FIND AND SOLVE THE FAILURE THAT
CAUSED IT TO BLOW. NEVER TRY TO REPLACE THE FUSE WITH ANY OTHER
MATERIAL (E.G., A PIECE OF ELECTRIC WIRE).
CAUTION
MODIFICATIONS OR REPAIRS TO THE ELECTRICAL SYSTEM, PERFORMED
INCORRECTLY OR WITHOUT STRICT ATTENTION TO THE TECHNICAL SPEC-
IFICATIONS OF THE SYSTEM CAN CAUSE MALFUNCTIONING AND RISK OF
FIRE.
03_12
Front light group (03_12)
To reach the headlight bulbs, remove the top handlebar cover, as described below.
After removing the driving mirrors, loosen the two screws, «
A
», and the two opposite
screws underneath the handlebar. Lift cover «
B
» and release the two springs which
allow extracting the bulb socket from its housing. To remove the bulbs, push down-
wards and rotate them anticlockwise. To replace warning light bulbs, it is sufficient to
pull them off.
37
3 Maintenance
Summary of Contents for PX 125
Page 4: ...4 ...
Page 6: ...6 ...
Page 7: ...Vespa PX 125 150 Chap 01 Vehicle 7 ...
Page 16: ...16 1 Vehicle ...
Page 17: ...Vespa PX 125 150 Chap 02 Use 17 ...
Page 22: ...02_06 22 2 Use ...
Page 27: ...Vespa PX 125 150 Chap 03 Maintenance 27 ...
Page 49: ...Vespa PX 125 150 Chap 04 Technical data 49 ...
Page 53: ...04_01 53 4 Technical data ...
Page 55: ...Vespa PX 125 150 Chap 05 Spare parts and accessories 55 ...
Page 58: ...58 5 Spare parts and accessories ...
Page 59: ...Vespa PX 125 150 Chap 06 Scheduled maintenance 59 ...


