COMPONENT
ACTION
OPERATION
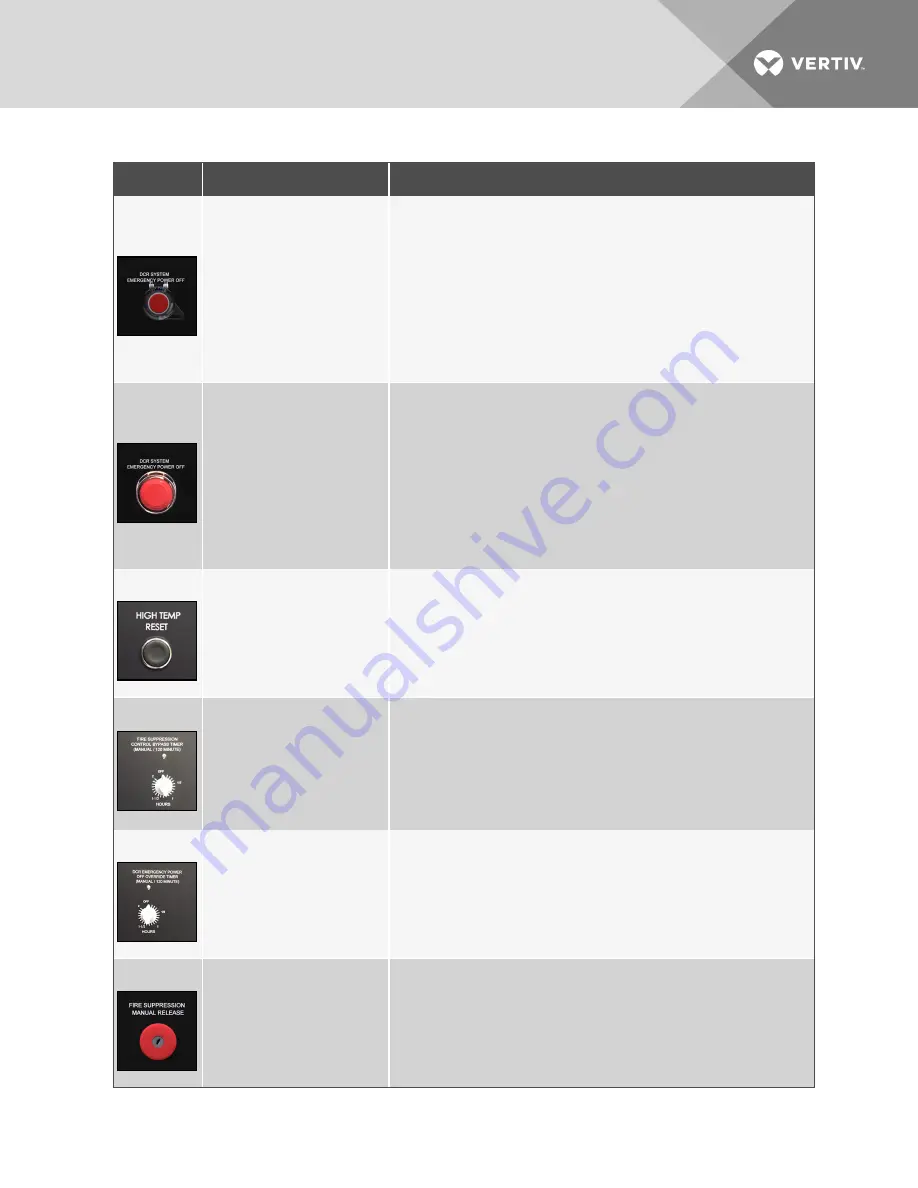
Emergency power-off
(Non-latching button)
Press the EPO button on the front
door of the Control Panel and Fire
Suppression System.
Press the Remote EPO (REPO)
button(s) if they are connected to the
system.
Note: Systems manufactured and
shipped before August 26, 2016 have
the non-latching EPO button.
The EPO button is a spring loaded, non-latching button.
To engage the EPO: Press the button once and the system shuts down.
To disengage the EPO: Press the EPO button once more.
When engaged, all cooling units, UPS(s) (if wired into EPO circuit), Fire suppression and
emergency ventilation fans (if running) power down. There are multiple ways to configure
the EPO circuit per the electrical schematic to comply with local codes, so your operation
may vary. However, all equipment can be wired to shutdown.
If equipped, the Shunt trip breaker in the load panel can be wired to open as well.
Emergency power-off
(Latching button)
Press the EPO button on the front
door of the Control Panel and Fire
Suppression System.
Press the Remote EPO (REPO)
button(s) if they are connected to the
system
Note: Systems manufactured and
shipped after August 26, 2016 have
the latching EPO button.
The EPO button is a latching button.
To engage the EPO: Press the button until it latches and the system shuts down.
To disengage the EPO: Pull-out the EPO button.
When engaged, all cooling units, UPS(s) (if wired into EPO circuit), Fire suppression and
emergency ventilation fans (if running) power down. There are multiple ways to configure
the EPO circuit per the electrical schematic to comply with local codes, so your operation
may vary. However, all equipment can be wired to shutdown.
If equipped, the Shunt trip breaker in the load panel can be wired to open as well.
Resetting emergency ventilation fans
Push the High Temp Reset button
after an event in which the fans have
activated and lowered the return air
temperature to 89°F ±3°F or lower.
Deactivates the emergency ventilation fans after the safe temperature is reached.
Allows cooling unit to reactivate when possible (Utility power restored, alarm cleared, etc.).
Resets the control logic for the Emergency Ventilation Fans for future activation.
Note: Do not reset emergency ventilation fans for at least 2 minutes after they activate to
ensure that the thermal unit’s 2-minute restart delay has expired.
Turning the fire-suppression-control
bypass timer
Turn the timer past the 1-hour
position.
Suspend the fire-detection so that maintenance can be performed on the system.
The timer provides a normally-closed circuit bypassing the internal, normally-closed relays
in the fire-suppression panel.
Once the timer expires, the circuit is returned to its normal setting (Off).
Note: You can turn the timer up to a maximum of two hours if necessary to perform
maintenance.
To continue the bypass operation, just turn the timer again when time gets low
Turning the DCR emergency
power-off override timer
Turn the timer past the 1-hour
position.
Temporarily bypass the EPO circuit. This allows manual restart of the UPS after an EPO
event.
Note: You can turn the timer up to a maximum of two hours if necessary to perform
maintenance.
To continue the bypass operation, just turn the timer again when time gets low.
Turning the key to activate the manual
fire-suppression release
If you see smoke and/or fire in the DCR system, but the smoke detector is malfunctioning,
you can manually discharge the fire suppression material into the DCR system.
Table 7.1 Component operation for the DCR Control Panel and Fire Suppression System
Vertiv
| SmartRow DCR Installer/User Guide |
63
Summary of Contents for SmartRow DCR
Page 6: ...Vertiv SmartRow DCR Installer User Guide 6...
Page 12: ...Vertiv SmartRow DCR Installer User Guide 12 This page intentionally left blank...
Page 52: ...Vertiv SmartRow DCR Installer User Guide 52 This page intentionally left blank...
Page 66: ...Vertiv SmartRow DCR Installer User Guide 66 This page intentionally left blank...
Page 70: ...Vertiv SmartRow DCR Installer User Guide 70 This page intentionally left blank...
Page 72: ...Vertiv SmartRow DCR Installer User Guide 72 This page intentionally left blank...
Page 76: ...Vertiv SmartRow DCR Installer User Guide 76 This page intentionally left blank...
Page 82: ...Vertiv SmartRow DCR Installer User Guide 82 This page intentionally left blank...
Page 101: ......


