AVOCENT® LONGVIEW™ 3000 SERIES HIGH PERFORMANCE KVM EXTENDER SYSTEMS
Quick Installation Guide
5
590-1516-501A
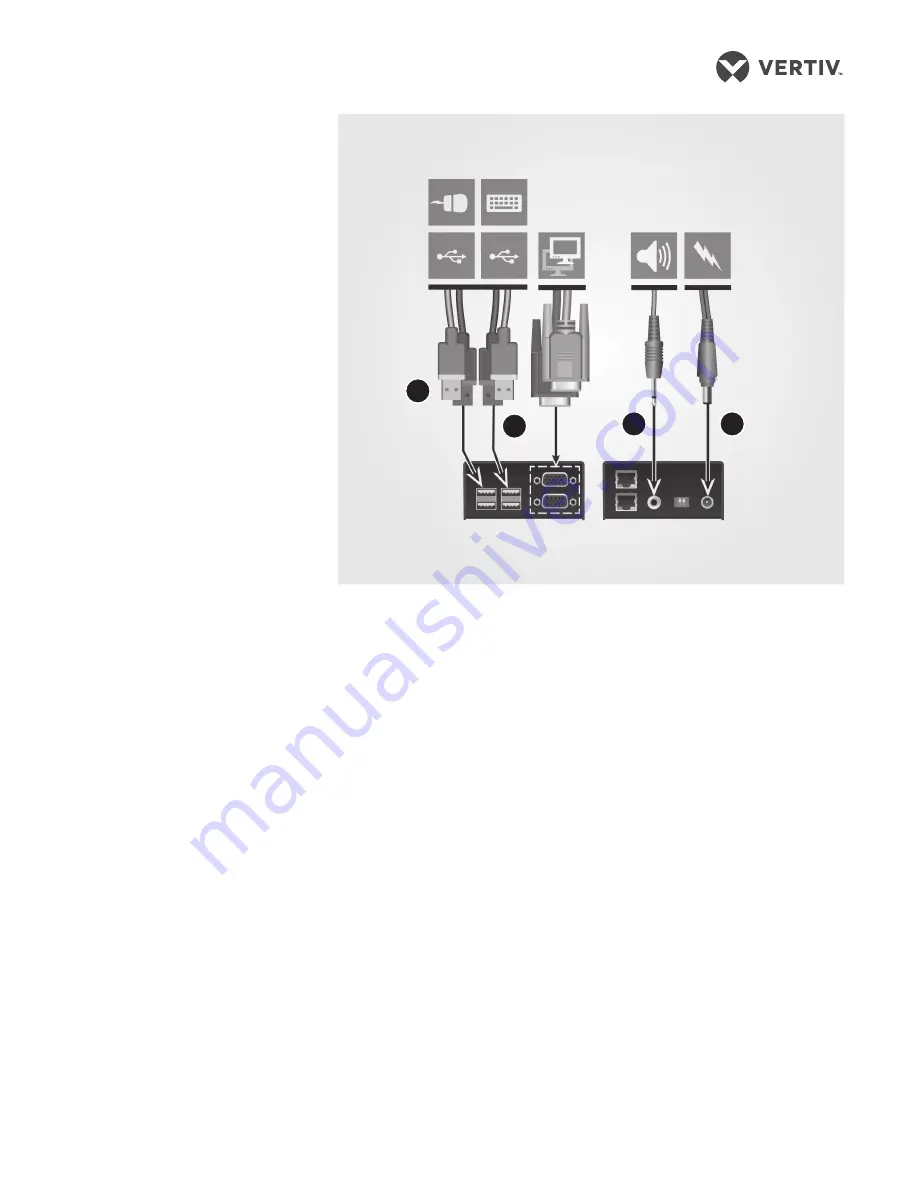
9. Connecting audio
On the right end of the receiver
extender for both models,
attach the speaker and
microphone cables to the
appropriately labeled ports.
10. Connecting receiver extender
power
For both models, assemble the
power adaptor and the power
cord. Insert one end of the
power cord into the POWER
port on the right end of the receiver
extender and plug the other end into
an appropriate power source.
11. Powering the extender
system (either model)
NOTE:
If you plan to use a dual-user
configuration, ensure steps 7-11 are
completed for both receiver
extenders.
Turn on the monitor and the receiver
extender. If the transmitter extender
is not powered by the computer, turn
it on next.
When you turn on the transmitter
extender, observe the green
LED lighting pattern on the
right side of the extender. Then,
turn on the computer.
Verifying transmitter extender
video data
It is not possible for video display
data to be transmitted from the monitor
at a receiver extender across the
transmitter extender and then to the
computer video adaptor. To compensate
for this, the LongView™ extender system
uses a DDC scheme to prompt a
transmitter extender to read and store
the data from the receiver monitor and
share it with the computer as needed.
This DDC data search takes place at the
transmitter extender video out port
when the extender is turned on and
status is shown via LEDs on the TO
RECEIVER port.
NOTE:
Dual video channels are handled
separately for LongView™ 3020
extenders. If you wish to capture DDC
data from both receiver monitors,
temporarily connect both monitors to the
Video Out ports on the transmitter
extender.
When you turn on the transmitter
extender, a green LED will flash
once to indicate that data is being
read. If the information matches what is
already stored on the transmitter
extender, normal extender
operation resumes. If the
information is different, the green
LED will flash rapidly as new
information is stored. A single flash
after that indicates that normal
operation will resume.
LED Flashing Indications
•
Two flashes: indicates a
checksum error and no
information is programmed
•
Three flashes: indicates too much
data to fit into the extender; the
extender holds no more than two
pages of DDC data
•
Rapid flashing, then four flashes:
indicates data was lost during
copying and default data was
substituted; power cycle the
transmitter extender
•
Rapid flashing, then five flashes:
indicates a checksum error
during copying and default data
was substituted; power cycle the
transmitter extender
Adjusting Receiver Extender
Video Quality
LongView receiver extenders contain a
video compensation system that allows
you to delay or advance timing of color
signals so that they arrive at the video
monitor at the correct times and
provide an optimal display of video
content. Receiver extenders feature a
miniature switch to enable Video
Compensation Mode. When you enable
this mode by moving miniature switch 1
to the ON position, the Num Lock, Caps
Lock and Scroll Lock keys on the USB
keyboard at the receiver extender will
flash in sequence. A green LED located
on the TO TRANSMITTER port on the
receiver extender will also flash.
Transmitter LongView™ Extender Receiver Module Configuration
LongView
TM
3020 Extender
Left End
Right End
8
7
9
10


