Vertiv™ NetSure™ 5100 Series -48 VDC Power System User Manual
Proprietary and Confidential © 2022 Vertiv Group Corp.
26
4.6
Reconfiguring a Dual Voltage Distribution Panel (List DA, DB, DC, DD, DE,
FA, FB, FC, FD, FE)
Perform the following procedure to reconfigure a dual voltage distribution panel (List DA, DB, DC, DD, DE, FA, FB, FC, FD, FE) to move
distribution positions from one voltage to the other.
DANGER!
Performing this procedure exposes service personnel to battery potential. Exercise extreme caution not to
inadvertently contact or have any tool inadvertently contact any energized electrical termination.
NOTE!
Save all removed hardware. Hardware will be re-used.
NOTE!
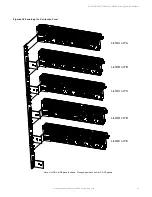
Refer to Figure 4.13 through Figure 4.18 as this procedure is performed.
Procedure
1.
Open the distribution cabinet’s front door by turning the latch in the counterclockwise position or open the system’s
enclosure door.
2.
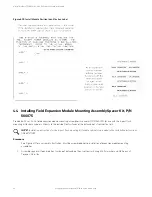
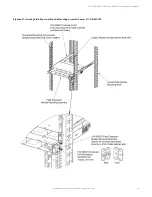
Remove the shield from the front of the distribution panel by loosening the screws securing it and lifting it up and out. Refer
to Figure 4.13.
3.
Locate the place in the distribution panel where the voltages switch form one level to another. List DA-DE panels have a gap
in position at this location.
4.
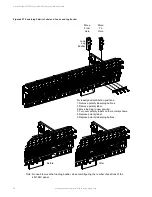
Remove the shorting busbar, FA alarm strap, and FA shorting strap from the rear of the distribution panel for the positions to
be reconfigured. Refer to Figure 4.14.
5.
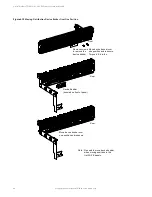
Remove the screws from the front plastic panel to remove the device busbar for the positions to be reconfigured. Move the
device busbar over one position and re-secure with the screws just removed. Refer to Figure 4.15.
NOTE!
No need to move the device busbar for the List FA-FE panels.
6.
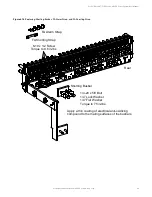
Replace the shorting busbar over one position and re-secure as shown in Figure 4.16. Replace the FA alarm strap over one
position and reposition the FA shorting strap as shown in Figure 4.16. Secure these as shown in Figure 4.16.
7.
Remove the polarity label plug buttons as shown in Figure 4.17.
8.
Remove the polarity label then turn over the label to show the other polarity as shown in Figure 4.17.
9.
Reposition the load lug as shown in Figure 4.17.
NOTE!
No need to move the load lug busbar on List FA-FE panels.
10.
Replace the polarity label and the plug buttons with the proper polarity visible.
11.
Install the shield onto the front of the distribution panel. Refer to
12.
Close the distribution cabinet’s front door and turn the latch clockwise or close the system’s enclosure door.
13.
Ensure that there are no local or remote alarms active on the system.

