background image

35-2   100 Service Hours

BC1000XL Brush Chipper Maintenance

Safety Signs - Maintain

Safety signs located on your machine contain important and useful information that will help you operate your 
equipment safely. Refer to the 

Parts Manual

 for locations and 

Controls

 section of the 

Operator’s Manual,

 for other 

information.

To assure that all signs remain in place and in good condition, follow instructions given below:

Keep signs clean. Use soap and water - not mineral spirits, abrasive cleaners, or other similar cleaners that 
will damage the decal.

Replace any damaged or missing signs. When attaching signs, the temperature of the mounting surface 
must be at least 40°F (5°C). The mounting surface must also be clean and dry.

When replacing a machine component with a sign attached, replace sign also.

Replacement signs can be purchased from your Vermeer equipment dealer.

H

YDRAULIC

 S

YSTEM

 - C

HECK

Ensure all connections are tight and hoses are in good condition before applying pressure to the system.

Check hydraulic lines, fittings, and hose sleeves for leaks or damage. Check for rubbing or pinching of lines 
which might damage the line. Repair or replace as necessary. Check hose protective sleeving and replace if worn 
or damaged.

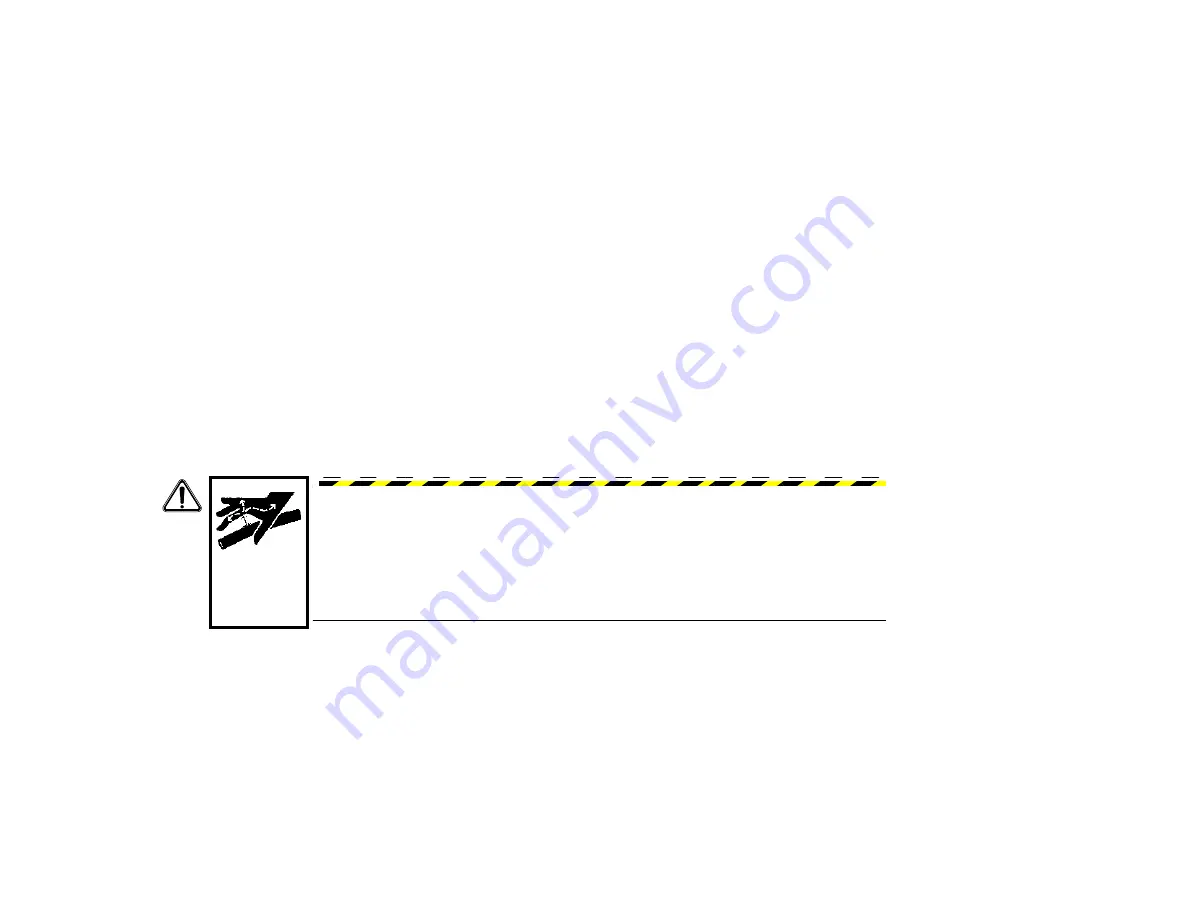
WARNING:  Pressurized fluid can penetrate body tissue and result in serious injury or 
death. Leaks can be invisible. Keep away from any suspected leak. Relieve pressure in the 
hydraulic system before searching for leaks, disconnecting hoses, or performing any other 
work on the system. If you must pressurize the system to find a suspected leak, use an 
object such as a piece of wood or cardboard rather than your hands. When loosening a 
fitting where some residual pressure may exist, slowly loosen the fitting until oil begins to 
leak. Wait for leaking to stop before disconnecting the fitting. Fluid injected under the skin 
must be removed immediately by a surgeon familiar with this type of injury.

3_06

3_01

Summary of Contents for BC1000XL

Page 1: ...BC1000XL Brush Chipper BC1000XL_m3_06 Serial No 5001 Order No 105400V87 Maintenance Manual ...

Page 2: ...d Never operate the machine with the shields removed keep all shields in place If removing a shield is necessary return it to its operating position before operating the machine Vermeer Manufacturing Company reserves the right to make changes at any time without notice or obligation This manual is supplied with each machine Refer to it for all lubrication and maintenance procedures Keep this manua...

Page 3: ...h often involves complex service procedures There are also many components which are not user serviceable Do not attempt any service which you do not fully understand nor any service that you cannot do accurately and safely with proper tools and equipment If you encounter a problem that you do not understand or cannot solve contact your Vermeer dealer TRADEMARKS VERMEER and VERMEER Logo are tradem...

Page 4: ...This page intentionally left blank ...

Page 5: ...5 8 Discharge Chute Rotation Gear Lubricate 25 9 Cutter Drum Drive Belt Tension Initial Check 25 9 Wheel Lug Nut Torque Initial Check 25 9 Pintle Hitch Check 25 10 Knife Drum Maintenance 25 10 Knife Removal 25 11 Knife Inspection 25 13 Bolt Inspection 25 14 Knife Mount Surface Inspection 25 15 Drum Inspection 25 16 Knife Sharpening 25 17 Knife Installation 25 18 Feed Roller Controls Check 25 19 Up...

Page 6: ...djust 40 7 Brakes Adjust 40 8 500 Service Hours 45 1 Engine Maintenance 45 1 Ball Coupler Lubricate and Inspect 45 1 Pintle Hitch Inspect Maintain 45 2 Hydraulic Fluid Change 45 3 Hydraulic Fluid Strainer Inspect 45 4 Wheel Bearings Check 45 5 Bearings Repack 45 6 Battery Electrolyte Levels and Terminals Check 45 8 Battery Electrolyte Levels and Terminals Check 45 9 Battery Terminals Clean 45 11 F...

Page 7: ...nts iii Storage 60 7 Preparing for Storage 60 7 Removing from Storage 60 8 Troubleshooting 65 1 Power System 65 1 Drive System 65 2 Electrical System 65 3 Hydraulic System 65 4 Specifications 70 1 Lubricants 70 1 Machine Specifications 70 2 3_06 3_04 ...

Page 8: ...This page intentionally left blank ...

Page 9: ...ARNING or CAUTION are located near specific hazards SAFETY SYMBOL EXPLANATION DANGER Indicates a hazardous situation which if not avoided will result in death or serious injury WARNING Indicates a hazardous situation which if not avoided could result in death or serious injury CAUTION Indicates a hazardous situation which if not avoided could result in minor or moderate injury This is the safety a...

Page 10: ... let go of limb Cutting injury or death will result Feed material only from side of feed table Never climb onto feed table Feed base of limb or branch first Use wood object to push short material Wear gloves with narrow tight fitting cuffs Keep away from rotating feed roller and blades WARNING Wear personal protective equipment Dress properly 3_06 ...

Page 11: ... all shields before starting WARNING Use Shutdown Procedure before servicing cleaning repairing or transporting machine Refer to Shutdown Procedure page 15 1 for instructions WARNING Failure to follow any of the preceding safety instructions or those that follow within this manual could result in serious injury or death This machine is to be used only for those purposes for which it was intended a...

Page 12: ...This page intentionally left blank ...

Page 13: ...OW RPM position IMPORTANT Whenever practical and consistent with good safety practice run engine without load for a few minutes before shutting it off This allows engine temperatures to decrease and equalize which will increase engine life Step 3 Wait for the cutter drum to slow Step 4 Place Cutter Engage Throttle Lever in the DISENGAGED LOW RPM position Step 5 Turn ignition key to OFF position St...

Page 14: ...intenance Quick Stop Procedure Step 1 Turn ignition to the OFF position while cutter drum clutch is still engaged Step 2 Wait for cutter drum and belt to stop Step 3 Fully disengage cutter drum To Stop Drum Quickly Shut Off Engine with Clutch Engaged ...

Page 15: ...ection 20 5 Service Hours CUTTER DRUM BEARINGS 1 Purge with grease two fittings To ensure grease will be evenly distributed in bearing Step 1 Disengage cutter drum belt drive Step 2 Shut off engine Step 3 Grease when cutter drum has almost stopped turning 1 1 ...

Page 16: ...Brush Chipper Maintenance CLUTCH ARM BEARINGS GREASE Applies to Serial No 10311 and up or as equipped 1 Purge with grease two fittings Visually inspect grease that is purged from bearings and if contaminated grease more often 1 3_06 ...

Page 17: ...nder seals from corrosion caused by condensation as temperature drops Ensure all fittings and nozzle of grease applicator are clean before applying grease If any grease fittings are missing replace them immediately ENGINE MAINTENANCE Inspect engine drive belt Inspect for leaks Check engine oil level Refer to the Engine Operation Manual supplied with the machine for instructions 3_04 3_01 ...

Page 18: ...er mixture NOTE Never add pure antifreeze to a cooling system Vermeer recommends using a 50 50 mixture Never use high silicate antifreeze or antifreeze that is higher than a 60 40 mixture Inspect hose clamps and overflow tubes Check clean grill radiator and fins Check fan for cracks loose rivets and bent or loose blades WARNING Hot fluid under pressure can erupt and scald if opened Allow to cool b...

Page 19: ...ulic fluid through a 10 micron filter before adding it to the tank Pull fill check cap 1 off Hydraulic fluid level must be between the two lines on the dipstick located beneath cap Refer to Specifications section Lubricants page 70 1 for fluid requirements Push cap back on until fully seated The hydraulic fluid must be free of bubbles Bubbles indicate trapped air in the hydraulic system 1 3_01 ...

Page 20: ...ance FUEL TANK FILL Fill tank at the end of each day to prevent condensation Do not fill tank to the very top leave room for expansion 1 Fill Cap WARNING Fuel and fumes can explode and burn Shut off engine before refueling No flame No smoking 1 3_04 3_01 ...

Page 21: ... is damaged allowing unfiltered air to enter the engine Air transfer duct between air cleaner and engine is damaged or clamps are loose Air duct between air cleaner and restriction indicator is damaged or pinched Deluxe Gauge Panel Option Clean or replace filter element immediately when the yellow indicator reaches the red area Reset indicator by pressing button 2 on the front of the restriction i...

Page 22: ...lean diesel fuel and install it After it contacts filter head tighten it an additional 2 3 to 3 4 turn Step 7 Prime fuel system Refer to the Engine Operation Manual NOTE Do not fill elements with fuel before installing The fuel could be contaminated and damage engine HYDRAULIC SURGE BRAKE OPTION FLUID LEVEL CHECK Step 1 Remove master cylinder cap 1 and filler cap beneath it Step 2 Check that brake...

Page 23: ... 2 Install a bleeder hose onto bleeder screw A Submerge loose end of the hose in a glass container partially filled with brake fluid so bubbling in the following steps can be seen Step 3 Retract hydraulic brake actuator using a lever against the end of the actuator or a large clamp around the actuator Step 4 Gradually open bleeder screw A to release air and brake fluid Step 5 Tighten bleeder screw...

Page 24: ...tion properly the brakes must be correctly adjusted and the electrical components must be reliable Engage brakes while coasting at 20 30 mph 30 50 km h in a traffic free area The braking force should easily be noticed in the tow vehicle If not operating properly adjust brakes and check the following electrical components All wire connections Trailer plug for corrosion While adjusting brakes check ...

Page 25: ... TENSION INITIAL CHECK Check cutter drum drive belt tension after the first 10 hours of use and every 50 service hours after that Refer to Cutter Drum Drive Belt Tension Check Adjust page 30 1 WHEEL LUG NUT TORQUE INITIAL CHECK Check wheel lug nut torque after first 10 service hours and every 100 service hours thereafter Torque to 90 120 ft lb 122 163 Nm 1 3_03 ...

Page 26: ...nterval for cutter knives is 10 service hours However the actual service hours interval before knife maintenance is required may be more or less depending upon the wood being chipped and the chipping conditions Performing the following maintenance procedures will aid in reducing the possibility of the knives becoming loose failing and being ejected from the machine WARNING Rotating knives under co...

Page 27: ...ept together To remove knives Step 1 Follow Shutdown Procedure page 15 1 Step 2 Remove six bolts and washers and open cutter drum access door 1 WARNING Wear gloves when working with the cutter drum knives Serious cutting injuries will result if contact is made with the knives while removing or installing them WARNING Knives can cut off hand Lock drum before servicing knives 1 3_03 ...

Page 28: ...ep 4 Remove four bolts 3 from first knife 4 To prevent damage do not use impact tool to remove bolts Step 5 Lift off knife from drum Step 6 Unlock cutter drum Pushing on outside surface of drum rotate drum 1 2 turn to the next cutter knife Step 7 Lock cutter drum Step 8 Repeat Steps 2 5 to remove both knives Step 9 Clean and inspect drum mounting surfaces knives and bolts as per the instructions t...

Page 29: ...nife can separate from the cutter drum Distortion Check the mounting side of the knife for distortion Bolting a distorted knife to the cutter drum will add stresses in the knife and possibly cause knife cracking and failure Step 1 Place a straightedge 2 on the mounting side of the knife 3 and parallel to the mounting holes as shown Step 2 Move straightedge slowly across the knife surface and monit...

Page 30: ...tortion allowing wood to pack under the knife Distorted knives can crack and fail resulting in death or serious injury and machine damage Use a straightedge and check all knives for distortion discard any that are distorted WARNING Knife mounting bolts must be replaced each time knives are sharpened or replaced Bolts may be reused ONLY ONCE when rotating knife to its second cutting edge Failure to...

Page 31: ...nt the knife from lying perfectly flat on its mating surface Any dirty or damaged threads will affect the bolt torque and prevent the knives from being properly clamped Either of these conditions can lead to knife failure during operation Thoroughly clean and inspect the following Knife Mount Surface Remove all wood chips and other material from the mounting pocket area 1 Replaceable Thread Bars 2...

Page 32: ... Edge Welds Inspect entire drum for cracks 3 in the welds where the drum sides are joined to the drum Use a mirror to aid in this inspection Pockets Closely inspect area in and around knife mount and pockets 4 for damage or cracks Cutter Drum Surface Inspect drum surface 5 for cracks that may begin at the pockets and migrate outward If any drum damage or cracks are found contact an authorized inde...

Page 33: ...6 grit Use adequate coolant while grinding Hone knives between sharpening with an oil honing stone IMPORTANT The knives are double edged and have a minimum usable size of 2 00 51 mm measured from the centerline of the bolt holes to the knife edge Do not use a side of a knife that measures less than this Minimum 30 2 00 51 mm Minimum 2 00 51 mm 40 30 ...

Page 34: ... Torque bolts with a torque wrench to 210 ft lb 285 Nm beginning with the center bolts Torque in the same sequence again after the last bolt is tightened WARNING Mounting bolts 3 must be replaced each time knives are sharpened or replaced Bolts may be reused ONLY ONCE when rotating knife to its second cutting edge Failure to replace bolts can cause knife drum separation resulting in death or serio...

Page 35: ...until the drum lock pin is released and stored Step 10 Adjust shear bar refer to Maintenance As Required section Shear Bar Check Adjust page 60 2 FEED ROLLER CONTROLS CHECK Step 1 Follow engine Starting Procedure refer to the Operator s Manual engage cutter drum set engine speed to high RPM Step 2 Place Upper Feed Control Bar 1 in FORWARD and momentarily push Hold to Run Button 2 to start feed rol...

Page 36: ...ons and repairs before using the machine Lower Feed Stop Sensitivity Switch BC1000XL Only Step 1 Select REDUCED sensitivity setting with Lower Feed Stop Bar Sensitivity Switch 1 NOTE The Rear Warning Light 3 must turn ON Step 2 With REDUCED sensitivity setting selected follow Shutdown Procedure page 15 1 then restart machine and momentarily push the Hold to Run Button 2 NOTE The sensitivity select...

Page 37: ...h Hold to Run Button 4 to restart feed roller Step 4 BC1000XL Only Select REDUCED sensitivity with Lower Feed Stop Bar Sensitivity Switch 1 Step 5 Push Lower Feed Stop Bar 2 forward approximately 1 1 2 4 cm NOTE The feed roller rotation must stop and the Rear Warning Light 3 must flash quickly Step 6 Push Hold to Run Button 4 to restart feed roller NOTE If the feed roller control system does not w...

Page 38: ...This page intentionally left blank ...

Page 39: ...rdware Check machine for loose worn or missing parts and hardware Tighten any loose parts and replace any worn or missing parts refer to the Parts Manual for replacement parts Frame Check frame and contact dealer immediately if you notice any bending or cracking CUTTER DRUM DRIVE BELT TENSION CHECK ADJUST IMPORTANT On machines with serial numbers below 10311 Vermeer recommends replacing the clutch...

Page 40: ...off and machine partially disassembled to illustrate parts Cutter Drum Drive Belt Tension Check Adjust S N 101 10310 Step 1 Loosen two nuts 2 one at either end of turnbuckle 3 NOTE One nut is left hand thread Step 2 Rotate turnbuckle to adjust the center distance between the bolts Longer distance loosens belt tension Shorter distance tightens belt tension 1 3 2 3 2 Older models Newer models 7 8 3_...

Page 41: ...t shield and three bolts Cutter Drum Drive Belt Tension Check Adjust S N 10311 Up or With Kit IK001380 Step 1 Move clutch handle 4 to engaged position Step 2 Set a torque wrench 1 to 125 ft lb 169 5 Nm and attach wrench to clutch cable 2 Step 3 Adjust linkage by rotating turnbuckle 3 until clutch handle 4 just reaches the bottom of detent slot when applying 125 ft lb 169 5 Nm force using torque wr...

Page 42: ...ice Hours BC1000XL Brush Chipper Maintenance BELT DRIVE PIVOTS GREASE Remove three bolts 1 and open belt shield Apply one shot of grease to two fittings 2 BELT DRIVE U JOINTS GREASE 1 One shot one fitting 1 2 3_04 ...

Page 43: ...BC1000XL Brush Chipper Maintenance 50 Service Hours 30 5 FEED ROLLER ARM PIVOTS GREASE 1 One shot two fittings 1 1 3_04 ...

Page 44: ...the area under the muffler before cleaning Step 1 Open hood Step 2 Remove plug 1 on bottom of muffler 2 with 7 16 wrench Step 3 Start engine and move throttle from slow to fast several times to clear carbon from the spark arrestor Step 4 Follow Shutdown Procedure page 15 1 Step 5 Replace plug and close hood 2 1 ...

Page 45: ...ing decals Refer to the Parts Manual and the Controls section in the Operator s Manual Curtains Check curtains for rips tears or wear Replace any damaged curtains Highway Lights With lights plugged into towing vehicle check that all vehicle lights are operating properly Refer to Maintenance As Required section Highway Lights Replace page 60 5 Reflectors Check that reflectors are present Replace mi...

Page 46: ... HYDRAULIC SYSTEM CHECK Ensure all connections are tight and hoses are in good condition before applying pressure to the system Check hydraulic lines fittings and hose sleeves for leaks or damage Check for rubbing or pinching of lines which might damage the line Repair or replace as necessary Check hose protective sleeving and replace if worn or damaged WARNING Pressurized fluid can penetrate body...

Page 47: ...Filter all hydraulic fluid through a 10 micron filter before adding it to the tank TIRES AND RIMS CHECK Check tires for correct pressure Inflate standard tire to 65 psi 4 5 bar inflate optional flotation tire to 80 psi 5 5 bar Check tires and rims for damage Check lug nuts for tightness Torque to 90 120 ft lb 122 163 Nm WARNING Tire explosion can result if the following procedures are not followed...

Page 48: ...2 Step 2 Place a spring scale at the top and center of the Upper Feed Control Bar 3 to check the force Step 3 Loosen jam nut 4 Step 4 Tighten adjustment nut 1 to increase force loosen it to decrease force NOTE Adjust bolt so it takes 20 34 lb 9 0 15 4 kg to move the bar out of forward feed to stop position Step 5 Retighten jam nut 4 Step 6 Replace Upper Feed Control Bar shield 2 IMPORTANT When the...

Page 49: ... Sensitivity Switch 3 NOTE Amber light 4 will come on solid Step 5 Set protractor 5 at 102 Step 6 Set protractor head flat on feed table and move Lower Feed Stop Bar 6 and protractor backward until straightedge touches both the Lower Feed Stop Bar at 7 and table edge at 8 and hold in place Step 7 Move switch adjustment plate 9 back until feed stop bar indicator light 4 flashes Step 8 Tighten bolts...

Page 50: ...n Lower Feed Stop Bar is adjusted correctly the side bars will also be correct Step 1 Move brackets 3 so Lower Feed Stop Bar is flush with table Ensure gap between table and bar is even Step 2 Remove Lower Feed Stop Bar switch covers 4 from both sides of feed table Step 3 Start engine Step 4 Press Hold to Run Button 5 to reset flashing amber light 6 Step 5 Place a compression spring scale Vermeer ...

Page 51: ...en jam nut 7 and adjust switch stop bolt 8 until switch activates when 150 N of force is applied to end of Lower Feed Stop Bar amber light begins to flash Step 7 Tighten jam nut 7 Install switch covers 4 Step 8 Repeat Steps 6 8 on other end of Lower Feed Stop Bar 4 3 7 8 ...

Page 52: ...This page intentionally left blank ...

Page 53: ...ice Hours ENGINE MAINTENANCE Check air intake system Change engine oil and replace filters Initial valve lash clearance adjustment Refer to the Engine Operation Manual supplied with the machine for instructions JACK LUBRICATE Apply a light coat of oil to the inside tube 1 1 3_04 ...

Page 54: ...tom of the vee and the tops of the ridges between the vees will not be polished Since the chipping environment generates a lot of abrasive dust the walls of the vees on the sheaves may be subject to greater than normal wear Always inspect the side of the vee with a straight edge If the wall is dished out more than 1 32 1 mm or if belt contacts the bottom of the sheave see lower illustration replac...

Page 55: ...ter If the strainer becomes dirty or clogged low engine power could result Step 1 Remove fuel hose 1 Remove bolt 2 from fuel filter Step 2 Remove banjo fitting from bolt Step 3 Unscrew fuel strainer from banjo fitting Step 4 Flush fitting and fuel strainer until they are free of debris Step 5 Screw fuel strainer back into fitting and then onto the bolt Step 6 Install bolt 2 in fuel filter Install ...

Page 56: ...replaced earlier if the machine is in storage for a long period of time such as through the winter Step 1 Thoroughly clean area around filter to keep contaminants out of the hydraulic system Step 2 Use a filter wrench to turn the filter counterclockwise and remove Step 3 Clean the filter head surface Step 4 Apply thin film of oil to gasket of new filter WARNING Hot fluid under pressure can scald A...

Page 57: ...nd OUT 2 stamped in the head to indicate correct positioning for the direction of oil flow If replacing the filter head ensure that the new filter head is positioned correctly Step 6 Tighten with filter wrench an additional 1 2 to 3 4 turn Step 7 Follow Starting Procedure refer to the Operator s Manual and cycle feed roller to pressurize system Check for leaks Step 8 Follow Shutdown Procedure page...

Page 58: ...rimary element 4 Step 3 Check secondary element 5 replace every 1000 service hours sooner if dirty or damaged NOTE The secondary element that fits inside the primary filter element is provided for additional protection during field changes and should not be removed except in a clean environment Step 4 Check replacement air cleaner element for damage Step 5 Install air cleaner element Ensure end of...

Page 59: ...eleration force of the towing vehicle Do not use a brake controller that is purely a manually operated controller If your towing vehicle is equipped with a manually operated controller remove it and install one that can be applied both automatically and manually Brake Controller Adjust The controller is properly adjusted when there is a slight lead in trailer braking over vehicle braking no sensat...

Page 60: ...clockwise until the wheel has a heavy drag Then turn adjuster screw counterclockwise only until the wheel turns freely IMPORTANT Rotate drum only in the direction of forward rotation when adjusting the brakes The adjuster screw may be turned with a screwdriver blade or with a standard brake adjusting tool Step 4 Install dirt plug Step 5 Remove blocking and jack Step 6 Repeat Steps 1 5 for the othe...

Page 61: ...ndition Vent injection pump Vent fuel supply lines Check electrical ground connections Refer to the Engine Operation Manual supplied with the machine for instructions BALL COUPLER LUBRICATE AND INSPECT Oil threads of bolt 1 and loop nut 2 Check ribs around bolt hole 3 for wear Replace any missing broken damaged or worn parts 3 1 2 3_02 3_04 ...

Page 62: ...ngaged Step 1 Fully disassemble the hitch Step 2 Engage tongue 9 of the clamping lip into recess 10 Step 3 Hinge the lip forward to its operating position and assemble hitch IMPORTANT Only use genuine replacement parts Do not make any substitutions for the loop nut or the square head bolt PINTLE HITCH INSPECT MAINTAIN Inspect pintle hitch for wear and damage If wear exceeds 1 8 3 mm from the origi...

Page 63: ...to 250 Service Hours section Hydraulic Fluid Filter Replace page 40 4 Step 4 Remove clean and inspect hydraulic fluid strainer refer to Hydraulic Fluid Strainer Inspect page 45 4 and perform all steps Step 5 Clean inspect and install hoses Step 6 Fill hydraulic tank and install fill cap NOTE The hydraulic fluid must be free of bubbles Bubbles are trapped air that is entering the hydraulic system S...

Page 64: ...nner or other good cleaning solvent Scrub strainer with a small soft bristled brush Look for lacquers which may have formed as a result of hot spots in the hydraulic system Step 3 Rinse strainer with clean solvent or thinner Use compressed air to blow it clean Step 4 Use a suitable thread sealant such as Loctite Vibra Seal on fitting and strainer Step 5 Install and tighten strainer and fitting WAR...

Page 65: ...he ground Step 3 Remove dust cap 1 Step 4 Remove cotter pin 2 castellated nut 3 and washer 4 Step 5 Remove outer bearing 5 and inspect the lubricant If a generous amount of grease is on the bearing and in the housing and if the grease is soft the grease will not need changing If the lubricant is caked and the bearings seem dry the bearings should be repacked 2 3 1 4 5 3_03 ...

Page 66: ...for damage Replace if damaged Step 6 Remove inner bearing 4 Step 7 Wash cone bearings and inside the hub with solvent and wipe clean NOTE When repacking be sure grease is worked into the roller retainers from the edge to fill the entire bearing with grease Step 8 Install inner bearing 4 Step 9 Install seal 3 Step 10 Install outside bearing 5 Step 11 Slide brake hub 2 onto the spindle NOTE When sli...

Page 67: ...s felt when turning the wheel Loosen nut until the nearest castellation in the nut lines up with the cotter pin hole in the spindle Step 14 Install cotter pin 8 and dust cap 9 Step 15 Mount wheel and rim Step 16 Install lug nuts Torque to 80 ft lb 110 Nm Step 17 Remove blocks and lower jack Step 18 Repeat procedure for the other wheel 9 3 1 2 4 8 5 6 7 3_03 ...

Page 68: ...lame and sparks away and do not smoke Keep out of reach of children Do not short across battery terminals or allow tools to short from battery terminals to frame Do not jump start or charge a battery with frozen electrolyte WARNING Battery fumes are flammable and can explode Keep all burning materials away from battery Battery explosion can blind Acid can blind and burn Tools and cable clamps can ...

Page 69: ... and Terminals Check Step 1 Unlatch and raise engine hood to access battery Step 2 Remove four bolts 1 and panel 2 Step 3 Remove the two bolts A from the hold down bracket B and remove bracket Step 4 Remove negative cable C first Then remove positive cable D Remove battery Step 5 If equipped remove cell caps E Step 6 Fill each cell with distilled water WARNING Battery post terminals and related ac...

Page 70: ... minutes immediately after filling the battery to allow proper mixing of the water and electrolyte Never add acid unless electrolyte is lost by spilling If the battery uses too much water check it for overcharging Step 7 Install cell caps E Step 8 Replace battery Step 9 Install positive cable D first Then install negative cable C and tighten Check that the red cap over the positive cable clamp is ...

Page 71: ... B and secure with the two bolts A Step 7 Install positive cable D first Then install negative cable C and tighten Check that red cap over the positive cable clamp is properly installed Step 8 Close and latch engine hood Keep top of the battery clean If necessary wash it with a baking soda solution then rinse with clean water Do not let any baking soda solution enter the battery FEED TABLE CURTAIN...

Page 72: ...tep 2 Place lever 2 in DISENGAGED Step 3 Remove two bolts 3 and panel 4 Step 4 Press down on bottom side of belt and remove it from grooves on sheave Step 5 Remove belt replace with new belt Step 6 Replace bolts and panel Step 7 Place lever 2 in ENGAGE Step 8 Adjust belt tension Refer to 50 Service Hours section Cutter Drum Drive Belt Tension Check Adjust page 30 1 Step 9 Close shield and replace ...

Page 73: ...k engine drive belt tension Replace air cleaner secondary safety element Refer to Air Cleaner Replace page 40 6 Replace engine fan and alternator belts Refer to the Engine Operation Manual supplied with the machine for instructions SURGE BRAKE ACTUATOR GREASE BC1000XL EU ONLY 1 Four shots two fittings 1 3_04 3_01 ...

Page 74: ...50 2 1000 Service Hours BC1000XL Brush Chipper Maintenance PARK BRAKE LEVER GREASE BC1000XL EU ONLY 1 Two shots one fitting 1 3_04 3_01 ...

Page 75: ... fresh water Step 4 Follow Shutdown Procedure page 15 1 Allow system to cool then drain the water Step 5 Add a 50 50 mixture of low silicate ethylene glycol antifreeze and clean water to the radiator Do not fill completely Follow Starting Procedure and run engine until mixture has circulated in the system Step 6 Fill radiator System capacity is approximately 14 qt 13 L Recheck radiator after engin...

Page 76: ...This page intentionally left blank ...

Page 77: ...cal system Replacement battery must meet standard battery specifications provided Refer to Specifications section Lubricants page 70 1 Replace battery every 2000 hours or more frequently if needed WARNING Tools and cable clamps can make sparks Shield eyes and face WARNING Battery post terminals and related accessories contain lead and lead compounds chemicals known to the state of California to ca...

Page 78: ...e cable 6 Step 5 Lift battery out of compartment Step 6 Install new battery Step 7 Apply a light coating of petroleum jelly around base of each terminal Step 8 Install hold down bracket 4 and secure with the two bolts 3 Step 9 Install positive cable 6 first Then install the negative cable 5 and tighten Check that the red cap over the positive cable clamp is properly installed Step 10 Install panel...

Page 79: ...r other damage to the air cleaner which could allow unfiltered air to enter the engine Inspect air transfer hose between the air cleaner and the engine to be sure all the clamps are tight all flange joints are tight and there are no cracks in the hose Ensure inlet is free of obstructions Check rubber evacuator valve on bottom of filter housing for cracks or tears KNIFE MOUNTING SURFACE INSPECT Ins...

Page 80: ...hear bar toward the knives on the cutter drum WARNING Rotating knives behind cover can cut off hand Thrown objects can strike you Stop engine wait for drum to stop then open bottom cover WARNING Never start engine or operate machine with the cutter drum housing open Material leaving the housing will be ejected at high speed resulting in possible injury and blindness WARNING Wear gloves when workin...

Page 81: ... with an impact wrench Step 3 Insert knife gauge between shear bar and edge of the drum knife 4 Shear bar should fit snugly against the gauge if it does not slide shear bar snugly up to gauge NOTE Gap 1 8 or 3 2 mm should be equal across full length of both knives Step 4 Using a hand wrench snug the bolts 3 Step 5 Finish tightening the bolts by turning them 1 6 of a turn 5 or to 210 ft lb 285 Nm S...

Page 82: ...lts 3 shear bar will slide out NOTE This is most easily done with an impact wrench NOTE Shear bar can be turned over and also reversed giving four edges to use Shear bar can also be reground for additional life WARNING Rotating knives behind cover can cut off hand Thrown objects can strike you Stop engine wait for drum to stop then open bottom cover WARNING Never start engine or operate machine wi...

Page 83: ...to 210 ft lb 285 Nm Step 6 Close access door and replace bolts HIGHWAY LIGHTS REPLACE Highway lights include two rear fixtures 1 on the BC1000XL and five rear fixtures 2 on the BC1000XL EU machine NOTE Light fixtures have non serviceable bulbs Replace complete assembly Remove entire light fixture by pushing it out of the grommet from back to front unplug from connector Install new fixture by plugg...

Page 84: ...trical damage can result If the fuse needs to be replaced often an electrical problem may exist Contact your Vermeer dealer SLIP HOOK REPLACE Replace towing chain slip hook if the latch is damaged missing or does not snap closed to the hook Step 1 Remove cotter pin 1 and slip hook pin 2 to remove slip hook from the chain link Step 2 Slide new slip hook onto chain link and install slip hook pin and...

Page 85: ...place If stored outside cover with weatherproof material Clean all mud dirt grease and other foreign material from the machine To inhibit rusting repaint areas where the paint has been worn Repair or replace any worn or damaged parts and decals Refer to the Parts Manual for ordering replacements Refer to the Engine Operation Manual supplied with machine for engine storage instructions Disengage cu...

Page 86: ...t from fuel tank that may have built up during storage Fill fuel tank Check battery fluid level charge battery and install in machine Refer to the Engine Operation Manual supplied with machine for restoring engine to operation Lubricate all grease points on the machine Refer to 10 Service Hours page 25 1 for additional service points ...

Page 87: ...il Use correct oil Restricted air filter Clean or replace air filter Dirty injectors See your Vermeer dealer Lack of engine power Wrong fuel Use correct fuel Dirt or water in fuel system Remove fuel clean tank and replace fuel filter Air in fuel system Remove air from fuel system Dirty fuel filter Replace fuel filter Fuel strainer is dirty or clogged Clean fuel strainer Wrong weight engine oil Use...

Page 88: ...ler SmartFeed System See your Vermeer dealer Discharging shredded material Knives are dull Replace or sharpen knives Fed material moves back toward operator Knives are dull Replace or sharpen knives Small material not being chipped Shear bar not adjusted properly Adjust shear bar Belts squeal when feeding materials Belts are loose or glazed Adjust or replace belts 3_06 ...

Page 89: ...cked battery case or broken terminal Replace battery Dirty or wet battery top causing discharge Clean battery top Battery using too much water Cracked battery case Replace battery Overcharged battery See your Vermeer dealer Low battery charge Alternator not charging See your Vermeer dealer Loose or corroded battery cables Clean and tighten battery cables Loose or glazed alternator belt Tighten or ...

Page 90: ...See your Vermeer dealer Slow hydraulic power Low hydraulic fluid level Add hydraulic fluid Plugged hydraulic filter Replace filter Worn pump See your Vermeer dealer Improper pressure relief setting See your Vermeer dealer Cold hydraulic fluid Let machine warm up and operate hydraulic system Oil foams Low hydraulic fluid level Add hydraulic fluid Water in hydraulic fluid Change fluid Air leak betwe...

Page 91: ...r Biodegradable Hydraulic Fluid Mobil EAL 224H or equivalent Use caution not to get dirt or other contaminants into the system s when connecting with a tractor or when servicing Filter all fluid through a 10 micron filter before adding NOTE Use of any other hydraulic oil without written factory approval will jeopardize warranty Grease Vermeer Ultra LF Grease As required EP grease Shell Alvania EP2...

Page 92: ... kg Axle capacity 5 200 lb 2360 kg Maximum log diameter 12 30 cm Engine Cummins Model B3 3 Specification number Vermeer 180006280 Fuel capacity and type 25 gal 95 L Diesel Cooling medium Liquid Maximum power 85 hp 63 kW at 2600 rpm Peak torque 215 ft lb 291 5 Nm at 1600 rpm Battery Size Group 31 12 volts Cold cranking amps 660 CCA Hydraulic System System pressure 2 500 psi 172 bar maximum Tank cap...

Page 93: ...aintenance Specifications 70 3 Tires Standard size ST225 75R15 LRD Standard tire pressure 65 psi 4 5 bar Flotation tire option size LT245 75R16 LRE Flotation tire pressure 80 psi 5 5 bar Lug nut torque 90 120 ft lb 122 163 Nm ...

Page 94: ...This page intentionally left blank ...

Page 95: ... Controller Adjust 40 7 Brake System Check 25 8 Brakes Adjust 40 8 C Clutch Arm Bearings Grease 20 2 Cooling System Drain and Clean 50 3 Corrosion Inhibitors Add to Coolant 40 4 Cutter Belt Wear Check 40 2 Cutter Drum Bearings 20 1 Cutter Drum Drive Belt Replace 45 12 Cutter Drum Drive Belt Tension Check Adjust S N 101 10310 30 2 Cutter Drum Drive Belt Tension Check Adjust S N 10311 Up or With Kit...

Page 96: ... 35 2 Hydraulic System Troubleshooting 65 4 Hydraulic Tank Keep Clean 35 3 I J Jack Lubricate 40 1 K Knife Inspection 25 13 Knife Installation 25 18 Knife Mount Surface Inspection 25 15 Knife Removal 25 11 Knife Sharpening 25 17 Knife Drum Maintenance 25 10 Knife Mounting Surface Inspect 60 1 L Lower Feed Stop Bar Switch Adjust BC1000XL European 35 6 Lower Feed Stop Bar Switch Adjust BC1000XL 35 5...

Page 97: ...Procedure 15 1 Slip Hook Replace 60 6 SmartFeed System Fuse Replace 60 6 Specifications 70 1 Stopping the Machine 15 1 Storage 60 7 60 8 Surge Brake Actuator Grease BC1000XL EU Only 50 1 T Tires and Rims Check 35 3 Towing Chain Replace 60 7 Troubleshooting 65 1 U Upper Feed Control Bar Force Adjust 35 4 Upper Feed Control Bar 25 20 V W Wheel Bearings Check 45 5 Wheel Lug Nut Torque Initial Check 2...

Page 98: ...This page intentionally left blank ...

Page 99: ...d 60 1 5 14 Index Addition of EU machine information Safety and formatting updates m3_02 02 06 500 Hours p 45 1 Correction m3_03 07 06 TOC 10 Hours pp 25 5 18 500 Hours pp 45 3 8 Index Addition of pintle hitch information m3_04 02 07 TOC 10 Hrs 25 1 2 4 8 50 Hrs 30 1 3 5 100 Hrs 35 1 4 6 250 Hrs all 500 Hrs 45 3 4 9 10 1000 Hrs 50 1 2 2000 Hrs all As Reqd 60 1 Index Updated maintenance intervals m...

Page 100: ...her reproductive harm CALIFORNIA Proposition 65 Warning Diesel engine exhaust and some of its constituents are known to the State of California to cause cancer birth defects and other reproductive harm Copyright 2004 2007 2009 All rights reserved Vermeer Manufacturing Company 1210 Vermeer Road East P O Box 200 Pella Iowa 50219 0200 ...

Reviews: