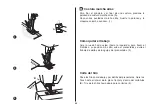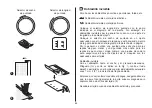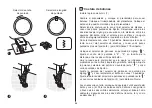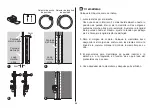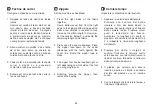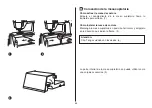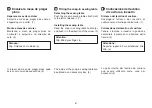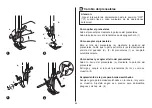
Collocare la piastra di rammendo. (1)
Sostituire il piedino, collocando il piedino da
cucitura bottoni. Collocare il tessuto sotto il
piedino. Collocare il bottone nella posizione
contrassegnata e abbassare il piedino.
Regolare la manopola di selezione dei motivi su
" " e cucire un punto di sicurezza. Selezionare
uno dei due zig-zag stretti a seconda della
distanza tra i due fori del bottone. Ruotare il
volantino per controllare che l'ago entri sia nel
foro di destra che in quello di sinistra senza
toccare il bottone. Cucire circa 10 punti,
lentamente. Selezionare il motivo " " e cucire
alcuni punti di sicurezza. (2) (per Rita/Grace,
Ava/Greta)
Selezionare sul quadrante di selezione motivi il
punto zig zag " ". Regolare la larghezza su "3"
- "5" a seconda della distanza tra i due fori del
bottone.
Girare il volantino in modo da verificare che l'ago
entri distintamente nel foro sinistro e destro del
bottone. Impostare il selettore motivi su punto
diritto " " e praticare alcuni punti di fissaggio.
Impostare il selettore motivi su punto zig zag " ",
e praticare lentamente 10 punti sul bottone.
Impostare il selettore motivi su punto diritto " " e
praticare alcuni punti di fissaggio. (2) (per
Barbara, Romy)
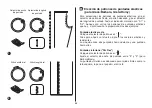
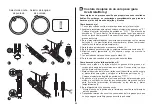
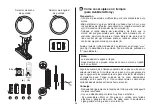
Qualora fosse necessario realizzare un gambo
del bottone, collocare un ago da rammento in
cima al bottone e cucire. (3) Per bottoni a 4 fori,
cucire prima i due fori anteriori (2), sospingendo
il tessuto in avanti, e quindi cucire i due fori
posteriori, come precedentemente descritto. (3)
Monte a placa de cerzir. (1)
Mude o Pedal para o pé calcador de costurar.
Coloque o trabalho por baixo. Coloque o botão
na posição que marcou e baixe o pé calcador.
Comute o botão do selector do padrão para " "
e costure alguns pontos de segurança.
Seleccione um dos dois padrões de zigue-zague
estreitos, de acordo com a distância entre os
dois orifícios do botão. Rode o volante para
verificar se a agulha entra no orifício direito e
esquerdo do botão sem ferir o botão. Seleccione
o padrão "
" e costure alguns pontos de
segurança. (2) (para Rita/Grace, Ava/Greta)
Configure o botão selector de padrão no ponto
ziguezague " ". Ajuste a largura do ponto para
"3" a "5" conforme a distância entre os dois
orifícios do botão.
Rode o volante para ver se a agulha corre para
a esquerda e para a direitos nos orifícios. Ponha
o selector de padrões no ponto recto "
", e
costure alguns pontos para segurar.
Ponha o selector de padrões no ponto
ziguezague "
" e lentamente comece a
costurar o botão com cerca de 10 pontos.
Ponha o selector de padrões no ponto recto " "
e dê alguns pontos. (2) (for Barbara, Romy)
Se precisar de uma haste ponha uma agulha
de cerzir no topo do botão e costure. (3) Para
botões com 4 furos, costure primeiro nos dois
orifícios da frente (2), empurre para diante e
depois costure os outros dois, como se
mostra. (3)
Install the darning plate. (1)
Change presser foot to button sewing foot.
Position the work under the foot.
Place the button on the marked position and
lower the foot. Set the pattern selector knob on
" " and sew a few securing stitches. Select the
zig-zag stitchwidthaccording to the distance
between the two holes of the button. Turn the
handwheel to check if the needle goes into the
right and the left hole of the button without any
obstruction (adjust the stitchwidthaccording to
the button). Slowly sew on the button with about
10 stitches.
Select pattern "
" and sew a few securing
stitches. (2) (for Rita/Grace, Ava/Greta)
Set the pattern selector dial on zig zag stitch " ".
Adjust the stitchwidthto "3" - "5" according to
the distance between the two holes of the button.
Turn the handwheel to check that the needle
goes cleanly into the left and right holes of the
button. Set the pattern selector knob on straight
stitch " ", and sew a few securing stitches.
Set the pattern selector knob on zig zag stitch " ",
and slowly sew on the button with about 10
stitches. Set the pattern selector knob on straight
stitch" ", and sew a few securing stitches. (2)
If a shank is required, place a darning needle
on top of the button and sew. (3) For buttons
with 4 holes, sew through the front two holes
first (2), pushwork forward and th
en sew
through the back two holes as described. (3)
(for Barbara, Romy)
Sewing on buttons
PT
EN
IT
Cozer botões
Applicazione di bottoni
57

