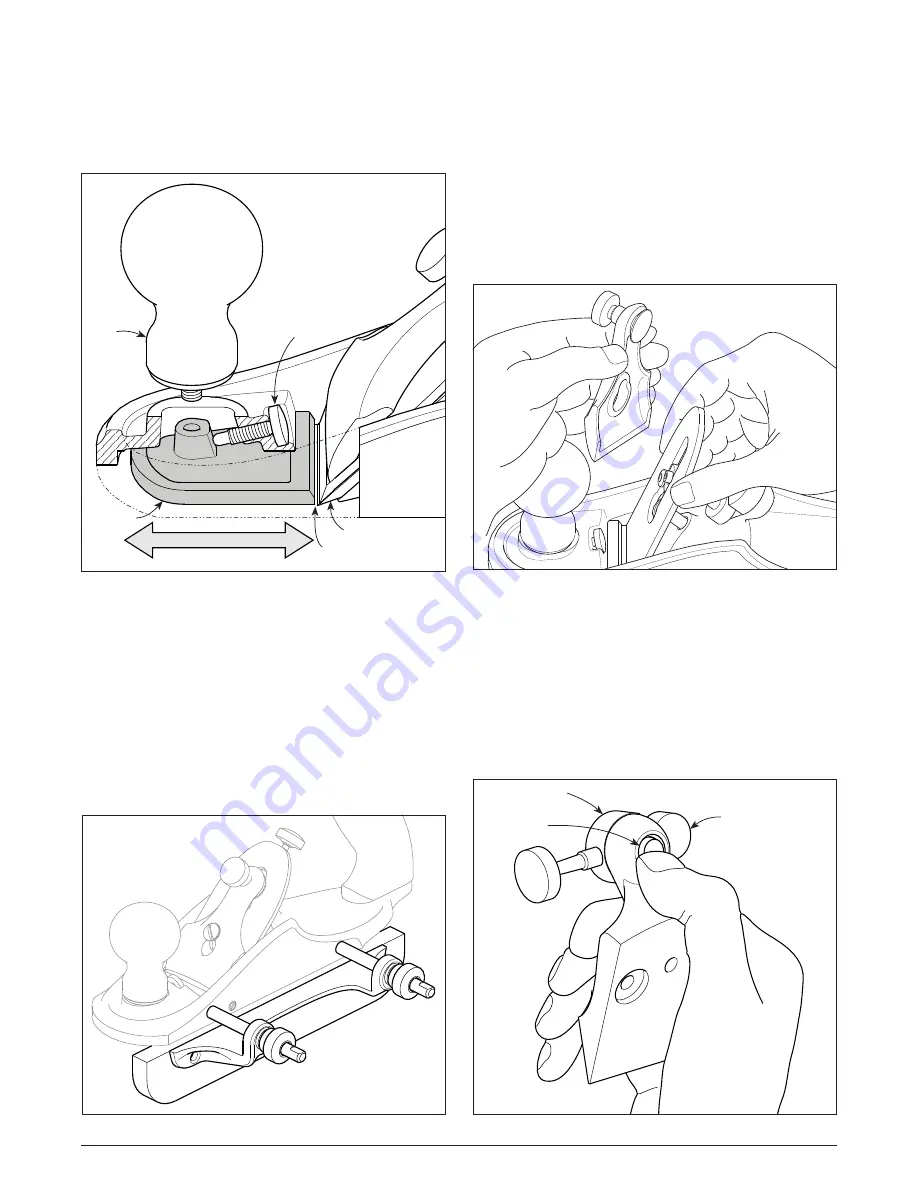
Mouth Adjustment
Screw
Mouth
Blade
Knob
Toe
Button
Pivot
Traveller
4
Loosen the toe locking knob and adjust the position
of the toe by sliding the knob forward or backward,
as required. Tighten the knob fi
rmly, but avoid
overtightening. Rotate the mouth adjustment screw
clockwise until it stops turning.
Figure 13: Mounted fence (not included).
Figure 14: Removing the lever cap and blade. (Cap
iron not shown.)
Frog
The frog provides the bed for the plane’s blade and
determines its cutting angle. Every now and then, you
may want to remove the frog for cleaning or, at some
point in time, replace it with another frog that provides
a different cutting angle.
To remove the frog, loosen the lever cap knob, then
remove the lever cap and the blade. (The blade carrier
does not need to be removed from the blade.) Also
remove the oval-head screw from the frog.
Figure 15: Pressing out the adjuster.
Using the hex key, loosen then remove both of the
cap screws holding the frog to the body. Lift the frog/
adjuster assembly out of the body.
To release the adjuster, turn it 90° to the frog, then press
the button on the underside of the adjuster (see
Figure 15
).
Hold the adjuster by the pivot to take it out; avoid pulling
on the shaft of the adjuster, as this could bend it.
Figure 12: Mouth adjustment.
Fence Mounting Holes
A fence is effective for planing accurate and consistent
square or bevelled edges on a board. There are integral
holes tapped in either side of the body of the plane so
you can mount a fence (not included) to better register
the plane to the workpiece. Simply make a wooden
fence, as plain or as fancy as you wish, and attach it
to the plane using #10-32 machine screws. These holes
are spaced 4
1
/
2
"
(114mm) center to center to match the
holes in the plane fences available from Veritas.


