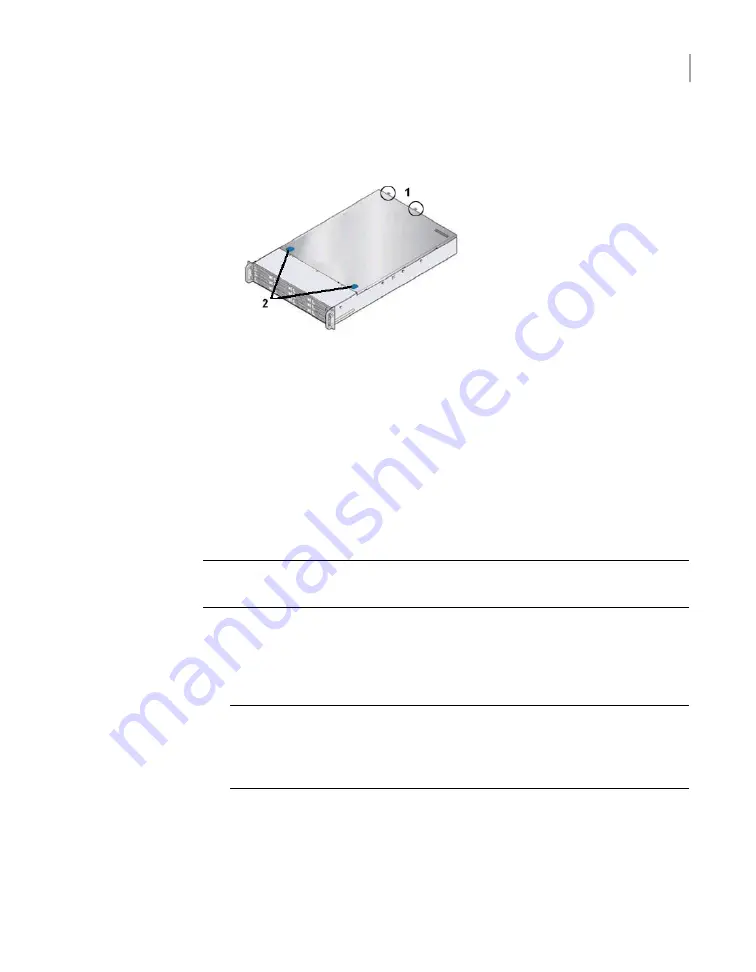
To remove the cover
1
If the top of the appliance looks like this
Do the following:
1
Completely loosen the two
thumb screws (circled) on the
rear of the chassis cover.
2
Press down on the blue thumb
grips and slide the cover back
0.5 inches.
3
Lift the cover off the chassis and
set it aside where it cannot be
damaged.
2
Proceed to install the storage kit components into the appliance.
Installing the Expansion Storage Kit components
This section explains the process of installing the components of the Expansion
Storage Kit into the appliance.
The expansion storage kit contains eight, 32Gb, Dual in-line memory modules
(DIMMs)
Caution:
Veritas service personnel must perform all tasks that involve the inside
of the appliance chassis.
To replace the DIMMs
1
Put on a grounded ESD-compliant wrist strap or take other ESD-preventive
measures.
Note:
The static discharged by human bodies can damage static-sensitive
components on the boards. When installing and maintaining the equipment,
you must observe appropriate electrostatic safety precautions to prevent
personnel injuries or device damage.
2
Remove the air duct that covers the DIMM slots as follows:
■
Disconnect the cable connector that is mid-way between the MFBU and
the external SAS controller PCIe card. Then, disconnect the cable from the
external maintenance free backup unit (MFBU) holder.
77
Adding one or more storage shelves to an operating appliance that does not have any storage shelves
Installing the Expansion Storage Kit components
Summary of Contents for 5250
Page 1: ...Veritas 5250 Appliance Hardware Installation Guide ...
Page 46: ...46 Installation procedures Connecting an appliance to more than one storage shelf ...
Page 47: ...47 Installation procedures Connecting an appliance to more than one storage shelf ...
Page 53: ...53 Installation procedures Connecting an appliance to more than one storage shelf ...
Page 151: ...V Veritas Remote Management interface accessing 70 151 Index ...


