background image

6

Operation

Instructions for Use

Use consists of sitting close to the HappyLight Energy Lamp with your eyes 

open. While staying oriented toward the light, feel free to engage in other 

activities such as reading, writing, hobbies and crafts, sewing, needlepoint, 

applying make-up, painting or working at your computer or desk.

1.

 Turn on the lamp and allow a few 

minutes for the bulb to achieve full 

brightness.

2.

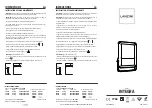
 The HappyLight Energy Lamp should 

be positioned as close as 6 inches, but 

within 24 inches from your face, and 

should be slightly offset from center 

(see diagram). 

Note:


Do not look directly 

into the lamp.

3. 

Recommend switching on high setting 

for morning and low setting in the 

afternoon.

The light from the HappyLight Energy 

Lamp must be directed at your eyes; 

therefore, your eyes must be open to achieve the full benefit. 

Note: Tinted 

glasses reduce the amount of light reaching your eyes.

When you are feeling sluggish and lethargic, spend more time with the light, sit 

closer to the light or add more lighting devices to increase the intensity. If you 

experience edginess, or are over stimulated, move the light further away or 

reduce usage time.

Selecting a Location 

•  Place your Verilux

®

 HappyLight

®

 Energy Lamp on a table or other flat 

surface. 

•  For best performance, place the HappyLight as close as 6 inches, but within 

24 inches from your face. 

CAUTION :

  Avoid placing this lamp in areas that are exposed to direct 

sunlight or close to heat-radiating products such as heaters. Do not place the 

lamp on the top of appliances that radiate heat. 

                               DO NOT BLOCK VENTS 

Vents are necessary for proper function of the electronic ballast; 

blocking them may cause overheating of the electronics and 

increase risk of fire.

WARNING:

Summary of Contents for VT05

Page 1: ...Model VT05 ...

Page 2: ...ur home or office Many other healthy lighting products are available through our catalog and online Visit us on the web at www verilux com to request a free catalog and learn more about all our quality Verilux products or call our toll free number 1 800 454 4408 As a Verilux customer your satisfaction means everything to us We look forward to serving you now and in the future Have a Bright Day Nic...

Page 3: ...etest 5 Operation 6 Selecting a Location 6 Instructions for Use 6 Recommended Usage 7 Bulb Removal and Replacement 8 Re installing Bulb and Plastic Diffuser 9 Troubleshooting 10 Care and Cleaning 10 Technical Specifications 11 Warranty 12 Contents ...

Page 4: ... has been exposed to rain or moisture the lamp does not operate normally or has been dropped it should not be operated There are no user serviceable parts in this lamp Do not block vents Vents are neccessary for proper function of the electronic ballast blocking them may cause overheating of the electronics and increase risk of fire Different people react differently to the light from energy lamps...

Page 5: ...of this device Step 1 Place the lamp about 18 inches from your face and turn it on do not look directly into the lamp Step 2 Operate lamp for approximately 10 minutes and turn it off If any discomfort is felt discontinue use of the lamp and consult a doctor If no discomfort is felt for subsequent use the user may want to gradually decrease the distance from the face and increase time used which re...

Page 6: ...our eyes therefore your eyes must be open to achieve the full benefit Note Tinted glasses reduce the amount of light reaching your eyes When you are feeling sluggish and lethargic spend more time with the light sit closer to the light or add more lighting devices to increase the intensity If you experience edginess or are over stimulated move the light further away or reduce usage time Selecting a...

Page 7: ... and at about the same time each day It is not necessary to sit in front of the lamp continuously You can divide the time into several mini sessions Continue to use the HappyLight daily to feel an improvement in your mood and activity level When you are feeling sluggish and lethargic spend more time with the light sit closer to the light or add more lighting devices to increase the intensity If yo...

Page 8: ...the Bulb 1 Unplug the lamp from power outlet 2 To access the bulb remove the plastic diffuser by pressing the tabs D and lifting out the diffuser 3 Using a standard screwdriver remove the two screws E which secure the bracket Remove the bracket F 4 Remove the bulb B by holding the base and pulling straight up Bulb Removal and Replacement D B E F ...

Page 9: ...o Slot A 4 Insert one diffuser corner at a time 5 Work one diffuser corner into the side track and slide gently down into place into bottom track 6 Snap side tab into place side slot Entire side of lens should be seated into the track 7 Repeat for other side of diffuser Note alignment of diffuser corner into side track 8 Firmly push diffuser down until Tab A snaps into place Align top of diffuser ...

Page 10: ...nnected to a dimmer switch Insert plug securely into wall outlet Check bulb for blackening darkening at bottom of spiral where it joins the base an indicator of bulb life and replace bulb Be sure the bulb is securely seated into socket repeat the bulb installation process Sometimes when a new bulb is turned on for the first time the tube will darken but this will fade after a few minutes With olde...

Page 11: ...ture 15 C to 35 C 56 F to 95 F Storage Temperature 0 C to 40 C 32 F to 104 F Relative Humidity 5 to 95 non condensing Bulb Replacement bulb 36 Watt 10 000 hour bulb replace with Verilux brand only Model number CFML36VLX Power Input Power AC 120V 60Hz UL Listed in Canada and the USA ...

Page 12: ...sed by or resulting from accident external destruction alteration modification abuse misuse or misapplication of this product This warranty does not cover damage to the product resulting from return shipping or handling The use of shipping insurance is recommended to help protect your product Return Authorization is required for all returns To obtain a Return Authorization please contact the Veril...

Page 13: ...Model VT05 ...

Page 14: ...tres produits d éclairage bons pour la santé sont disponibles sur notre catalogue et en ligne Visitez notre site Web à www verilux com pour demander gratuitement un catalogue et pour en savoir plus sur tous nos produits de qualité Verilux ou appelez notre numéro sans frais 1 800 454 4408 En tant que client Verilux nous accordons beaucoup d importance à votre satisfaction Nous sommes fiers de pouvo...

Page 15: ...pareil 5 Fonctionnement 6 Choisir un emplacement 6 Directives d utilisation 6 Utilisations recommandées 7 Retrait et remplacement de l ampoule 8 Réinstallation de l ampoule et du diffuseur en plastique 9 Dépannage 10 Entretien et nettoyage 10 Données techniques 11 Garantie 12 Sommaire ...

Page 16: ...as être utilisée Cette lampe ne contient pas de pièces réparables Ne bloquez pas les bouches d aération Les bouches d aération sont nécessaires au bon fonctionnement du ballast électronique si vous les bloquez le système électronique risque de surchauffer et de provoquer un incendie Chaque personne réagit de façon différente à la lumière des lampes d énergie Suivez les instructions de test préalab...

Page 17: ...lisation au test préalable suivant Étape 1 Placez la lampe à 50 cm 18 po environ de votre visage et allumez la ne regardez pas directement la lampe Étape 2 Laissez la lampe allumée pendant 10 minutes environ puis éteignez la En cas de gêne interrompez l utilisation de la lampe et consultez un médecin En cas d absence de gêne poursuivez l utilisation en réduisant progressivement la distance du visa...

Page 18: ...vos yeux et ceux ci doivent être ouverts afin d en tirer tous les avantages Note Ne regardez pas directement la lampe Lorsque vous vous sentez paresseux et manquez d énergie passez plus de temps sous la lampe rapprochez vous de la lampe ou ajoutez d autres appareils d éclairage pour augmenter l intensité Si vous vous sentez nerveux ou si vous êtes excité éloignez la lampe ou réduisez le temps d ut...

Page 19: ...heure chaque jour Il n est pas nécessaire de s asseoir devant la lampe continuellement Vous pouvez diviser la durée en plusieurs courtes sessions Continuez à utiliser la lampe HappyLight tous les jours pour ressentir une amélioration de votre humeur et de votre niveau d activité Lorsque vous vous sentez paresseux et manquez d énergie passez plus de temps sous la lampe rapprochez vous de la lampe o...

Page 20: ... ampoule 1 Débranchez la lampe de la prise de courant 2 Pour accéder à l ampoule enlevez le diffuseur en plastique en faisant pression sur les onglets D et en soulevant le diffuseur 3 À l aide d un tournevis standard enlevez les deux vis E qui fixent le support Enlevez le support F 4 Enlevez l ampoule B en tenant la base et en tirant directement vers le haut Retrait et remplacement de l ampoule D ...

Page 21: ...5 Placez un coin du diffuseur dans la coulisse latérale et faites le glisser doucement vers le bas pour l insérer dans la coulisse inférieure 6 Enclenchez l onglet latéral en position fente latérale La totalité latérale de la lentille doit être engagée dans la coulisse 7 Répétez la même procédure pour l autre côté du diffuseur Notez l alignement du coin du diffuseur dans la coulisse latérale 8 Pou...

Page 22: ... de noircissement assombrissement au bas de la spirale là où l ampoule rejoint la base indicateur de vie de l ampoule et remplacez l ampoule Parfois quand une ampoule neuve est allumée pour la première fois le tube s assombrit mais cela disparaît au bout de quelques minutes Dans les anciennes ampoules l assombrissement du tube indique la fin de vie de l ampoule Ceci n affecte pas le fonctionnement...

Page 23: ... de stockage entre 0 C et 40 C entre 32 F et 104 F Humidité relative entre 5 et 95 sans condensation Ampoule Ampoule de rechange ampoule de 36 watts 10 000 heures remplacez l ampoule uniquement par une ampoule de la marque Verilux numéro du modèle CFML36VLX Alimentation électrique Puissance d entrée 120 V c a 60 Hz Homologuée UL au Canada et aux États Unis ...

Page 24: ...ment modification abus mauvaise utilisation ou mauvaise application de ce produit La garantie ne couvre pas les dommages causés pendant l expédition ou la manutention du produit Il est recommandé de souscrire une assurance expédition afin de protéger votre produit Une autorisation de renvoi est requise avant tout retour de produit Afin d obtenir cette autorisation prière de contacter le service cl...

Reviews: