background image

4

Software and Installation

Install the software before connecting your Veo Mobile Connect!

If you have already plugged the camera into the computer, please unplug it
before installing the software.

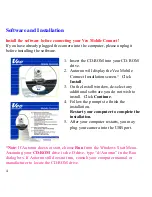
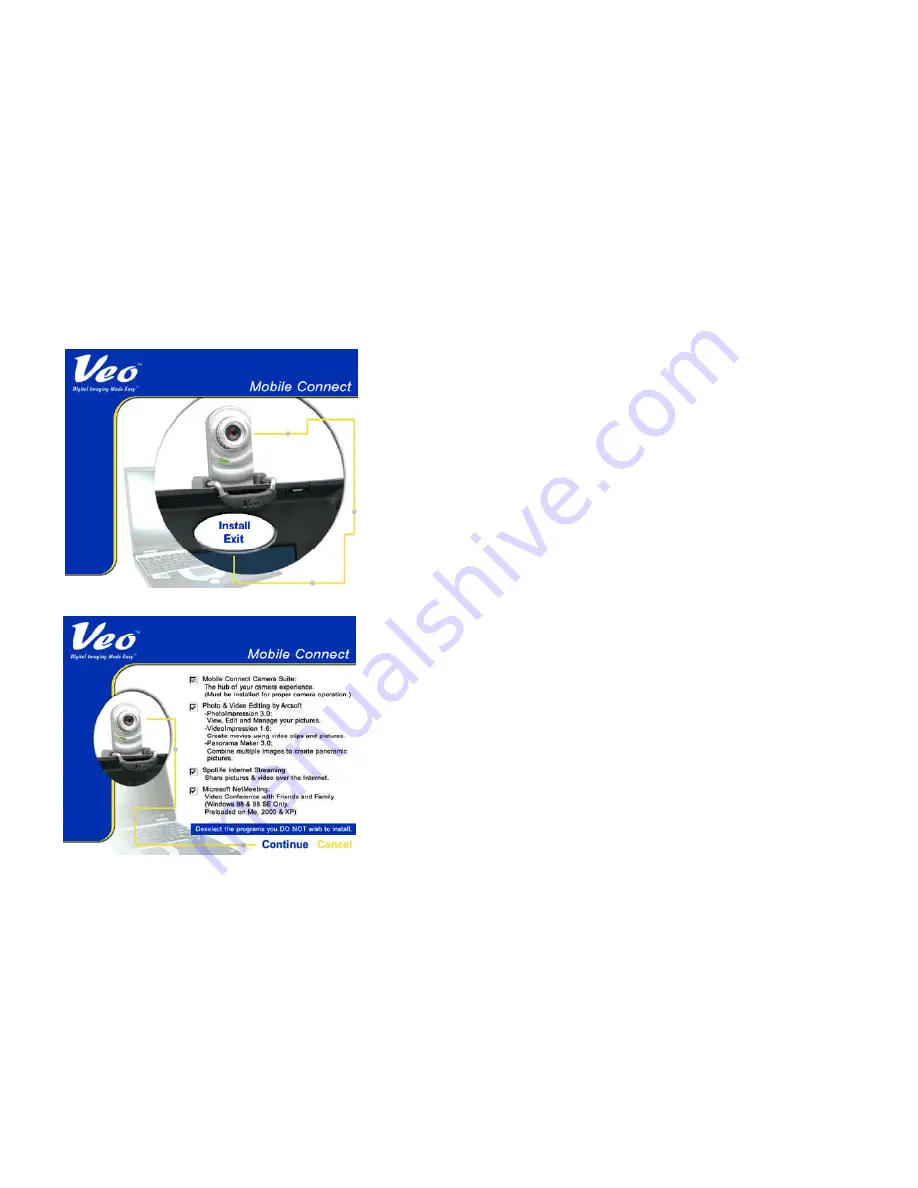
  1. Insert the CD-ROM into your CD-ROM

drive.

  2. Autorun will display the Veo Mobile

Connect Installation screen.

 Click

Install

.

  3. On the Install window, de-select any

additional software you do not wish to
install.  Click 

Continue

.

  4. Follow the prompts to finish the

installation.

Restart your computer to complete the
installation.

  5. After your computer restarts, you may

plug your camera into the USB port.

*Note

: If Autorun does not start, choose 

Run

 from the Windows Start Menu.

Assuming your 

CD-ROM

 drive is the D drive, type “d:\Autorun” in the Run

dialog box. If Autorun still does not run, consult your computer manual or
manufacturer to locate the CD-ROM drive.

Summary of Contents for Mobile Connect

Page 1: ... System Requirements 3 Software and Installation 4 How to connect the Veo Mobile Connect 5 6 The Veo Mobile Connect Suite 7 15 How to send Snapshots and Videos 16 18 Microsoft Windows Messenger NetMeeting 19 33 Troubleshooting 34 40 Additional Help and Resources 41 ...

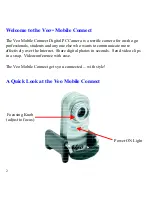
Page 2: ... is a terrific camera for on the go professionals students and anyone else who wants to communicate more effectively over the Internet Share digital photos in seconds Send video clips in a snap Videoconference with ease The Veo Mobile Connect gets you connected with style Focusing Knob adjust to focus Power ON Light ...

Page 3: ...g video mail and videoconferencing messages Microphone not included Internet connection Required for video mail and videoconferencing software Software Microsoft Windows 98 2000 Me or XP Internet browser application i e Microsoft Internet Explorer AOL E mail Program i e Microsoft Outlook Yahoo E mail AOL Note To find the version number of your Windows operating system select Settings from the Wind...

Page 4: ... On the Install window de select any additional software you do not wish to install Click Continue 4 Follow the prompts to finish the installation Restart your computer to complete the installation 5 After your computer restarts you may plug your camera into the USB port Note If Autorun does not start choose Run from the Windows Start Menu Assuming your CD ROM drive is the D drive type d Autorun i...

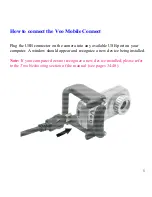
Page 5: ...port on your computer A window should appear and recognize a new device being installed Note If your computer does not recognize a new device installed please refer to the Troubleshooting section of the manual see pages 34 40 How to connect the Veo Mobile Connect ...

Page 6: ...6 How to Mount the Camera Rotate clip horizontally or vertically Clip to your laptop screen Pull to clip ...

Page 7: ...e Connect Suite your camera s video image Note If you do not see an image a Try closing and re opening the Veo Mobile Connect Suite OR If you still cannot see any images please consult the Troubleshooting section again computer Then plug the camera in b Unplug the camera restart your 2 The Application window opens and displays ...

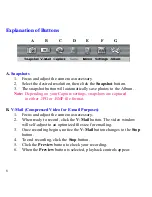
Page 8: ...aptured B V Mail Compressed Video for E mail Purposes 1 Focus and adjust the camera as necessary 2 When ready to record click the V Mail button The video window will self adjust to an optimized file size for emailing 3 Once recording begins notice the V Mail button changes to the Stop button 4 To end recording click the Stop button 5 Click the Preview button to check your recording 6 When the Prev...

Page 9: ...wing C Capture Uncompressed Video 1 Focus and adjust the camera as necessary 2 When ready click Capture to begin recording 3 Notice the Capture button changes to the Stop button 4 Click Stop at any time to end recording 5 Before saving your video to your Album click Preview 6 Playback controls will appear 7 To save to the Album finish viewing the video or click Stop 8 Click the Save button to save...

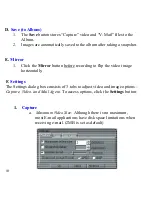
Page 10: ...ages are automatically saved to the album after taking a snapshot F Settings The Settings dialog box consists of 3 tabs to adjust video and image options Capture Video and Mail Agent To access options click the Settings button 1 Capture a Maximum Video Size Although there is no maximum most E mail applications have disk space limitations when receiving e mail 2MB is set as default ...

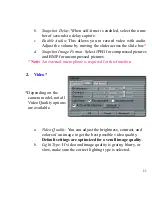
Page 11: ...ctures and BMP for uncompressed pictures Note An external microphone is required for this function 2 Video Depending on the camera model not all Video Quality options are available a Video Quality You can adjust the brightness contrast and colors of an image to get the best possible video quality Default settings are optimized for overall image quality b Light Type If video and image quality is gr...

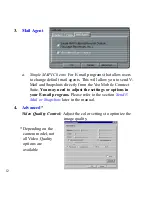
Page 12: ...from the Veo Mobile Connect Suite You may need to adjust the settings or options in your E mail program Please refer to the section Send V Mail or Snapshots later in the manual 4 Advanced Video Quality Control Adjust the color settings to optimize the image quality Depending on the camera model not all Video Quality options are available 3 Mail Agent ...

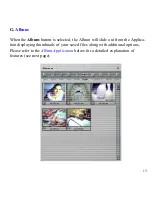
Page 13: ...ton is selected the Album will slide out from the Applica tion displaying thumbnails of your saved files along with additional options Please refer to the Album Application below for a detailed explanation of features see next page ...

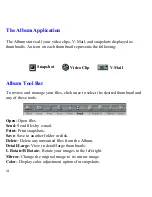
Page 14: ...er folder or disk Delete Delete any unwanted files from the Album Detail Large View in detail large thumbnails L Rotate R Rotate Rotate your images to the left right Mirror Change the original image to its mirror image Color Display color adjustment options for snapshots The Album Application The Album stores all your video clips V Mail and snapshots displayed as thumbnails An icon on each thumbna...

Page 15: ...s Messaging Application Program Interface MAPI For E mail programs and all web based e mail that do not support MAPI please refer to the Manually Attaching Files section on Page 18 If the information located in this section is not sufficient you may need to contact your E mail or web based E mail provider for further assistance Print Snapshots 1 Select the snapshot to be printed and click the Prin...

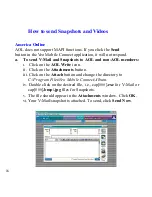
Page 16: ... to AOL and non AOL members i Click on the AOL Write icon ii Click on the Attachments button iii Click on the Attach button and change the directory to C Program Files Veo Mobile Connect Album iv Double click on the desired file i e cap exe for V Mail or cap bmp jpg files for Snapshots v The file should appear in the Attachments window Click OK vi Your V Mail snapshot is attached To send click Sen...

Page 17: ... Microsoft Outlook Express 5 6 Under Tools Options select the button Make Default under Default Messaging Programs This application is NOT the default Mail handler and then click OK Restart your computer Example B Using MAPI with Microsoft Outlook Microsoft Outlook automatically setup your MAPI e mail program during installation Make sure your Outlook e mail application is properly set up with the...

Page 18: ...provided by your web based e mail service to attach the file s 4 Once the file s has been attached to your e mail click the appropriate button to send off your e mail with the snapshot or video attached to it Note Snapshots and V Mail residing in the Album should have this location in your hard drive C Program Files Veo Mobile Connect Album Manually Attaching Files 1 Open your E mail program and c...

Page 19: ...ing To ensure that you obtain the most from your camera experience we have compiled this brief instruction guide to help you get started Note that this guide is provided only as a reference and is not endorsed by Microsoft To obtain additional assistance with Microsoft Windows Messenger beyond what is outlined in this guide refer to the support options on Page 33 ...

Page 20: ...on Start All Programs Windows Messenger to start Windows Mes senger 2 You will be prompted with the sign in screen Enter your e mail address and password and then click OK For example any address ending in hotmail com or msn com can be used ...

Page 21: ...contact list will appear If you want to connect with an other user for videoconferencing you will need to add them to your contact list using the Add button Follow the rest of the directions in Windows Messenger to add your friends or family to your contact list ...

Page 22: ... like to connect with A con versation window will appear where you can do the following Start camera Turn on your camera for videoconferencing Start talking Use your microphone to talk to another person Send a file Transfer a file to another person Text messages Type text messages to another person ...

Page 23: ... the message You have asked to have a video and voice conversation Please wait for a response or Cancel Alt Q the pending invitation The other person who sent the invitation to join the video and voice conversation will see the screen shown on the next page with the message I would like to have a video and voice conversation with you Do you want to Accept Alt T or Decline Alt D the invitation The ...

Page 24: ...person s video will appear in the large video window while your own video will appear in the lower right corner as a Picture in Picture win dow If you have a soundcard and microphone the options for voice will also be avail able You have the options to adjust your speaker volume or mute the micro phone ...

Page 25: ...amera will already have some exposure to the software and probably own a copy Although this is an excellent program to become acquainted with it can be rather complicated the first time you set up a conference To ensure that you obtain the most from your camera experience we have compiled this brief instruction guide to help you get started However since this is a Microsoft program we cannot offer...

Page 26: ...l assistance more information can be obtained from Microsoft at http www microsoft com windows netmeeting IMPORTANT Make sure the Veo Mobile Connect Suite and any other video camera applications are closed before starting Microsoft NetMeeting 1 Look for the NetMeeting icon on your desktop or Quick Launch bar and then double click on it to start Microsoft NetMeeting 2 Microsoft NetMeeting will star...

Page 27: ...se button to initiate the video stream this may take up to a minute depending on your computer Adjust the camera angle and focus to ensure a clear picture of you for your videoconferencing partner These are the buttons you will use with NetMeeting 27 ...

Page 28: ... from Microsoft at http messenger msn com Directions for installing and setting up MSN Messenger will be shown on the MSN Messenger webpage Connecting via MSN Messenger With MSN Messenger you can send instant messages to your friends and family if they are online To start follow the steps outlined below 1 Connect to the Internet and then start MSN Messenger MSN Messenger will indicate the people o...

Page 29: ... bring up a window similar to the interface shown below You may now have a text based conversation in this window 3 Next click on the Invite button and then select To Start Microsoft NetMeeting which will automatically start Microsoft NetMeeting The other person will receive an invitation to start Microsoft NetMeeting ...

Page 30: ...ster frame rates This translates into smoother motion and clearer video 4 If the other person you are connecting to accepts the invitation to start Microsoft NetMeeting you will automatically be connected You will receive video in a window similar to this The person who you are calling will appear in the large main window while you will appear in the smaller Picture in Picture window ...

Page 31: ...et the IP address from the person you are trying to contact each time You can also determine your IP address and then send it to the other person who will use NetMeeting to call you To obtain your IP address first connect to your Internet Service Provider Then use either Method A or B to determine your IP address Method A Start NetMeeting and then click on Help About Windows NetMeeting You can see...

Page 32: ...NFIG You can send your IP address to the person who you are calling or they can send you their IP address by e mail or through an Instant Messaging application such as MSN Messenger To connect to a person using their IP address you can enter it into the high lighted area as shown below After you type in the person s IP address press Enter on your keyboard to connect ...

Page 33: ...mation listed below The resources listed below are third party sources and are neither endorsed nor supported by the camera manufacturer and have been provided only as a reference Microsoft Windows NetMeeting http www microsoft com windows netmeeting 800 936 5700 Toll Free Pay per incident 425 635 7123 Toll Call No charge support MSN Messenger http messenger msn com The Windows NetMeeting Zone htt...

Page 34: ... ROM drive and XXXX corresponds to your version of Windows Select the files that Windows is asking for and copy them into C Windows System Some files may still require the Windows CD Contact your computer vendor to obtain a copy of the Windows CD if one did not come with your computer Problem No such interface supported message Solution Unplug the Veo Mobile Connect from the computer Double click ...

Page 35: ... Click here to restart video to restart the Veo Mobile Connect This will allow the camera to start up properly If the problem persists please consult our extended troubleshooting tips on our website at http www veoproducts com Problem Class not registered hr 0x80040154 or hr 0x800706F8 Solution Refer to the No such interface supported solution Figure 1 Figure 2 ...

Page 36: ...m BIOS Try using the camera on another system to verify that the camera is working properly Problem Digital Video PC Camera is not connected to this computer Solution The camera may not be plugged into the computer or may have a driver conflict Make sure the camera is snugly plugged into the USB slot on your computer then try the camera software again If this doesn t help click on Start Settings C...

Page 37: ...der for the program to clean the installation of the Veo Mobile Connect 4 After the cleanup program has completed press the Exit button 5 Uninstall the Veo Mobile Connect software Start Settings Control Panel Add Remove Programs Veo Mobile Connect and restart the computer 6 Reinstall the Veo Mobile Connect software restart the computer and plug in the camera 7 Try launching the Veo Mobile Connect ...

Page 38: ...e already using the best driver for this device What would you like to do Continue using the current driver Recommended Veo PC Camera Install one of the other drivers View List 5 Select Install one of the other drivers and then click the View List button 6 There will be a list of 1 4 possible Veo PC Camera drivers Usually there will be a few drivers from the CD ROM drive and 1 from the Hard Drive ...

Page 39: ...re your email program to be the default MAPI client correctly You can also manually attach your files to your e mail Please refer to the section titled Send V Mail or Snapshots for more information Problem No e mail agent found on this PC Do you want to continue with video mail disabled message Solution You will get this message if the e mail application you are using does not support MAPI functio...

Page 40: ... plugging the microphone into other jacks Make sure it is not plugged into the speaker or output jack If this does not work please refer to your sound card or microphone manuals Problem You cannot play back an AVI EXE video file Solution The Windows Media Player you are using may not be working correctly Download the latest Windows Media Player from Microsoft at http www microsoft com windows medi...

Page 41: ...om the date of purchase that this product 1 is free from manufacturer defects in materials and work manship and 2 conforms to its specifications If this product does not function due to manufacturer defects during the warranty period Xirlink Inc at its option will either replace this product with one that is functionally equivalent or will refund your purchase price These are your exclusive remedi...

Reviews: