


How to Change Settings in the Setup Screens
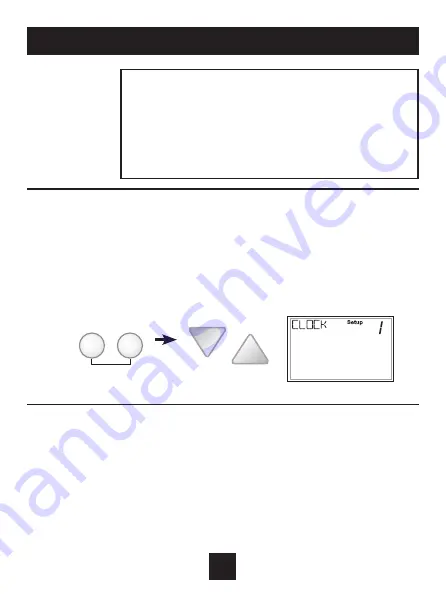
To enter the setup screens, press the MODE button, and
simultaneously press FAN button for 5 seconds. Release the buttons
when you see “Setup” on the display. Use the WARMER or COOLER
buttons to adjust the value of your selection. Press MODE to advance
to the next setup step. Press MODE and FAN together again to leave
the setup screens.
User Setup
17
FAN
MODE
press together for
5 seconds
TO ENTER MENUS
BUTTON PRESS
Setup Steps .......................MODE & FAN for 5 seconds
Time Schedule ..................MODE & Up for 2 seconds
Emergency Heat ...............Up & FAN for 2 seconds
Lockout Buttons ................MODE, Up & Down for 2 seconds
Calibration ..........................MODE & Down for 2 seconds
Wireless Setup .................FAN for 5 Seconds
Setting the Clock and Day
(setup step 1 & 2)
When your thermostat is connected to Skyport Cloud Services, the time and day
of the week are controlled by Skyport. There is no local adjustment, Skyport also
adjusts the time for Daylight Savings Time as well.
To set the time and day when not connected to Skyport; enter the setup screens
by pressing the Mode button and simultaneously pressing the Fan button for
5 seconds.
(Continued)
Table for button
presses that are
required for
entering various
menus


