


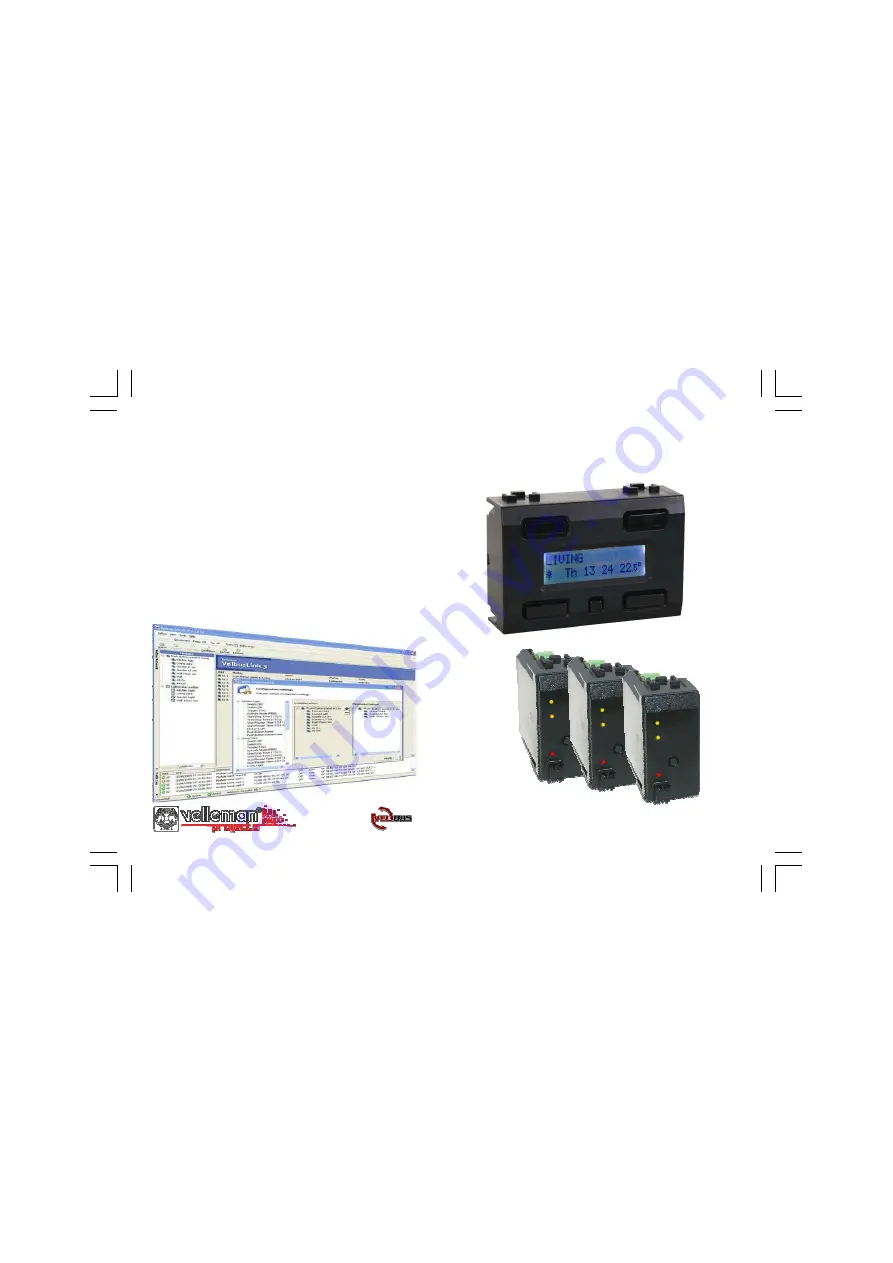
MULTIROOM TEMPERATURE CONTROLLER SYSTEM
MULTIROOM TEMPERATURE CONTROLLER SYSTEM
MULTIROOM TEMPERATURE CONTROLLER SYSTEM
Up to 32 sensors per controller
Up to 7 zones
Up to 31 program instructions can be saved per sensor or zone
Program types
:
day programs
working day programs
weekend programs
week programs
Power supply: 12VDC ... 18VDC/50mA
VMB1TC
VMB1TC
VMB1TC
VMB1TS
VMB1TS
VMB1TS
Summary of Contents for VMB1TC
Page 17: ...17 Program step overview ENGLISH...
Page 23: ......