PMRSET2_v2
VELLEMAN
1
PMRSET2
BASIC PMR TRANSMITTER/RECEIVER SET
1. Introduction
To all residents of the European Union
Important environmental information about this product
This symbol on the device or the package indicates that disposal
of the device after its lifecycle could harm the environment.
Do not dispose of the unit (or batteries) as unsorted municipal
waste; it should be taken to a specialized company for recycling.
This device should be returned to your distributor or to a local recycling
service. Respect the local environmental rules.
If in doubt, contact your local waste disposal authorities.
Thank you for choosing Velleman! Please read the manual thoroughly before
bringing this device into service. If the device was damaged in transit, don't
install or use it and contact your dealer.
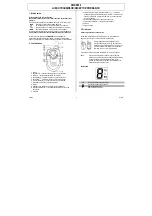
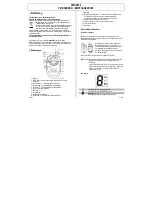
2. Controls
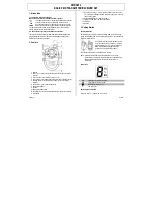
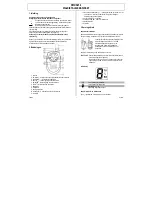
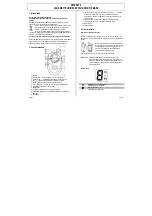
1.
antenna
2.
LCD screen – displays the current selected channel and other status
symbols
3.
torch button – used to turn the torch on or off
4.
up button – press to adjust the volume level and to change channel
5.
down button – press to adjust the volume level and to change
channel
6.
call
C
button – press to transmit call tones
7.
battery compartment
8.
speaker
9.
battery compartment latch
10.
scan
S
button – used to activate/deactivate the channel scan function
11.
microphone
12.
menu/power on/off / button – press and hold to turn the unit on or
off – allows you to change channels, select low/high power – press to
tune on weak signals
13.
push-to-talk
PTT
button – press to transmit
14.
transmission
TX
LED – red when transmitting
15.
LED torch
16.
belt clip
3. Getting Started
Battery Installation
Carefully remove your PMR set from its packing. Remove the belt clip by
pulling the latch away from the unit. While pulling the latch, push the belt clip
to remove it from the unit.
Open the battery compartment by removing the
cover as shown on the left. Insert 3 x 1.5V AAA
alkaline batteries (not incl.) or the included 3.6V
NiMH rechargeable battery pack. Mind the
polarity. Close the battery compartment.
Click the belt clip onto the unit by sliding it into the slot.
NOTE: Switch off the unit and remove the batteries when not in use.
Do not throw your batteries into fire. Replace the batteries with the
exact equivalent type. Please contact your dealer for more
information.
LCD Screen
TX
Lights when in transmission mode
RX
Lights when in reception mode
8
Main channel display (
1
~
8
)
L
Low power icon
Switching the Unit On/Off
Press and hold / to switch the unit on or off.


