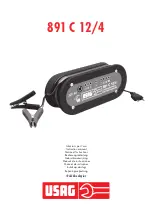
3
Controls and Indicators
FUNCTION BUTTONS (FROM LEFT TO RIGHT):
Battery Type
(Step 1) — allows the user to select Wet, Gel or AGM type of battery
for efficient and safe charge. Most automotive batteries are Wet batteries. Refer to the
battery manufacturer’s specifications for battery type.
4/10/20/50 AMP (Charge Rate Selector)
(Step 2) — allows the user to select
the charger rate based on battery size. This selection and the actual battery charge
rate are monitored by the microprocessor. The charger will stop charging if the rate
is too fast or too slow for the battery size or condition.
150 amp/Engine Start —
places the charger in an engine start sequence, this
button will not be activated unless the charger is in the 50 amp charge mode, set the
4/10/20/50 amps button to 50 amps first to activate this button.
Battery Recond. —
is an automatic mode that, once started, continues for 24 hours
and then stops. A series of electrical pulses breaks the crystalline form of lead sulfate
to return these chemicals into useful battery electrolytes. More than 24 hours may be
needed to restore. Periodic reconditioning is recommended to maintain a battery's
optimum performance. However, if 5 cycles does not improve battery performance,
discontinue and recycle the battery.
Battery Voltage (Alternator Voltage Check) —
is a quick check that measures
the battery voltage. This check is repeated at various electrical load levels and the
tests allow the user to determine if the alternator can keep up with the loads. It can
indicate whether alternator service may be required.
INDICATOR:
Large (.375”) 3-Character Digital Display
in the upper left of the control panel
indicates the various conditions and/or status codes:
Status Codes
are described in the following chart and on the back of charger.
CONTROL PANEL
DIGITAL READOUT
CIRCULATING PATTERN
2
Stage Two —
Absorption Charge maintains the maximum possible charge at a
constant, safe, predetermined voltage. During this phase, the charging voltage remains
constant, while the actual charging current is reduced to allow for the maximum proper
internal chemical energy transfer. At the end of Stage 2, the charger will signal "beep"
and move into Stage 3 charge mode.
Stage Three —
Top-Off Charge — voltage is automatically maintained and
reduced to a predetermined level while current is adjusted for a safe, effective battery
charge. At the conclusion of Stage 3, the unit will BEEP signaling the completion of
the charging cycle.
The Automatic Float Charge feature is ideal for maintaining a battery. It automatically
tops off battery as needed to keep battery fully charged all the time.
FEATURES
• This unit has four charge rate settings, accessed by the 4/10/20/50 AMP button:
a) 4 amps: smaller batteries, as in lawn mowers, snowmobiles, motorcycles, etc.
b) 10 amps: mid-sized batteries, as in small cars
c) 20 amps: automobiles and light trucks
d) 50 amps: large truck batteries, banks of RV batteries
• 150 amp engine start
• Automatic Temperature Compensation
• Battery type selection
• Digital diagnostics
• Alternator voltage and battery voltage check
• Digital display shows charge rate, operating mode, fault codes and FUL when
charged
• 1-minute engine start
• 3-stage high-frequency switch mode automatic rapid charging
• Spark resistant reverse polarity and short circuit protection for user
• Built-in battery reconditioning (desulfate)
• Lightweight, high-efficiency design
• Internal short circuit protection
• Cables and clamps self-stored
• Reverse polarity indication
• Microprocessor control (Digital Smart Control)/High frequency power
• Compensates for low AC from extension cord use
• Equalization function
• Battery recondition function
VEC1098A_Manual_022405 2/24/05 6:08 PM Page 2