


© Continental Automotive GmbH
27
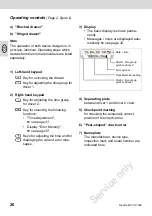
Enable the device
(Page 3, figure
II
)
Opening the drawer
1.
Press the
key.
¾
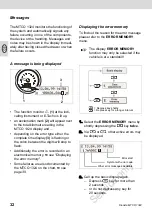
In the display, the "Ejection active"
symbol is shown. Additionally, a
process indicator shows that this
process may take some time.
¾
Wait until the drawer has been
unlocked.
2.
a)
Pull out the
blocked
drawer to the
limit stop.
b)
Pull out the
hinged
drawer to the limit
stop and tip it down.
Remove driver 1 chart if necessary.
3.
Tilt separating plate entirely upwards.
Remove driver 2 chart if necessary.
Inserting the driver 2 chart
4.
The
driver 2
inserts the recorded chart
with the front side facing up in the
"pear-shaped" chart carrier.
5.
Tilt separating plate downwards.
Inserting the driver 1 chart
6.
The
driver 1
inserts the recorded chart
with the front side facing up to the sepa-
rating plate in the chart carrier.
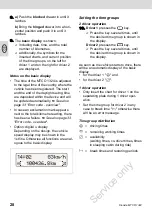
Comment on 1 driver operation
In the 1 driver operation, only the chart for
driver 1 is to be inserted on the separating
plate.
7.
Make sure that the position of the chart
carrier is temporally correct. The time
scale of the chart has to be adjusted to
the current time of the display at the
respective marker
(f)
.
¾
If this is not the case please start the
chart carrier settings update,
➥
see page 34.
The drawer may only be opened, if ...
• the vehicle is at a standstill and
• the ignition is switched on.
Do not try to tip down this drawer
design!
Before starting to drive, the centre
field of the chart has to be duly
recorded,
➥
see page 37
.
Make sure that the chart is located
below the spring element
(c)
.
Make sure that the tachograph chart
is located under the holding-down
device
(d)
and the latches
(e)
of the
pear-shaped chart carrier.
Service only