


VBox V@Home TV Gateway User Manual
5
. Setting up XTi-VBox TV Gateway using the Web Interface
5.1
. Step 1 – System Setup
16
4.
Click
Next
. The
Streaming Settings
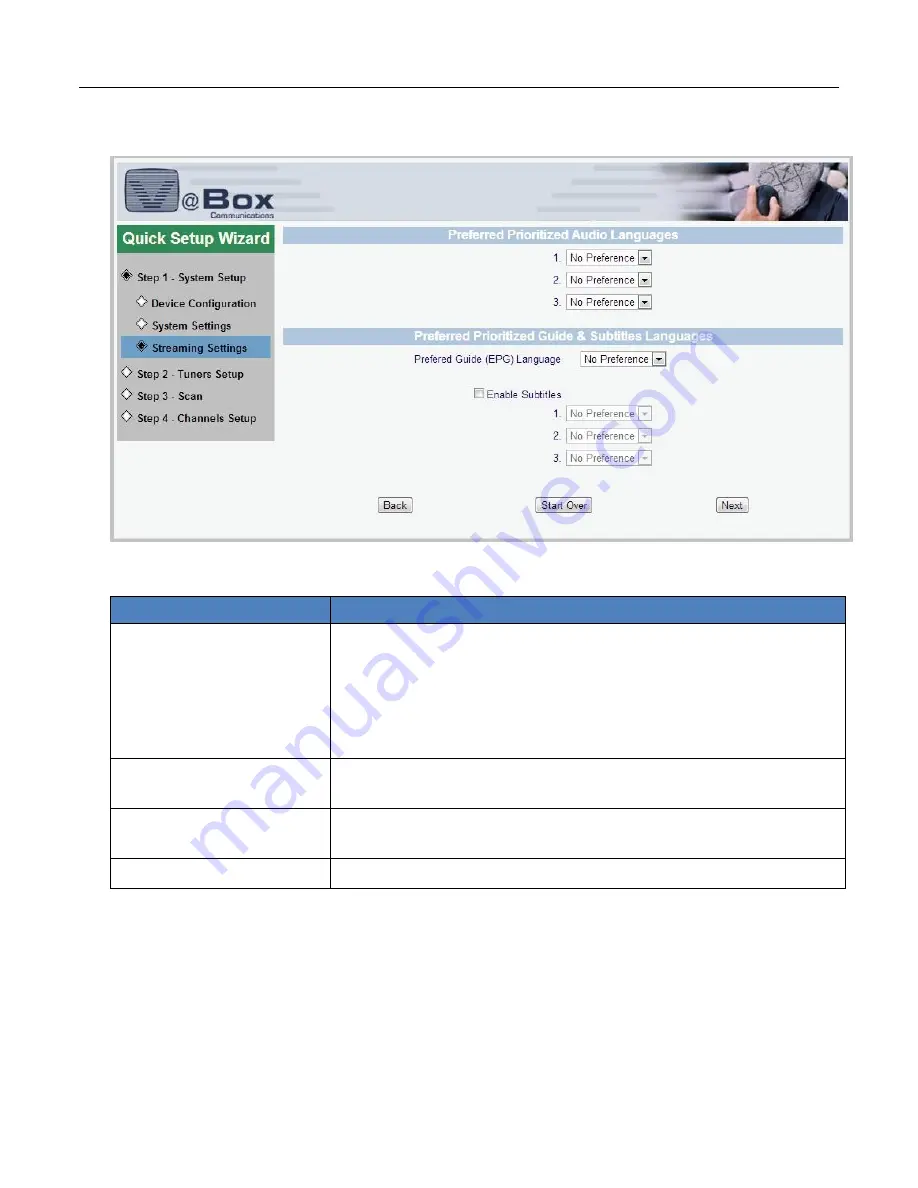
page is displayed (Figure 12).
Figure 12: Quick Setup Wizard – Step 1 – System Setup: Streaming Settings page
5.
Configure your streaming settings as explained in Table 5:
Table 5: Quick Setup Wizard – Step 1 – System Setup: Streaming Settings page
Option
Description
Preferred Prioritized
Audio Languages
Select the language in which you prefer to recieve audio media.
You can list up to three languagesin the order of preference. Your device
will perform the search in the specified order, and provide the audio in
the first requested language that is available in the stream.
If you do not set these preferences, or if these languages are not
available, the device will provide the stream’s default audio language.
Preferred Prioritized Guide
& Subtitles Languages
Select the language in which you prefer to view program guides and
subtitles.
PreferredGuide(EPG)
Language
Select the language in which you prefer to view your electronic
programguide (EPG).
EnableSubtitles
Check this box to display subtitles and select their preferred language.
These settings complete
Step 1-System Setup
and you can proceed to


