2
5
7 Troubleshooting
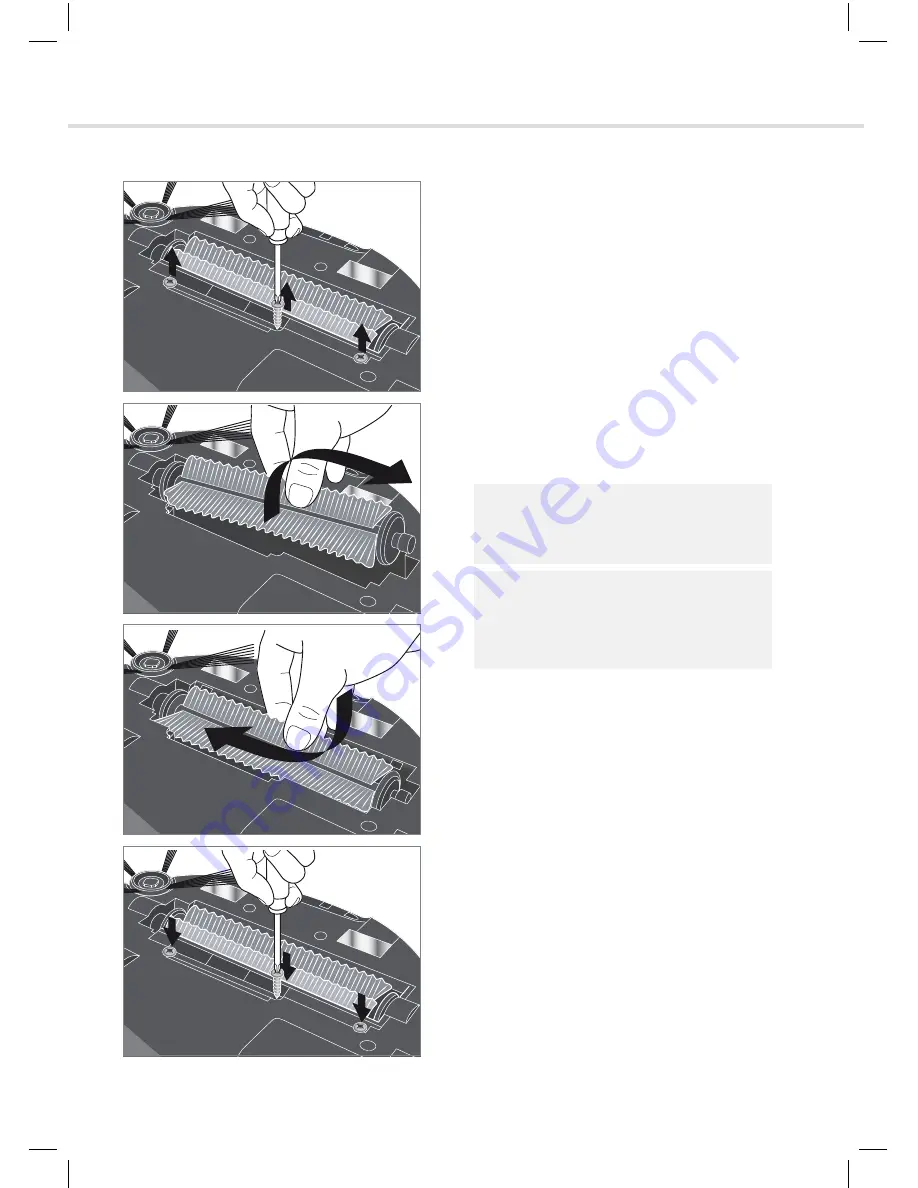
7.3 Removing and cleaning the main brush
If the main brush needs advanced cleaning,
proceed as follows:
1.
Ensure that the appliance is switched off
(no LED is lit).
2.
Position the robot upside down.
3.
Unscrew the 3 screws as shown (Fig. 30).
4.
Remove the support brush.
5.
Remove the main brush as indicated
(Fig. 31).
6.
Clean main brush and support brush thor-
oughly of hairs and lint.
7.
Re-insert the main brush as indicated
(Fig. 32).
8.
Put the support brush back into place.
9.
Screw in the 3 screws (Fig. 33).
30
31
32
33
NOTE:
If necessary,
carefully
use scissors or
tweezers.
NOTE:
If the brush is excessively dirty, it might be
useful to replace it;
2
6
7 Troubleshooting
7.4 Changing the side brush
1.
Ensure that the appliance is switched off
(no LED is lit).
2.
Pull off the side brush (Fig. 34).
3.
Install the new side brush. It will audibly
snap into place.
7.5 Changing the remote control's battery
1.
Open the remote control's battery com-
partment (Fig. 35). It is advisable to use a
small coin to ease this operation.
2.
Substitute the worn out CR2025 cell with a
new one. Pay attention to correct polarity
(Fig. 35).
3.
Dispose of the worn out cell at your local
recycling points. Keep these batteries
away from children!
7.6 Changing the light fence tower's batteries
Z
Chapter 3.6, "Inserting batteries into the light fence tower"
7.7 If the appliance is defective
34
+
35
WARNING:
Danger of injury! Never use or charge a defective appliance! If the robot or power cord of the AC
adapter is damaged, it must be replaced by the manufacturer, the manufacturer's customer ser-
vice or a similarly qualified person, in order to avoid danger.
If the appliance has been dropped or damaged in another way and has obvious signs of damage,
have it repaired by an authorised dealer or service agent
RBNAV1B1_Navigator_Robot_UG_Amd_190216.indd 26
19/02/2016 10:43


