background image

Introduction

19

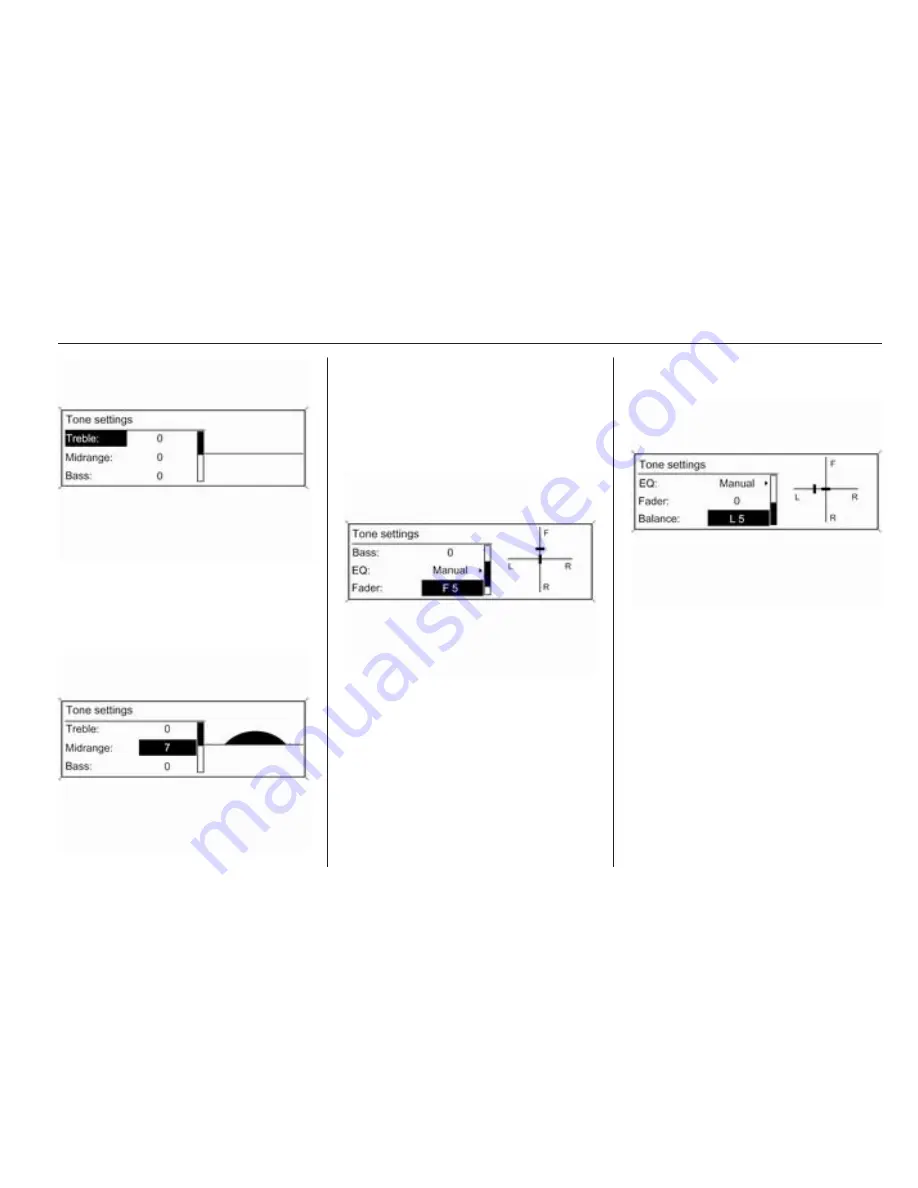
Press the TONE button to open the

tone menu.

Setting bass, middle and treble

Select Bass:, Midrange: or Treble:.
Set the desired value for the selected

option.

Setting the volume distribution

between front - rear

Select Fader:.
Set the desired value.

Setting the volume distribution

between right - left

Select Balance:.
Set the desired value.

Setting an individual setting to “0”

Select the desired option and press

and hold the multifunction knob for

a few seconds.

Setting all settings to "0" or "Off"

Press and hold the TONE button for

a few seconds.

Summary of Contents for 2011 Astra

Page 1: ...0 1 VAUXHALL Astra VAUXHALL Astra Infotainment Manual Model Year 2011 5 Edition December 2010 TS 1681 B 11...

Page 2: ...Introduction 2 Radio 23 CD DVD player 39 AUX input 45 USB port 47 Navigation 51 Voice recognition 81 Phone 86 Index 108 Contents...

Page 3: ...the Infotainment system as further audio sources The digital sound processor provides you with several preset equalizer modes for sound optimisation The navigation system only CD 500 DVD 800 with dyn...

Page 4: ...es that you are not allowed to turn into are not marked on the map In such areas the Infotainment system will issue a warning that must be accepted Here you must pay particular attention to one way st...

Page 5: ...4 Introduction...

Page 6: ...g press save stations automatically 24 8 FAV 1 2 3 25 Lists of favourites preset radio stations 25 9 TP 32 Activate or deactivate radio traffic service 32 10 CD DVD ejection 41 11 CONFIG 20 System set...

Page 7: ...6 Introduction...

Page 8: ...4 Long press save stations automatically 24 8 FAV 1 2 3 25 Lists of favourites preset radio stations 25 9 TP 32 Activate or deactivate radio traffic service 32 If Infotainment system is switched off d...

Page 9: ...8 Introduction...

Page 10: ...4 8 FAV 1 2 3 25 Lists of favourites preset radio stations 25 9 TP 32 Activate or deactivate radio traffic service 32 If Infotainment system is switched off display time and date 32 10 CD ejection 41...

Page 11: ...volume 10 5 Short press end decline call 99 or close call list 99 or deactivate speech recognition 99 or activate deactivate mute 10 Usage Control elements The Infotainment system is operated via func...

Page 12: ...ment system limits the maximum adjustable volume If necessary the volume is decreased automatically Modes of operation Radio Press the RADIO button to open the radio main menu or to change between the...

Page 13: ...value to switch a system function on off BACK button Press the BACK button briefly to exit a menu return from a submenu to the next higher menu level delete the last character in a character sequence...

Page 14: ...ched on or off Press the multifunction knob to switch between the settings On and Off Entering a character sequence To enter character sequences e g telephone numbers or road names Turn the multifunct...

Page 15: ...rrow on the right hand edge of the menu indicates that after selection of the option a submenu with further options will be opened Activating a setting Turn the multifunction knob to mark the desired...

Page 16: ...acter Press the multifunction knob to confirm the selected character Using the BACK button the last character in the character sequence can be deleted CD 300 Menu elements and symbols The down arrow 1...

Page 17: ...tion knob to display the desired setting Press the multifunction knob to activate the setting Setting a value Press the multifunction knob to open the corresponding settings menu Turn the multifunctio...

Page 18: ...to confirm the character displayed Using the BACK button the last character in the character sequence can be deleted Tone settings CD 500 DVD 800 In the tone settings menu the tone characteristic can...

Page 19: ...and hold the multifunction knob for a few seconds Setting all settings to 0 or Off Press and hold the TONE button for a few seconds Optimising the tone for the style of music Select EQ Equalizer The d...

Page 20: ...ing the volume distribution between front rear Select Fader Set the desired value Setting the volume distribution between right left Select Balance Set the desired value Setting an individual setting...

Page 21: ...800 Maximum startup volume Press the CONFIG button to open the system settings menu Select Radio settings and then Maximum startup volume Set the desired value Speed dependent volume Press the CONFIG...

Page 22: ...Press the CONFIG button to open the system settings menu Select Radio settings and then Maximum startup volume CD 300 select Audio settings and then Start up Volume Set the desired value Speed compens...

Page 23: ...ly saved for the key being used last volume settings one volume level for all non phone audio sources radio CD player AUX USB and one for phone audio if phone portal available all radio station preset...

Page 24: ...he RADIO button once or several times to select the desired waveband The station last played in that waveband will be received Station search Automatic station search Briefly press the button s or u t...

Page 25: ...on knob and set the optimal reception frequency on the pop up frequency display AM waveband Turn the multifunction knob and set the optimal reception frequency on the pop up frequency display DAB wave...

Page 26: ...AS button to open an autostore list or to switch to another autostore list Briefly press one of the station buttons 1 6 to open the station at the corresponding list position Favourite lists Stations...

Page 27: ...he currently received station is marked by i Storing a station Set the station to be stored Briefly press the FAV button to open a favourite list or to switch to another favourite list To store the st...

Page 28: ...knob to open the relevant waveband menu Note The following FM specific displays are shown as examples CD 500 DVD 800 Favourites list Select Favourites list All stations saved in the favourites lists...

Page 29: ...on lists The dual tuner in the Infotainment system continuously updates the station lists in the background This ensures that e g the station lists always contain the stations that can be received in...

Page 30: ...station is marked by i DAB announcements Besides their music programmes numerous DAB stations 3 36 broadcast various announcement categories The currently received DAB service programme is interrupte...

Page 31: ...r FM stations list All receivable AM FM stations in the current reception area are displayed DAB waveband not available for CD 300 Turn the multifunction knob All receivable DAB stations 3 36 in the c...

Page 32: ...d e g news Some stations also change the PTY code depending on the content currently being transmitted The Infotainment system stores these stations sorted by programme type in the corresponding categ...

Page 33: ...ates the finding of the desired station and its fault free reception Advantages of RDS On the display the programme name of the set station appears instead of its frequency On station search the Infot...

Page 34: ...t is currently receivable and about the music track being played at the moment are displayed below the programme name To show or hide the information Set Radio text to On or Off TA volume The volume o...

Page 35: ...tworks With EON you can listen to radio traffic announcements even if the station you have set does not broadcast its own radio traffic service If such a station is set it is displayed in black as for...

Page 36: ...ations are RDS stations that broadcast traffic news Switching the radio traffic service on and off To switch the traffic announcement standby facility of the Infotainment system on and off Press the T...

Page 37: ...l radio programmes services can be broadcast on a single frequency ensemble Besides high quality digital audio services DAB is also able to transmit programme associated data and a multitude of other...

Page 38: ...gs and then DAB settings The following options are available in the configuration menu Auto ensemble linking with this function activated the device switches over to the same service programme on anot...

Page 39: ...e switches over to a corresponding FM station of the active DAB service if available when the DAB signal is too weak to be picked up by the receiver Dynamic audio adaption with this function activated...

Page 40: ...standard may not play correctly or not at all Self recorded CD Rs and CD RWs are more vulnerable to mishandling than prerecorded CDs Correct handling especially in the case of self recorded CD Rs and...

Page 41: ...replacement of the device will then be necessary The following CD formats can be used CD ROM Mode 1 and Mode 2 CD ROM XA Mode 2 Form 1 and Form 2 The following file formats can be used ISO9660 Level...

Page 42: ...ide upward into the CD DVD slot until it is pulled in CD DVD replay starts automatically and the Audio CD or Audio MP3 menu is displayed If there is already a CD DVD in the unit but the Audio CD or Au...

Page 43: ...o select a track on the audio CD select Track list and then select the desired track During MP3 replay Press the multifunction knob to open the MP3 related menu To play all tracks in random order set...

Page 44: ...ly CD 300 During audio CD or MP3 replay press the multifunction knob and then select Default CD page view or Default MP3 page view Select the desired option Changing the folder level only CD 300 MP3 r...

Page 45: ...both audio and MP3 data the audio data can be selected from Playlists Folders To open a menu with additional options for track search and selection select Search What options are available depends on...

Page 46: ...es Note The socket must always be kept clean and dry It is possible for example to connect a portable CD player with a 3 5 mm jack plug to the AUX input Usage CD 500 DVD 800 Press the CD AUX button on...

Page 47: ...input CD 300 CD 400 Press the AUX button once or several times to activate the AUX mode An audio source that is connected to the AUX input can be operated only via the control elements of the audio s...

Page 48: ...and USB drives The MP3 players and USB drives connected must comply with the USB Mass Storage Class specification USB MSC Only MP3 players and USB drives with a cluster size smaller or equal to 64 kB...

Page 49: ...ng an iPod on which a more recent version of the firmware is installed than is supported by the Infotainment system When connecting an iPod on which firmware from other providers e g Rockbox is instal...

Page 50: ...n once or several times to activate the audio iPod mode Replay of the audio data stored on the iPod is started The operation of the iPod connected via USB is mainly the same as for an audio MP3 WMA CD...

Page 51: ...e described for USB drives only Operation of other devices like iPod or Zune is mainly the same Selecting tracks using the USB menu Press the multifunction knob to open the USB related menu To play al...

Page 52: ...short notice and hazards or problems that arise suddenly e g road works Caution The usage of the navigation system does not release the driver from the responsibility for a correct vigilant attitude i...

Page 53: ...s displayed in the route guidance display as symbols or as detailed text on the TMC messages menu To be able to use TMC traffic information the system has to receive TMC stations in the relevant regio...

Page 54: ...active show calculated route if route guidance active toggle between full map display arrow display if route guidance active and split screen display see Information on the display DEST button open me...

Page 55: ...scale change scale turn multifunction knob Route guidance active If route guidance is active the following information depending on the current Navigation options settings 3 68 is displayed Informatio...

Page 56: ...the map the following information is shown The route as a blue line The current position as a red triangle The final destination as a chequered flag Various symbols 3 77 that indicate traffic informat...

Page 57: ...e or based on the street name Warning messages when route guidance is inactive Decide whether the Infotainment system should announce warning messages even if no route guidance is active Delete lists...

Page 58: ...s an error message on loading removing map material this command can be used to quickly and completely erase the internal memory Delete Home address This command deletes the currently set Home address...

Page 59: ...s the multifunction knob to open the Countries menu Select the desired country Entering an address using the speller function Mark the City input field and press the multifunction knob to activate the...

Page 60: ...lecting an address from the address book Description 3 67 Selecting a previous destination Press the DEST button and then select Last destinations A list of destinations entered selected recently is d...

Page 61: ...eviations used for fuel types CNG Compressed natural gas LPG Liquefied petroleum gas Select the desired petrol station The Navigation menu is displayed description 3 68 Setting filters for search refi...

Page 62: ...t see example above for Vicinity current position Around other cities Selection of points of interest around any city Select the desired country Enter the desired city using the letter function 3 57 O...

Page 63: ...The Navigation menu is displayed description 3 68 Selecting a destination from the map Press the DEST button and then select Select from map Note The map scale can be changed by turning the multifunct...

Page 64: ...ly available for the regions saved Press the DEST button and then select Travel guide Various options for the selection of points of interest based on travel guide criteria e g accommodation sights le...

Page 65: ...aypoint the following options for selecting entering intermediate destinations are displayed Enter waypoint address entry Address book Last destinations Select from map Points of interest Select an op...

Page 66: ...avigation menu is displayed To start route guidance select Start tour All predefined intermediate destinations are taken into account for route calculation If you want to skip predefined intermediate...

Page 67: ...destination mark this destination and then press the multifunction knob Delete waypoints Displays a list with all intermediate destinations on the selected tour Mark the desired intermediate destinat...

Page 68: ...petrol station The Navigation menu is displayed Select Start navigation to start the route guidance 3 68 Description of all Navigation menu options 3 68 Using the address book Adding and saving an ad...

Page 69: ...ing an address or setting the Home address Press the DEST button select Address book select the desired address name and then select Edit The Edit menu is displayed The following options are displayed...

Page 70: ...hone number only available for Points of interest and a Phone portal is available the telephone number will be dialled Store store address in the address book 3 67 Edit change address name delete addr...

Page 71: ...e of the following criteria Fastest Shortest Economical Select Vehicle parameters to open a menu for the selection of vehicle specific parameters The selected parameters will be taken into account for...

Page 72: ...confirmed Select Apply settings to activate the displayed settings and to leave the menu If desired select one or several of the following options in the Navigation options menu Avoid freeways Avoid...

Page 73: ...rientation North up Head up and dimension 2D 3D on the map display 3D only available for DVD 800 Select Map options and then Show POIs on map to open a submenu with various options to define whether a...

Page 74: ...vigation the route guidance is deactivated and the menu options for route guidance inactive are displayed 3 68 TMC messages Information on TMC 3 51 After selecting TMC messages the Filtering menu is d...

Page 75: ...nformation Description 3 Functions with route guidance inactive Destination information Description 3 Functions with route guidance inactive Overview current route The following information on the cur...

Page 76: ...ains active until a new route calculation is performed Remove all route blockages After selecting this option all areas route sections previously selected as to be excluded from the route guidance wil...

Page 77: ...ing into account the current traffic situation The activation and deactivation of dynamic route guidance as well as criteria for the calculation of the route and other settings for navigation are made...

Page 78: ...Navigation 77 Symbols overview...

Page 79: ...1 Storm 12 Caution warning 13 Closed road 14 Dense traffic 15 Traffic jam 16 Narrow lanes 17 Open list No Explanation 18 Closed list 19 Shopping centre 20 Toll road 21 Tourist information 22 Sight 23...

Page 80: ...Navigation 79...

Page 81: ...er 42 Tunnel 43 Kiosk 44 Grocery 45 Hotel motel 46 Motorway exit 47 Car park 48 Park ride 49 Multi storey car park No Explanation 50 Petrol station 51 Service area 52 Restaurant 53 WC 54 Historical mo...

Page 82: ...this the speech recognition acknowledges important commands and will enquire if necessary To ensure that conversations inside the vehicle do not lead to unintentional triggering of the mobile phone t...

Page 83: ...ered depending on the context Entering a telephone number After the command Dial the speech recognition requests input of a number The telephone number must be spoken in your normal speech without any...

Page 84: ...telephone call To do so press the button w Commands available Send activate manual DTMF touch tone dialling e g for voice mail or telephone banking Send nametag activate DTMF touch tone dialling by en...

Page 85: ...oice output Please say the nametag to save User Name Voice output Please repeat the nametag to confirm User Name Voice output Saving the nametag Deleting A previously saved voice tag is deleted with t...

Page 86: ...n Example of a dialogue User Select device Voice output Please say a device number to select User device_number Voice output Do you want to select the device number device_num ber User Yes Voice outpu...

Page 87: ...tionally via the speech recognition system The mobile phone can be operated using an external vehicle antenna by inserting it into an adapter that is specific to the phone Not all Phone portal functio...

Page 88: ...at http www bluetooth com Additionally the Phone portal supports SIM Access Profile SAP EU R TTE Compliance Hereby we declare that the Bluetooth System Transceiver is in compliance with the essential...

Page 89: ...phone please refer to the operating instructions for the mobile phone Telephone specific adapters If you are using a telephone specific adapter the mobile phone is operated via the external antenna Th...

Page 90: ...f the phone first Mobile phones with connection interface on the lateral edge Installing the adapter Fasten the adapter to the base plate Make sure that the contacts are correctly connected First lowe...

Page 91: ...nlocking button on the adapter and lift the mobile phone Bluetooth connection Bluetooth is a radio standard for the wireless connection of for example a telephone with other devices Information such a...

Page 92: ...When the mobile phone is added as a handsfree device the user can make or receive calls and use other functions via the Phone portal The range of functions available depends on the mobile phone While...

Page 93: ...erated via the Phone portal Changing the Bluetooth code only relevant for handsfree mode The first time a Bluetooth connection to the Phone portal is set up a default code is displayed This default co...

Page 94: ...will have to enter the PIN code of the SIM card in the mobile phone Enter the PIN code of the mobile phone SIM The mobile phone is paired with the Phone portal Services of the mobile network provider...

Page 95: ...Select Change PIN Enter the current PIN code Enter the new PIN code Repeat the new PIN code and confirm The PIN has been changed Configuring network services Select Phone settings and then Network ser...

Page 96: ...de When the mobile phone is added as a handsfree device the user can make or receive calls and use other functions via the Phone portal The range of functions available depends on the mobile phone Whi...

Page 97: ...ted via the Phone portal Changing the Bluetooth code only relevant for handsfree mode The first time a Bluetooth connection to the Phone portal is set up a default code is displayed This default code...

Page 98: ...will have to enter the PIN code of the SIM card in the mobile phone Enter the PIN code of the mobile phone SIM The mobile phone is paired with the Phone portal Services of the mobile network provider...

Page 99: ...hange PIN Enter the current PIN code Enter the new PIN code Repeat the new PIN code and confirm The PIN has been changed Configuring network services Select Phone settings and then Network services Th...

Page 100: ...can enquire about this with the local network operators The emergency call number can differ depending on the region and country Please enquire beforehand about the correct emergency call number for t...

Page 101: ...instructions for the telephone specific adapter CD 500 DVD 800 Setting the volume for hands free facility Turn the m knob of the Infotainment system or press the buttons on the steering wheel Diallin...

Page 102: ...ntries that you want to have displayed Note Telephone book entries are carried over as they are transferred from the mobile phone The presentation and order of the telephone book entries may be differ...

Page 103: ...ly making a telephone call press the multifunction knob to open a submenu Various options are available depending on the situation and range of functions of the mobile phone Hang up disconnect the tel...

Page 104: ...ing process You can switch to the telephone book menu by selecting PB Telephone book After setting up the connection the telephone book is compared with the telephone book in the temporary memory prov...

Page 105: ...ialling process Call lists Via the menu Call lists the user can view incoming outgoing and missed calls and dial the relevant numbers To start a dialling process select the desired call list an entry...

Page 106: ...s The vehicle specific installation instructions and the operating guidelines of the mobile phone and handsfree manufacturer must be observed when installing and operating a mobile telephone Failure t...

Page 107: ...ed mobile telephone standards is only permitted using an antenna located outside of the vehicle Caution Mobile telephones and radio equipment may lead to malfunctions in the vehicle electronics when o...

Page 108: ...Phone 107...

Page 109: ...Connection 88 Control elements overview 5 D DAB 36 Destination input 57 Digital audio broadcasting 36 Dynamic guidance 75 E Emergency call 99 Enhanced Other Networks 32 EON 32 F Favourite lists 25 G...

Page 110: ...speller function 57 Navigation display 53 Navigation maps 51 Navigation volume 53 O Operation 99 P Personalisation 22 Phone adjusting ring tones 90 Bluetooth 86 Bluetooth connection 90 call lists 99 c...

Page 111: ...ns 24 25 Switching the Infotainment system on or off 10 Switching the radio on 23 Symbols overview 77 T Telephone specific adapter 88 Theft deterrent feature 3 Tone settings 17 Traffic announcements 2...

Reviews: