8
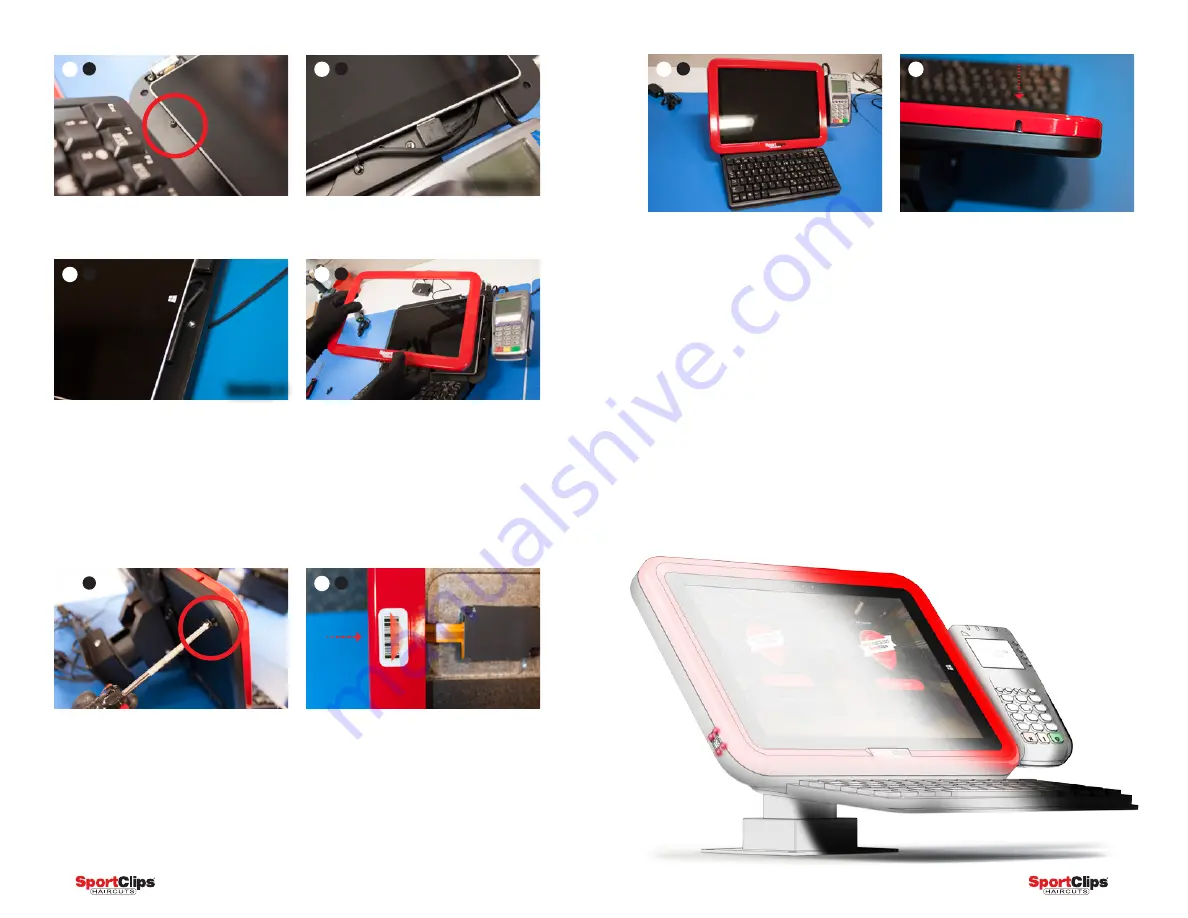
Ensure the faceplate is positioned evenly
around the perimeter, then carefully
install the (4) faceplate screws on the
back of the enclosure.
➑
D
IMPORTANT!
Attach the red faceplate
from the right side first, ensuring all
cables are contained neatly within the
enclosure. As the left side is brought
down, exert slight outward (leftward)
pressure to ensure the faceplate seats
correctly. There should be no exposed
wires or gaps between the faceplate and
the kiosk backplate. If there are, verify all
cables and the tablet itself are flat.
➑
C
Note the routing of the tablet cables.
➑
B
Version 4
The tablet should rest against the guide
pins on the side and bottom of the
enclosure to proper alignment.
➑
A
Note the routing of the tablet cables.
➑
B
Version 1-3
Place the included scanner decal on the
faceplate as shown.
➑
E
9
Completed kiosk.
Note: Please take all remaining bags/
parts to the store for kiosk installation.
All unused parts should be saved for
potential future use.
➒
A
The tablet power button can be
accessed through the top/left of the
enclosure. Be sure to use an appropriate
tool to avoid damaging the button (do not
use a paper-clip).
FUN FACT! The end of a lollipop stick is
the perfect tool for reaching the tablet
power button.
➒
B
Summary of Contents for Sport Clips Haircuts SC-PM-MS4P-P4SC
Page 8: ...12 13 ...


