background image

VASNER

17

Front 


    Back

Installation instructions

1.  Remove the heater from its packaging and remove any packaging 


materials from the heater and accessories. 

If you have tested the heater function before installing it, allow  

it to cool before installing it.

2.  Next, carefully choose where the heater is to be installed.  


It can be installed under the following circumstances:


a.  On the wall using the wall/ceiling bracket


a.  On the ceiling using the wall/ceiling bracket


The heater should not be positioned opposite outside windows, 


as this would result in the majority of the thermal energy being lost.


Ensure there is a minimum distance of 50 cm to other objects and en- 


sure that the radiation area is as free as possible to maximise the effect.  


There must be a distance of at least 10 cm to the side of the heater, as  


well as above and below it.


Removable wall bracket

Rotatable safety  

mechanism

GB

Drill hole in each

corner

Summary of Contents for Citara T PLUS Series

Page 1: ...3 GEG This product is only suitable for well insulated rooms or for occasional use Citara T Citara T PLUS Die beschreibbare Tafel Infrarot heizung in exklusiver Metall Optik Montage Bedienungsanleitung The infrared Blackboard Heater in exclusive metal design Installation guide and user manual Modelle Model Citara T 300M Art Nr VICT300 Citara T 450M Art Nr VICT450 Citara T 700M Art Nr VICT700 Citar...

Page 2: ...der Citara Serie für warme Momente VASNER Ein Stück Zuhause Inhalt Bedienungsanleitung Seite 3 Grundlegende Sicherheitshinweise Seite 6 Beschreibung und Zubehör Seite 6 Die Montagehinweise Seite 8 Montage der Flächenheizung Seite 8 Inbetriebnahme Seite 9 Hinweis Tafelkreide Seite 10 Reinigung Wartung Service Entsorgung Seite 11 Garantie Seite 12 Technische Daten Seite 24 CE Erklärung Seite 25 Serv...

Page 3: ...betrieb durchzuführen gemäß VDE WICHTIGE SICHERHEITSHINWEISE Nachstehend haben wir Ihnen die wichtigsten Sicherheitshin weise zusammengefasst um möglichen Gefahren wie Verlet zungen Feuer oder Stromschlag im Umgang mit elektrischen Geräten vorzubeugen Lesen Sie diese bitte sorgfältig durch bevor Sie das Gerät in Betrieb nehmen Bitte beachten Sie stets folgende Sicherheitshinweise Kindern ab 3 Jahr...

Page 4: ...sen Dieses ist vor Gebrauch zu prüfen Fassen Sie den Stromstecker nie mit nassen Händen an und achten Sie da rauf dass die Steckdose sauber und staubfrei ist Fassen Sie den Stecker zum Einstecken oder Ausstecken immer direkt am Stecker an Ziehen Sie niemals am Kabel selbst Vermei den Sie Knickstellen und klemmen Sie das Kabel nicht ein Wenn die Netzanschlussleitung dieses Gerätes beschädigt wird m...

Page 5: ... reinigen umpositionieren warten oder installieren so schalten Sie das Gerät immer komplett aus und entfernen Sie stets den Stromstecker aus der Steck dose Achten Sie auf mögliche Beschädigungen der Heizung Be sonders wenn das Gerät gefallen ist oder anderweitig be schädigt wurde Sollten Sie Störungen oder Beschädigungen erkennen so setzen Sie das Gerät sofort außer Betrieb und trennen Sie es von ...

Page 6: ...nd fest angeschlossenem Netzstecker 2 1x Metallwandhalterung für die Anbringung an der Wand oder Decke 3 1x Bedienungsanleitung Im Falle einer Beschädigung oder bei fehlenden Komponenten wenden Sie sich bitte direkt an Ihren Händler Vorderseite Rückseite Montagehinweise 1 Entnehmen Sie die Heizung der Verpackung und entfernen Sie jegliche Verpackungsmaterialien vom Gerät und Zubehör Im Falle desse...

Page 7: ...irkung zu erzielen Seitlich sowie nach oben und unten ist umlaufend ein Abstand von mindestens 10 cm einzuhalten 3 Die Heizung darf nur mit der mitgelieferten Halterung an der Wand oder der Decke angebracht werden 4 Bei einem Betrieb ohne Thermostat achten Sie darauf dass eine Überhitzung des Raumes verhindert wird Besonders von kleinen Räu men wo sich Kinder Haustiere befinden können 5 Wenn Sie d...

Page 8: ...ume Gipskarton wände etc Je nach Beschaffenheit Ihrer Wand oder Decke 6 Verwenden Sie Schrauben in der Größe von 6 x 80 mm und schrauben Sie die Halterung fest an die Wand oder Decke so dass die Eck Bohrlö cher der Wandhalterung plan an der Wand anliegen 7 Hängen Sie nun die Heizung in die Halterung ein und arretieren Sie diese durch verschieben der drehbaren Sicherung damit sie sicher hängt Inbet...

Page 9: ...g der Heizung kommen befinden sich im Inne ren Sicherheitsschalter wodurch die jeweilige Heizung abgeschaltet wird Mit Tafelkreide beschreibbar Die Citara T Serie besitzt eine spezielle Oberflächen Pulverbeschichtung die es ermöglicht die Front mit Tafelkreide zu beschreiben oder zu bemalen Hinterlassen Sie so Ihrer Familie Freunden oder Gästen tolle Notizen oder Bilder Sie werden merken wie anget...

Page 10: ...en Perso nen geöffnet werden Sollte einmal etwas nicht in Ordnung sein so kontak tieren Sie bitte Ihren Händler Service und Reparatur Sollte sich einmal ein Schaden oder Unstimmigkeit an Ihrer Heizung befin den so darf dies nur durch den Hersteller überprüft und repariert werden Schäden oder Störungen die infolge einer eigenmächtigen Reparatur auftreten sowie Veränderungen am Gerät Missbrauch Nach...

Page 11: ...törungen oder Schäden die durch unsachgemäße Handha bung oder Montage verursacht wurden besteht kein Anspruch auf Garan tieleistungen Während der Garantiezeit werden Geräte die aufgrund von Material und Fabrikationsfehlern Defekte aufweisen nach unserer Wahl repariert oder ersetzt Ausgetauschte Geräte oder Teile von Geräten gehen in den VASNER Eigentum über Die Garantieleistungen bewirken weder ei...

Page 12: ... 2 7 5 12 Citara T 700 700 Watt 900 x 600 x 25 2 14 18 Citara T 900 900 Watt 1200 x 600 x 25 4 18 22 Citara T 1100 1 100 Watt 1400 x 600 x 25 4 22 27 Citara T Plus Modelle Leistungen Maße in mm LxBxT Sicherheitsschalter Überhitzung Beheizbare Raumgröße ca m2 Citara T 450 Plus 450 Watt 600 x 600 x 25 2 5 5 9 Citara T 700 Plus 700 Watt 900 x 600 x 25 2 10 14 Citara T 900 Plus 900 Watt 1200 x 600 x 2...

Page 13: ...VASNER 13 ...

Page 14: ...s will provide many pleasant moments VASNER A PIECE OF HOME User manual contents Page 15 Basic safety information Page 16 Description and accessories Page 17 Installation Page 18 Installing the heating panel Page 19 Commissioning Page 20 Writeable with blackboard chalk Page 20 Cleaning maintenance service and disposal Page 21 Warranty Page 22 Technical information Page 24 CE declaration Page 25 VA...

Page 15: ...e risks such as injuries fire or electric shocks when handling electrical heaters Please read this information carefully before commission ing the heater Always observe the following safety information Never cover the heater with a blanket or other flammable objects It must not be laminated or painted The heater is designed to be installed on walls and ceilings Never move or position the heater in...

Page 16: ...ibed in this user manual Deviating from this user manual may result in damage or inju ries to people animals and objects This automatically results in the war ranty being voided and dealers manufactures and or importers shall not assume any liability Description and accessories The Citara series is part of the latest generation of infrared heating panels The heating elements are packaged specially...

Page 17: ...cumstances a On the wall using the wall ceiling bracket a On the ceiling using the wall ceiling bracket The heater should not be positioned opposite outside windows as this would result in the majority of the thermal energy being lost Ensure there is a minimum distance of 50 cm to other objects and en sure that the radiation area is as free as possible to maximise the effect There must be a distan...

Page 18: ...rised person electrician 7 Ensure that no water pipes or electricity cables within the wall or ceiling are damaged when drilling Installing the heating panel 1 On the rear of the heater remove the wall bracket which is fitted when delivered so you can see how to correctly fit the heater to the bracket 2 Position the bracket on the wall or ceiling to find the right position for the heater As soon a...

Page 19: ...ave an additional power switch and is immediately switched on when plugged in As an option the heater and room temperature can be automatically controlled using a thermostat temperature controller It is also possible to use a timer as an adapter plug 2 It takes approx 10 15 min for the heater to reach its full effect and for pleasant warmth to be felt 3 The heater is switched off by unplugging it ...

Page 20: ...he surface Clean the board heater when it is switched off as the surface can become around 105 C hot Cleaning maintenance service and disposal Cleaning Switch off and unplug the heater before cleaning it Only clean it when it is cool When cleaning use a microfibre cloth and avoid using aggressive cleaning agents scouring sponges or stiff brushes Use commercially avail able glass cleaner Once you h...

Page 21: ...er if your infrared heater does not function correctly we regret this very much and ask you to contact your dealer VASNER provides a 5 year warranty from the date of purchase if the installa tion and commissioning are completed in accordance with this user manual In the event of a fault or damage which was caused by improper handling or installation there shall be no claim for warranty services Du...

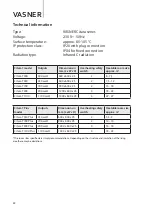
Page 22: ...x 25 2 7 5 12 Citara T 700 700 watt 900 x 600 x 25 2 14 18 Citara T 900 900 watt 1200 x 600 x 25 4 18 22 Citara T 1100 1 100 watt 1400 x 600 x 25 4 22 27 Citara T Plus model Outputs Dimensions in mm L x W x D Overheating safety switch Heatable room size approx m2 Citara T 450 Plus 450 watt 600 x 600 x 25 2 5 5 9 Citara T 700 Plus 700 watt 900 x 600 x 25 2 10 14 Citara T 900 Plus 900 watt 1200 x 60...

Page 23: ...VASNER 23 ...

Page 24: ...VASNER 24 ...

Page 25: ...VASNER 25 Serviceadresse service address VASNER Deutschland Europe Tel 49 0 5246 93 55 625 Fax 49 0 5246 93 55 622 Mail info vasner com Web www vasner com ...

Page 26: ...VASNER 26 ...

Page 27: ...VASNER 27 ...

Page 28: ...VASNER VASNER COM ...

Reviews: