Varisco S.p.A.
Z.I. Nord - Terza Strada, 9 - 35129 PADOVA – ITALY
Tel.+39.049.8294111 Email: [email protected]
Fax+39.049.8076762 Web: www.variscospa.com
23
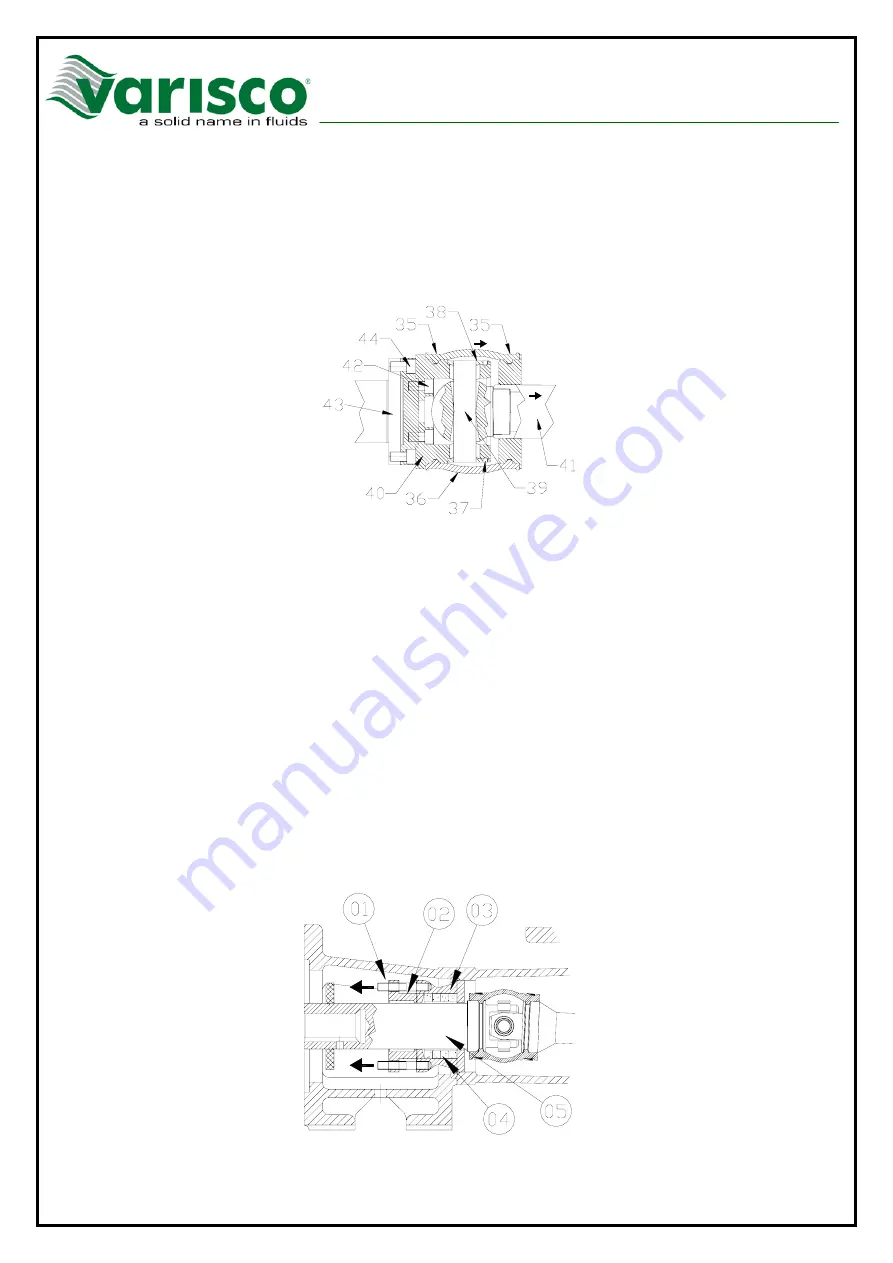
6. Pull the sphere in the direction of the black arrow. Since it is integral with the propeller shaft
(41), they’ll both be free of the joint. Then, the hexagonal-head screws holding the bell to
the rotor (or hollow shaft depending on the joint involved) will be visible at the bottom.
7. Unscrew the screws (42). The bell will be completely free of the rotor (or hollow shaft, as
mentioned above).
8. The rotor will still be anchored to the adapter flange (43), to be released through the screws
(44). Then, the rotor will be completely free, ready for replacement.
SN9
IMPORTANT: Bushes increase the life of the system but are integral with the pin, hence when the
pin is replaced they shall always be replaced as well.
9.4 REPLACEMENT OF SEALS
9.4.1 PACKING SEAL
This operation is quite easy and fast, since it is possible to replace the packing without the need to
remove any other part.
1. Loosen the screws (01) and force the gland (02) to move out of from the stuffing box (03) in
the direction of the black arrow.
2. Remove the old or worn-out packing (04).
3. Clean the hollow shaft (05), and replace it if worn-out.
4. Insert the new packing, pushing it at first by hand to place it between the shaft and the
stuffing box.
WARNING No sharpened tool shall be used for packing insertion, to prevent damage to the shaft or
the packing itself.


