25
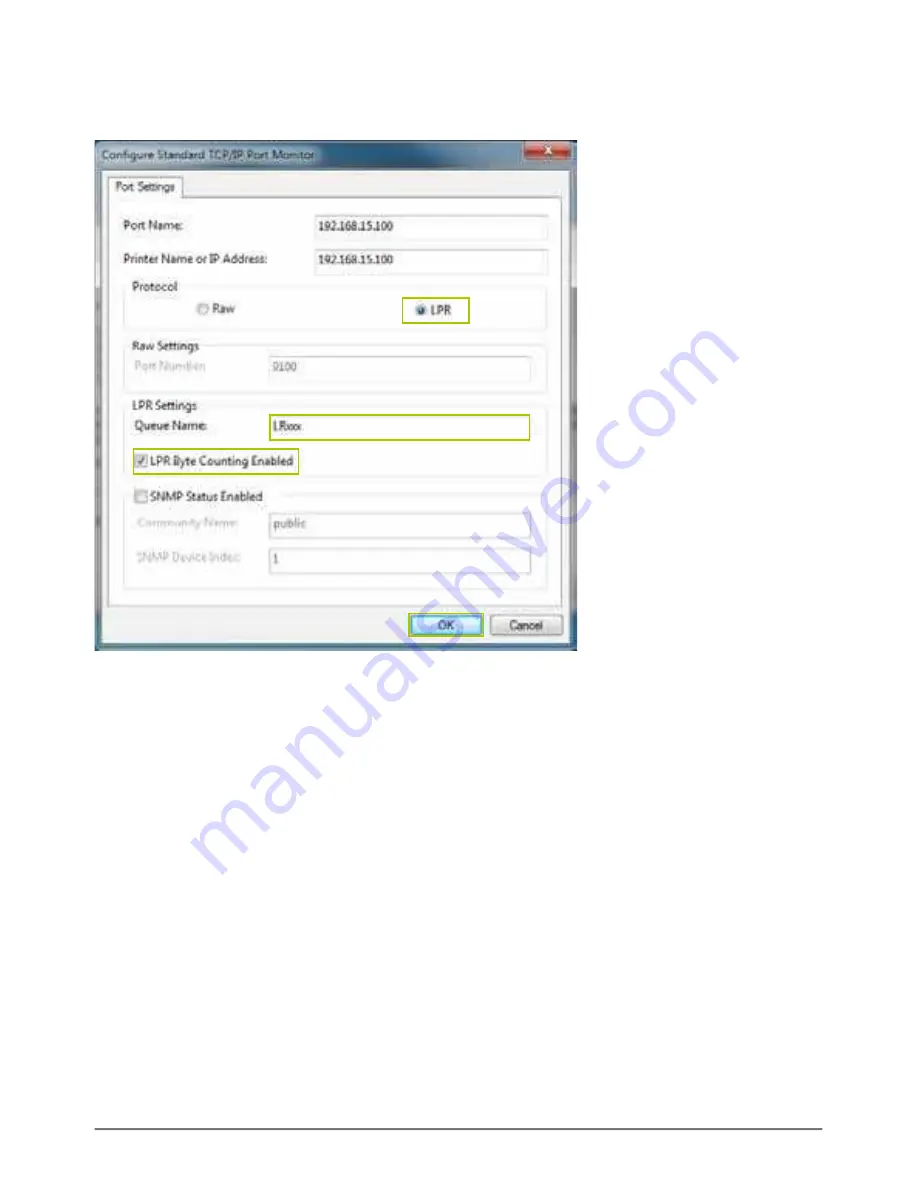
7. Select “
LPR
” in protocol, and give a queue name E.g. LRxxx; select LPR byte enable and
click “
OK
” to inish the port setting.
8. Click “
Finish
” to complete TCP/IP printer setup.
9. Go to “Printer server page and check printer server status. If status shows “
OK
”, the printer is
setting up successfully.
Notes:
NexStar FX Printer server does not support GDI/Host-based printers. For some Multi-
Function Printers (MFP); scanning functions may not work. Please contact the
printer manufacture for detailed speciications.


