


I N S T A L L A T I O N
©Vantage, 8/16/2016 / IS-0583-B
Equinox 41 LCD Keypad – MODEL: EQ41TB-TI
page 4 of 4
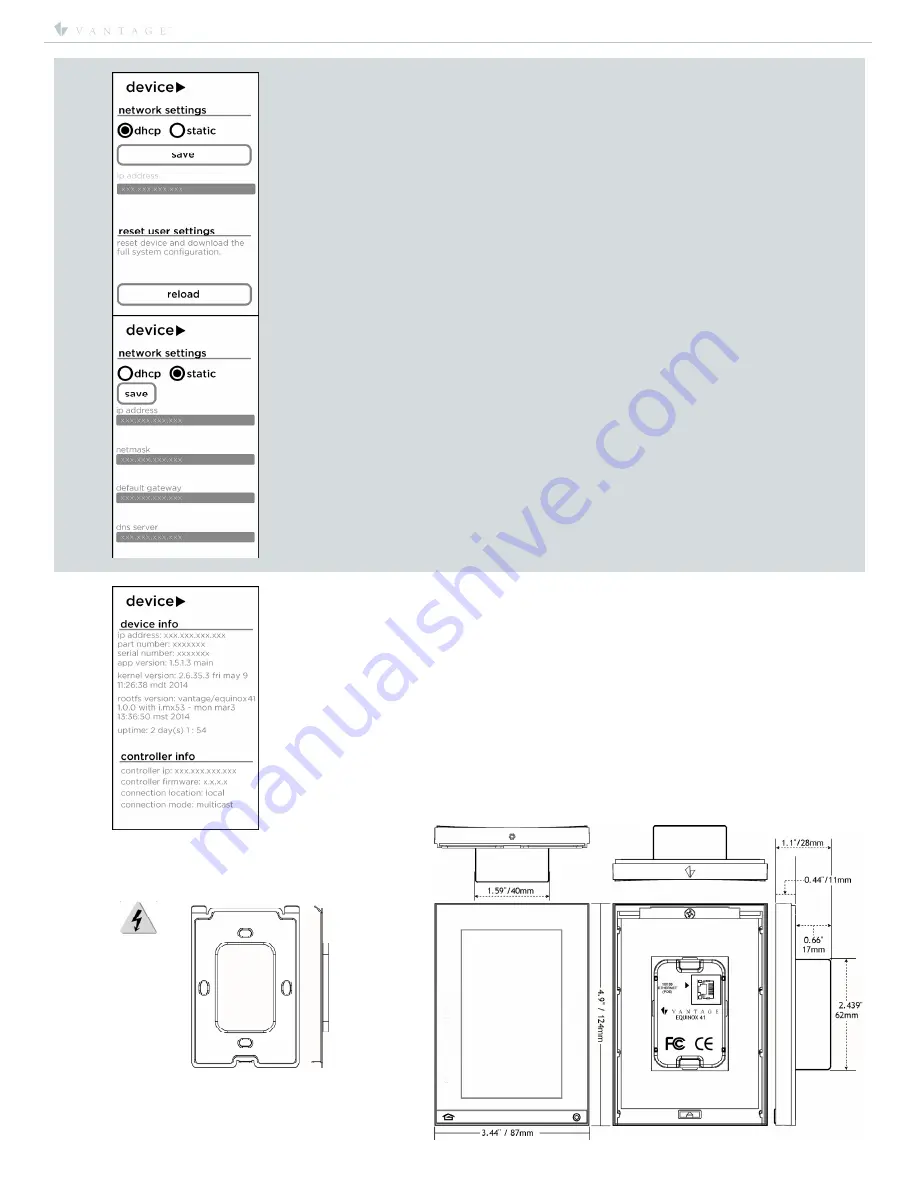
7.
Scroll down to the bottom of
device
screen:
network settings
– select dhcp or static*, see below if static is selected.
reset user settings / reload
:
This will reload, (replace)
all
of the devices information from the controller.
*static:
ip address
– xxx.xxx.xxx.xxx
netmask
– xxx.xxx.xxx.xxx
default gateway
– xxx.xxx.xxx.xxx
dns server
– xxx.xxx.xxx.xxx
Click
save
when IP information is completed.
8.
Scroll left to the
info
screen:
device information
–
ip address
: xxx.xxx.xxx.xxx
part number
: xxxxxx
serial number
: xxxxxxx
app version
– xx.xx.xx (used in diagnostics)
kernel version
– version and date (used in diagnostics)
rootfs version
– xx.xx.xx (used in diagnostics)
up time
: x day(s) x:xx
controller info
–
controller ip
– xxx.xxx.xxx.xxx
controller firmware
: x.x.x.x
connection location
: local
connection mode
: multicast
Mounting Plate
Use
flat-head
screws provided to mount
the
Mounting Plate
. Do not bend mounting plate.
CAUTION:
Pan-head
screws will
not allow the station
to fit snugly to the
wall and may damage
electronics.
Use screws supplied:
2 Each – US:
US: VHC-01090–SCREW,
6-32 X 0.75” P-FH, ZINC
Multi-View Line Drawing


