12
Tip:
The steps to turn on
Developer options
vary from different models of Android
device. You may check it from Internet or contact us for the detailed steps. We take
Samsung Galaxy S8+
as an example.
*
Go to settings of your Android device, then tap
About phone > Software information >
Build number
.
*
Continuously tap on
Build number
for several times until it shows
Developer mode
had been turned on
.
*
Get back to the settings of your mobile device, it will show
Developer options
.
3)
Connect your Android mobile device to the
USB
port of the projector with the
ORIGINAL
USB cable.
4)
Tap
OK
when your Android mobile device pops out the window of
Allow USB
debugging
, then your Android device will be projected to the wall/screen.
Allow USB debugging?
Allow USB debugging?
USB debugging is intended for development
purposes only. It can be used to copy data
between your computer and your device,
install application, and read log data.
The computer’s RSA key fingerprint is:
9D:BF:CE:3E:80:D7:12:89:
2A:6A:1D:30:74:5E:34:7B
*
Always allow from this computer
Notes:
1.
The USB cable must be the ORIGINAL
cable or the cable which can transfer the
data, otherwise screen mirroring may fail. You can plug the cable into your laptop to
check the availability of transferring the data.
2.
Some
mobile devices may not support screen mirroring due to the compatibility.
3.
Some
Android mobile devices may only transfer the display without audio due
to the protocol restrictions.
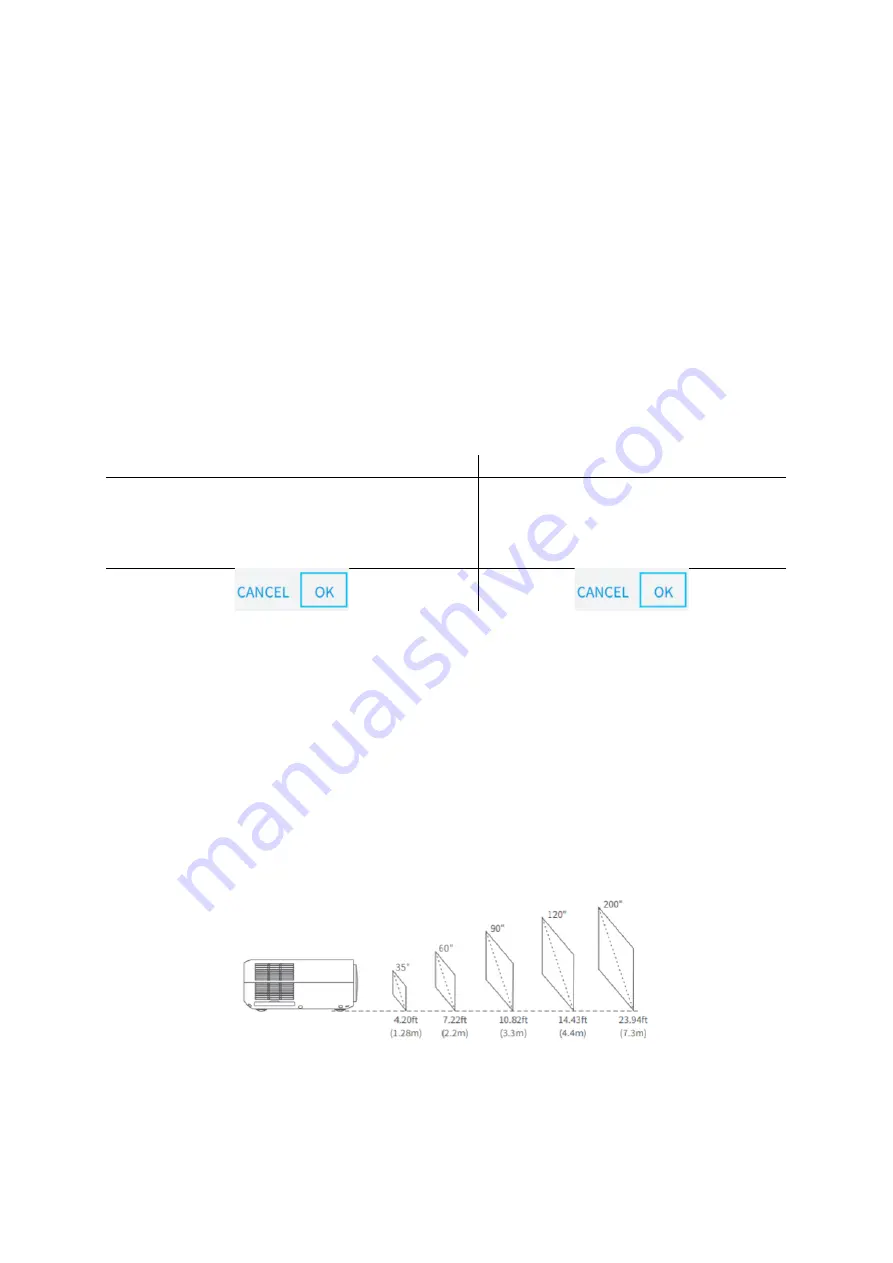
Projection distance & size
The recommended projection distance varies with different projection contents. Please
adjust the distance between the wall/screen and the projector properly as needed.
Ambient darkness will improve clarity of the projected images.


