


To configure stream settings, log in to the ACT365-VCU web interface (see
on page 17), then:
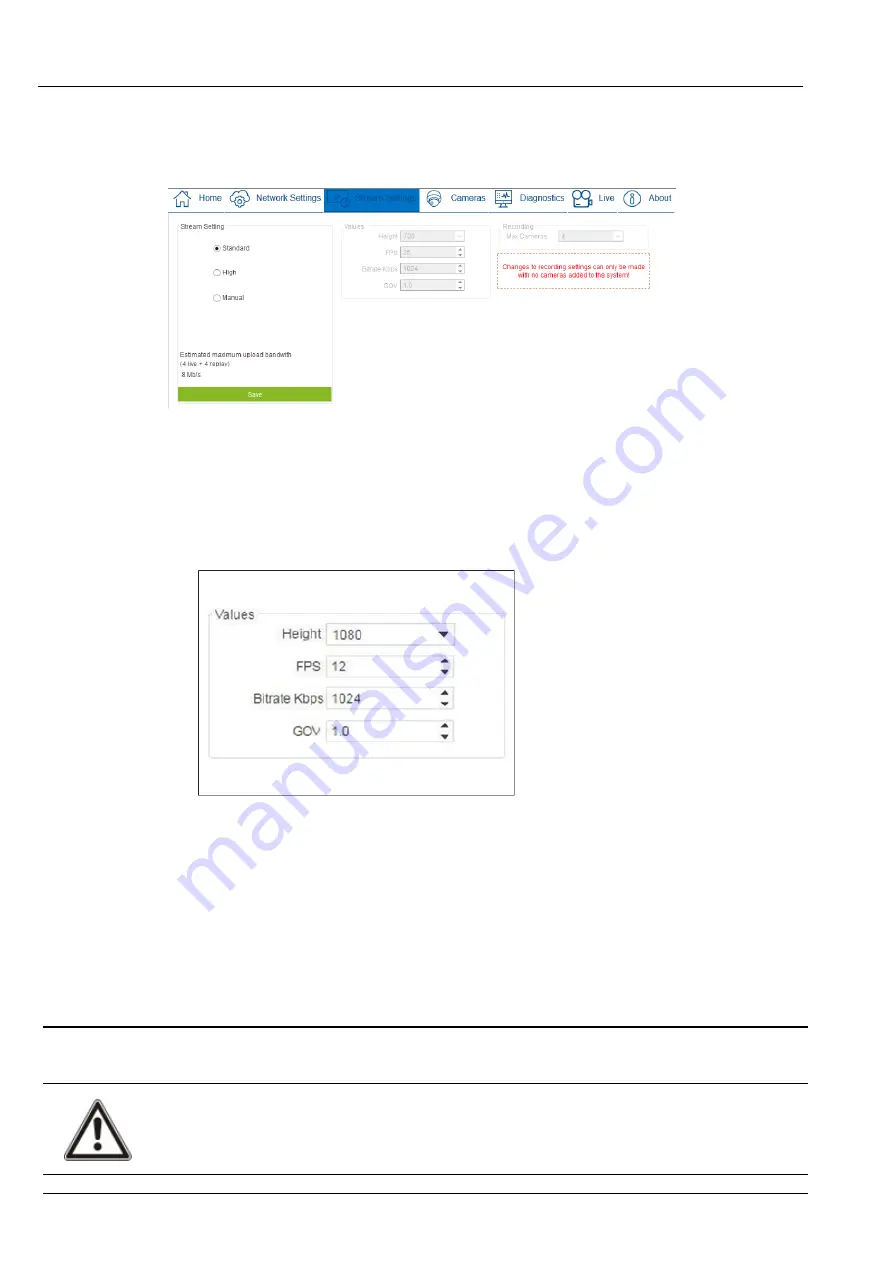
1. Click the
Stream Settings
tab.
2. Select one of the following options:
l
Standard
stream profile (default setting: 720p, H264, 25fps, 1024 Kbps)
l
High
stream profile (1080p, H264, 25fps, 2048 Kbps)
l
Manual
stream profile. This profile option is only recommended for experienced camera
installers. Customize this streaming profile by editing the
Values
. Ensure that your manual
settings are supported by your connection bandwidth.
3. Under
Recording
, select the number of cameras you will connect to the VCU. You can connect a
maximum of four cameras, and recording space on the connected HDD is divided equally between
the selected number of cameras.
Note:
This setting is only editable before cameras are added to the system. You must also enable
recording for each camera before the feed will be recorded to the HDD. You can enable recording as
you add each camera. See
Adding Cameras using Discovery
on page 18 and
4. Click
Save
.
5.9 Factory Reset
In the event of a unit failure or forgotten ACT365-VCU password, follow the procedure below to factory
reset the ACT365-VCU.
IMPORTANT:
Factory reset removes all custom settings and camera databases. Previous camera
footage is erased. Factory reset is
NOT REVERSIBLE
and should only be used as a last resort.
You can also perform a factory reset from the ACT365-VCU web interface
Diagnostics
tab. See
on page 32 for more information.
ACT365-VCU / ACT365-VCU2A / ACT365-VCUPoE – Installation and Operating Instructions
Configuring ACT365-VCU
© Vanderbilt 2019
26
A-100528-b
20.05.2019


